Whew! Has it been crazy around here or what?! Let me just tell you that hosting events in our tiny little home is fun but somewhat exhausting. There are simply more logistics to think through when you don’t have lots of space. We don’t even own a card table! For the record, last week we made dinner for some friends on Wednesday night, hosted our small group (which is not so small anymore…) on Thursday night, and then threw a church picnic on Sunday afternoon! We were counting on the weather to cooperate this weekend so that we could grill and send folks outside with their camp chairs, but unfortunately it rained (boo!), so we were packed inside like sardines. Thankfully everyone had great attitudes and it ended up being a really enjoyable time of fellowship.
About an hour after everyone left on Sunday, my throat started tickling and things went downhill from there. You know how your body sometimes shuts down when it knows it finally can rest? Well, I think that’s what happened to me, because I’ve spent the past two days sleeping off what I think is the flu. Blah. But here’s the cherry on top… This morning our carbon monoxide detector went off, so Matt tried to figure out what the problem was. Before he could get it all squared away, he had to leave for work. Of course I was just trying to catch a few more winks of sleep since I haven’t been feeling so hot, but as he’s walking out the door he tells me that he’s going to call the fire department—which, as it turns out, can only be reached by calling 9-1-1. So as I’m rubbing sleep from my eyes, he jets out the door and says he’ll call me when he gets to work. At this point I’m feeling less than stellar and slightly confused about what’s going on. Default: call Mom! As we’re hemming and hawing over whether or not I should stay in the house or go sleep in my car, Matt calls back. I put my mom on hold and have a very choppy conversation with him as he’s driving through the parking garage (horrible cell connection). As Matt is trying to explain to me that I need to get out of the house and what to tell the firefighters, I see the fire truck pull up to our house—lights flashing and all—and realize that I’m in my pajamas and am—ahem—not quite decent, if you know what I mean. So I hang up the phone and pull on a bulky sweatshirt, usher in five firefighters, and try to explain what has happened with our carbon monoxide detectors (there’s a little more to the story, but I’m not going to get into the details here…way too confusing). At that point my phone rings again because I left my mom on hold for too long, so I awkwardly answer it and then immediately hang up on my mom so I can continue explaining things to the fire men.
*If you’re still reading this, you get a gold star.* In a nutshell, the fire men tested our house for carbon monoxide and said they were reading zero (which is good!). They basically told us to replace our batteries. Then they said they would send out a man from the utility company just to double check and make sure things were okay. As they were leaving, one of the fire men asked if we fixed up the house ourselves. I told him we’d been working on it for over a year, and he said it looked great. Wasn't that nice of him?
After they took off (I’m sure the neighbors were dying of curiosity), the utilities guy came by and said everything checked out fine. He also took a look at our gas fireplace (it was converted to gas a long time ago, so we’re talking about an ancient gas fireplace set-up). We’ve had trouble getting our fireplace to light, but he was able to work some sort of utility guy magic and lit it right up. Within a few seconds our house was filled with fumes; apparently the fireplace doesn’t vent properly even with the flue open. He suggested either converting it back to a log-burning fireplace or installing a new enclosed gas fireplace. Before leaving he told me we should not use the current set-up under any circumstances. While I was a little sad that our fireplace is worthless, I was glad to know about the problem and relieved that we didn’t buy any expensive parts to fix it. We’ll have to decide whether we want to invest in a new set-up or not.
For now, we’re just happy to know that nothing is wrong with our house. And it’s a good reminder for us—and for you—to check the batteries in the smoke and carbon monoxide detectors. If you don’t have a carbon monoxide detector, go out and buy one today! Several years ago on Christmas Day at my parent’s house in Indiana, we had a huge carbon monoxide scare. My mom woke up at 5 am and instinctively knew that something was wrong (despite the fact that it’s impossible to smell carbon monoxide fumes). She made us all get out of the house. A utility guy came to the house and found a crack in their furnace. As it turned out, the gas levels were really high and could have been deadly had we stayed in the house much longer. It really is amazing that my mom woke up and felt like something was wrong though, because my parents did have a detector, but the batteries were out… Anyway, lots of lessons to be learned here, including that your friendly neighborhood fire/utility guys will check out your house for free, plus they were super nice (despite my serious bedhead and bleary eyes). As for me, I’ll be buried under the covers to sleep off more of this bug. Adios amigos.
Tuesday, May 17, 2011
Tuesday, May 10, 2011
Pinterest Plug
Some of you may recall that a few weeks ago I mentioned the fabulous (albeit addicting) website, Pinterest. I only recently found out about Pinterest, and although I am quite wary of just one more technological Facebookish time sucker, I have to admit that I’ve been pleasantly surprised by the Pin. In a nutshell, you create virtual idea boards and save inspirational photos to them.
For example, if you’re in the market to decorate a nursery, you might head over to Pinterest and “pin” ideas from their website to your idea board, or you might simply be browsing the internet when suddenly you happen across an amazing photo of a nursery that you just love! Click on the photo, click your “pin” icon, and whalaa, the photo is saved to your nursery idea board where you can access it anytime. But this site isn’t just about decorating or home inspiration. Travel, fashion, arts n’ crafts, food…those are just a few of the categories. And the food photos…mmm. Let’s just say it’s better if you check it out yourself: Pinterest. You’ll be required to ask for an invitation to join (no idea why), but in a week or two you’ll see an invite in your inbox and you’ll know exactly what I’m talking about. Let me know what you think!
Check out a few photos that I’ve been inspired by lately! And yes, these are neatly tucked away on my Pinterest idea boards.

Headboard love

Bench love


Kitchen love

Grapesicle love

Craft love



Kid room love...you know, because someday...

Painted stair love

Curtain & color love

Bread love...this is in honor of my ex-roomie, Gwen
Are you inspired? Do you want to join Pinterest? Do you like my found photos? Now go stick a pin in it!
My Chic Shanty was not perked in any way to unabashedly flaunt Pinterest love.
Sunday, May 8, 2011
Tried & True Tips: Oven Cleaning
When I tackled my spring cleaning this year, I was determined to clean my oven, a feat never before tackled on my very own. Fortunately, this proved not to be too difficult, considering that I only had to press a self-clean button… I did learn a few things though.
Oven Cleaning
1.) Wait for nice weather, because you’ll need to open as many doors and windows as possible. Also, turn on your oven fan. My oven took over four hours to self-clean, and by the end of it my eyes were watery from the heat and smell. Recently I heard that some people like to clean their ovens overnight, which sounds like a great way to multi-task.
2.) Remove the racks from inside the oven first, as they may warp due to the intense heat. (Some oven racks can probably withstand the heat, but I wasn’t sure if mine could, so I figured better safe than sorry.)
3.) Once the oven has incinerated every last piece of burnt cheese, splotch of butter, and stray crumb, it’s simplest to suck the remnants up using a vacuum hose. Afterward, wipe down the inside with a damp cloth.
4.) The inside of your oven window may not come clean during the incineration process (mine didn’t). To loosen grime, spray the window with a household cleaner and let it soak for awhile—about 30 minutes. Then wipe it clean using a plastic scraper (don’t use anything too abrasive) and a cloth.
5.) While you’re in cleaning mode, scrub down your stove top as well. We have a gas stove covered by wrought iron grates. I discovered that the best way to remove all the grime is to scrub them using a green Scotch-Brite pad. And for those who loathe trying to fit large objects into small sink basins, you might be interested in my friend Amber’s advice. Every so often she hauls her grates out to the backyard and scrubs them down using a garden hose. Less wrangling = more scrubbing!
I’m here to testify that cleaning one’s oven is rather easy and quite satisfying! I encourage you to give it a try if you’re new to the oven-cleaning-club.
Has anyone else suffered from oven-cleaning-phobia? And if you’re a veteran holding on to a great oven cleaning tidbit or two, please share your secrets!
Monday, May 2, 2011
Stucco Paint Job
We own a stucco house. The old chunky stucco—not the nice new spray-on stucco. This is an old picture (now we have a new roof and the ugly stumps are gone), but it gives you an idea of what we're working with.
In all honesty, stucco is not my favorite. I’d much prefer cedar shake or thin-slat siding. For some reason, stucco feels a little cold to me; it’s just not quite as inviting. But it’s the card we were dealt and we’ve taken on the challenge of making it work for us rather than against us.
We’re hoping to begin painting sometime in July. While this project isn’t exactly right around the corner, it’s funny how quickly these things will creep up on you. In the meantime, we’re researching the best paint and the best colors.
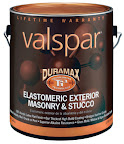
Let me deal with paint first. We are big fans of Sherwin-Williams paint, so when we saw that they were hosting a 40% off sale about a month ago, we kind of started freaking out. But before purchasing gallons and gallons of paint, my husband—cool, calm, and collected as always—decided to do a bit more research. He caught me just before I bolted out the door to SW and showed me a new paint developed by Lowe’s Valspar brand. It’s called Duramax, and here are the qualities it boasts:
We especially like that it’s self-priming and will bridge hairline cracks, as we have several tiny fractures in our stucco. On top of all that, it costs a tad less than SW paint, even at 40% off! Now we can take our time deciding on the color we like best, plus we’ll gain an additional 10% off with a Lowe’s coupon. Not bad.
When it comes to stucco colors, I feel semi-limited. Because of its earthy look, I tend to think that stucco looks best when it’s painted a warm neutral color, although my friend Elizabeth would argue that cool tones on stucco look just fine. Being the good friend that she is, last summer she joined me in snapping photos around the downtown area of stucco houses that we liked. It was helpful seeing the different color options, but I found that many of the homes we looked at have more trim than our house, and therefore possess more options for accessorizing with other colors. Take a look at what we found.
While I like the look of sage green, I’m worried that it will clash with the Kelly green color of our grass (if it ever grows!). Most of you know that I’m a sucker for the tan/beige palate, so I’m leaning that direction with hopes of painting our trim in white and either red or green accents.
What are your thoughts on stucco? Does anyone know of a great website or resource that will help us choose our outside paint colors? If so, let us know!
P.S. Funny side story… After taking a picture of one of the houses I really liked, I decided to knock on their front door to ask for the names of their colors. A young man answered the door and then flat out denied my request! He said that another woman asked him for his paint colors last year and then went out and painted all of her rental properties using the same color scheme. He did tell me that the colors were from Sherwin-Williams. Um…thanks for the hint? It was kind of a bummer at the time, but since then I’ve decided that his color scheme is too warm. Take that secretive man! Seriously, life is just too short to hold out on paint colors, right?!
In all honesty, stucco is not my favorite. I’d much prefer cedar shake or thin-slat siding. For some reason, stucco feels a little cold to me; it’s just not quite as inviting. But it’s the card we were dealt and we’ve taken on the challenge of making it work for us rather than against us.
We’re hoping to begin painting sometime in July. While this project isn’t exactly right around the corner, it’s funny how quickly these things will creep up on you. In the meantime, we’re researching the best paint and the best colors.
Let me deal with paint first. We are big fans of Sherwin-Williams paint, so when we saw that they were hosting a 40% off sale about a month ago, we kind of started freaking out. But before purchasing gallons and gallons of paint, my husband—cool, calm, and collected as always—decided to do a bit more research. He caught me just before I bolted out the door to SW and showed me a new paint developed by Lowe’s Valspar brand. It’s called Duramax, and here are the qualities it boasts:
- 100% acrylic latex infused with Crosslinking Ti3 Technology creating an impervious bond with the surface
- Ultimate hiding formula glides on smoothly and evenly for professional looking results every time
- Maximum fade resistance
- Self priming—no need for that extra coat of primer
- Bridges hairline cracks
- Flexible, won't crack or peel
- Triple resistance to mold, mildew & algae growth on paint film
- Early resistance to moisture and light mist means less worry about the weather
- Apply as low as 35 degrees
- Low odor, low VOC
- Lifetime warranty
We especially like that it’s self-priming and will bridge hairline cracks, as we have several tiny fractures in our stucco. On top of all that, it costs a tad less than SW paint, even at 40% off! Now we can take our time deciding on the color we like best, plus we’ll gain an additional 10% off with a Lowe’s coupon. Not bad.
When it comes to stucco colors, I feel semi-limited. Because of its earthy look, I tend to think that stucco looks best when it’s painted a warm neutral color, although my friend Elizabeth would argue that cool tones on stucco look just fine. Being the good friend that she is, last summer she joined me in snapping photos around the downtown area of stucco houses that we liked. It was helpful seeing the different color options, but I found that many of the homes we looked at have more trim than our house, and therefore possess more options for accessorizing with other colors. Take a look at what we found.
While I like the look of sage green, I’m worried that it will clash with the Kelly green color of our grass (if it ever grows!). Most of you know that I’m a sucker for the tan/beige palate, so I’m leaning that direction with hopes of painting our trim in white and either red or green accents.
What are your thoughts on stucco? Does anyone know of a great website or resource that will help us choose our outside paint colors? If so, let us know!
P.S. Funny side story… After taking a picture of one of the houses I really liked, I decided to knock on their front door to ask for the names of their colors. A young man answered the door and then flat out denied my request! He said that another woman asked him for his paint colors last year and then went out and painted all of her rental properties using the same color scheme. He did tell me that the colors were from Sherwin-Williams. Um…thanks for the hint? It was kind of a bummer at the time, but since then I’ve decided that his color scheme is too warm. Take that secretive man! Seriously, life is just too short to hold out on paint colors, right?!
Subscribe to:
Comments (Atom)
