Showing posts with label Kitchen. Show all posts

Monday, January 28, 2013

Faux Cornice Valences

Faux sounds so much better than fake, right?  Ha.  Either way you put it, our new kitchen valences definitely fall under the “cheap and easy” category. 

I’ve long admired the crisp, clean look of a cornice valence. 

cornice

cornice

Like this cornice board for over kitchen slider or French doors.   Fresh as salad greens, paired with pristine white cabs, and a lil' bling to boot!

Linen covered cornice boards with nailhead trim.

Shades of green and a modernized cornice make for a fabulous room.   # Pin++ for Pinterest # looooooove

contrasting but complimentary cornice & panels

Cornice Boards Design

There are clearly lots of ways to skin this cat…

Pelmet Cornice Shapes

After seeing pictures of foam valences on good old Pinterest, I decided to try my hand at it.  The burlap covering the bottom half of our kitchen windows was looking pretty bedraggled, plus I wanted to enjoy the view from our new windows (we finally replaced the old ones—two of which were broken).  *I didn’t follow this exact tutorial, but after reading through it, I think I like their process better than mine.  Both will work, so go with whatever works best for you.*

This was one of those projects that really should not have taken very long, but we dragged it out for months by completing it in miniscule steps.  Here was our basic process:

1.  Measure windows—be sure to also figure out how far you want your valences to stick out from the wall

2.  Choose fabric (this always takes me forever, since I want to find a good deal on quality fabric that I’ll like for awhile) *I found that upholstery fabric worked well for this project, as it’s weightier and covers up imperfections*

3.  Cut foam board to size with an Exacto knife (To cover three windows, I used 2 pieces of foam board that I picked up at Michael’s for 50% off—I used the thinner foam board, but if I were doing this again, I think I would use the thicker board for a more professional, sturdy look); use packing tape to piece foam board together if you need to make it longer *I did not worry about perfectly straight cuts, as the batting and fabric hid many of the imperfections*

1-23-13 (5)

4.  Cut and add wood blocks to the top of foam board (this will be the part that securely hangs on the wall above your window trim)

1-23-13 (10)

5.  Cover valence with batting—I stapled it to the foam board using 1/4 inch staples

1-23-13 (15)

6.  Cover batting with fabric—again, I used 1/4 inch staples *Be sure to pull batting and fabric as tight as possible to avoid saggy valences*

1-23-13 (17)

7.  Hang cornice valence and enjoy the view!

1-23-13 (33)

1-23-13 (24)

I’m considering adding some trim for interest and the feeling of dimension, but I’m not rushing into anything yet.  If I do add trim, I’ll just iron it on using iron-on bonding tape.  Overall, I’m happy with the end result.  Our kitchen feels much more finished now. 

Friday, August 26, 2011

Chair Flair

You may recall these lovely legs…


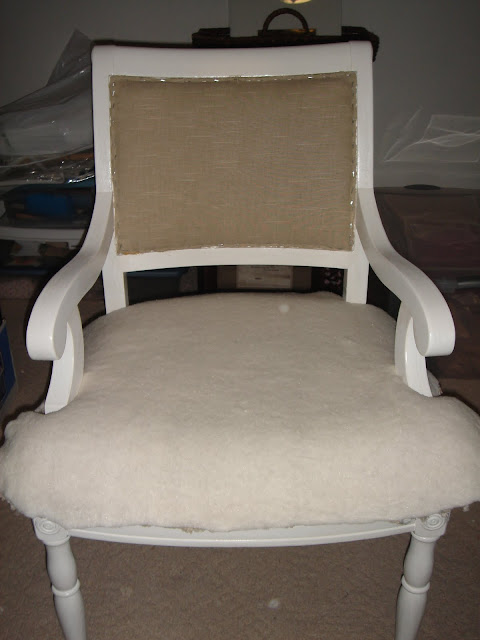
Well, I finally got around to clothing them in some fresh paint and starchy linens!  Because I’m not an expert in upholstery (that’s the understatement of the year…), and since Little Green Notebook recently posted  a fantastic DIY upholstery series on her blog, I decided to simply give you a rundown of the whole process in photos with just a few comments, rather than trying to reinvent the wheel by explaining all the steps I went through.  But, since I’ve decided that I need to be completely (sometimes painfully) honest about our DIY projects, I will be sure to drop a few tidbits that I learned along the way. 

*If you plan to upholster a piece anytime soon, you must check out these awesome tutorials by Little Green Notebook: Step 1, Step 2, Step 3, Step 4, and Step 5.*

First, I snapped a bunch of “before” pictures—mainly so I would have a reference point in case I forgot something important in the middle of everything.  Believe me—once you are in the throes of it all, you might feel slightly disoriented.


Then, I stripped her down to the bare bones.  If you have never done this with a piece of furniture, I encourage you to give it a try.  It’s amazing how often we sit on furniture but have no idea what lurks beneath the surface!  Trust me—it will make for an interesting afternoon!   


To keep things running smoothly, I labeled each piece of old upholstery with a sticky note reminding me which piece was for the back, front, etc. 


After freshening her up with several coats of paint and some poly (for a good protective measure), I came to the point of no return—cutting the fabric.  Eek!  Basically, I just traced the outline of the old upholstery and used that as my guide.  And this is where I made my first big mistake… I thought since I was using a linen fabric with no obvious pattern that I didn’t need to think about the direction of the fabric.  Wrong!  All fabrics have a pattern—or at least a texture—so be sure you don’t let your brain wander during this phase!  Thankfully, I had enough fabric left to cut another piece.  Whew!  It was nip and tuck, but in the end I averted disaster by the skin of my teeth (pardon the gross expression).   Disaster being that my fabric on the seat of the chair would have been horizontal, while the back of the chair would have been vertical.  I know—a harrowing afternoon at the Braham house. 

Once my fabric was cut, I kind of stared at the chair not knowing how to proceed.  I went back and read through the tutorial again, but I still felt a sort of paralysis.  That’s when I started having that odd back and forth conversation in my head about putting on my big girl panties and such… Can you relate?  So I pulled out the stapler and just started in.  After my first few staples were in place, the project took on a life of its own and I just followed suit.  I’ve done enough projects by now to know that I’m never going to be 100% comfortable trying my hand at something new; usually I have to just begin and everything falls into place after that. 
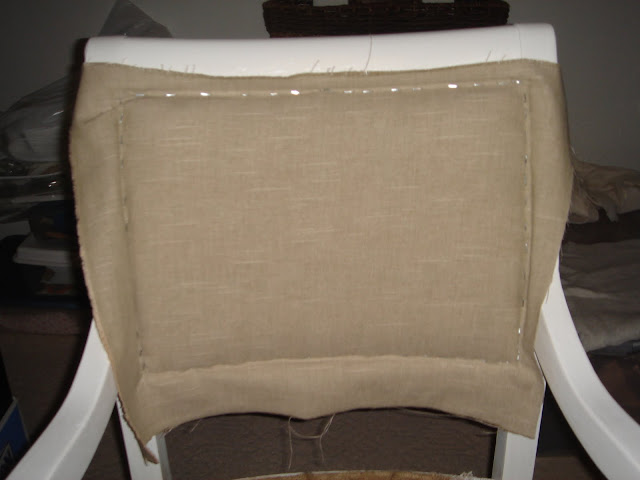


Once I stapled all of the fabric in place, I hot-glued trim around the unfinished edges for a clean look.  Originally I wanted to use nail head trim, but it was pretty expensive, and I actually like the soft finish of the trim I ended up with. 
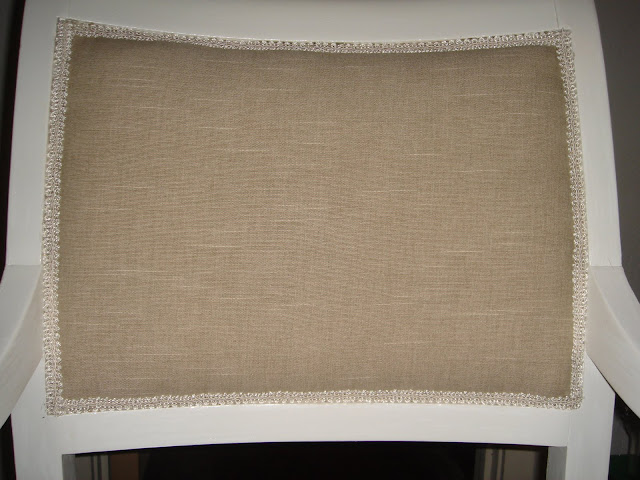

Now for the confessions… I had read in a tutorial that it’s possible to “damage the integrity of the wood” when stapling.  Sadly, this happened to me while stapling to the back of the chair.  There was a tiny lip that I was stapling into, and some of the wood splintered.  Thankfully, it didn’t compromise the stability of the chair, and since it’s on the back it’s not noticeable.  But still.  It was unfortunate.  I’m not exactly sure how to avoid this, but I imagine a nicer stapler and a tad more care might have helped.  


Can you see it along the right edge?

While we're on the topic of stapling, I must admit that I used the wrong size staple at first.  I thought maybe the wood was just really hard wood...until my husband gently informed me that my staple size was too big--hence the reason they weren't fully penetrating the wood.  It's never just one trip to the hardware store, is it?   

The second (or is this really the third?) confession is that I bought fabric and didn’t like it, so I ended up purchasing different fabric.  Because I always try to do projects on the cheap, I was a little frustrated, but I decided to make pillows out of the original fabric (which will be another “first” for me)—and since the second fabric was on clearance, it wasn’t a huge deal. 

After moving her into the kitchen, I realized that the ugly black fabric on her underside could be seen from certain angles.  I ended up covering the bottom with extra fabric simply by tacking it around the edges. 


A last look…
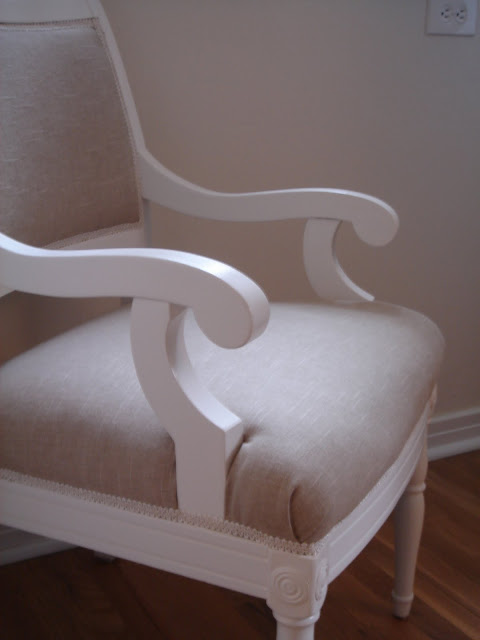


Overall, it was a good experience!  You’ll definitely want to go into it with a large dose of common sense sprinkled with bits of humor and some courage, but this is a project that anyone can tackle.  I mean, people, the internet has all the answers!  Just kidding—kinda. 

What about you guys?  Have you upholstered anything?  Did you freeze when you came to the point of no return?  Do you know of any amazing tutorials floating around in cyberspace?

Monday, June 20, 2011

Another Thrifty Find

Our kitchen has an odd corner that used to baffle me.  It's not very large, and it's near a window, which limits the kind of furniture that might fit there.  But one evening when I was making dinner, the proverbial light bulb clicked on.  A chair.  A cute little chair for the odd corner of our kitchen.  A place for friends to sit and chat.  A surface for bags laden with groceries.  A dash of texture (and--gasp--possibly even some color) for our kitchen.  A chair!

Of course, I wasn't about to spend lots of money on an expensive chair, so I turned to a girl's best friend--Craigslist.  Within a few days I spotted this beauty for a mere $25.


According to the seller, this chair once graced the halls of The Broadmoor, which is an absolutely fabulous (and outrageously expensive) resort in Colorado Springs.  If you live in the area, The Broadmoor makes for a great date with your special someone.  You can go high class and enjoy their delectable Sunday brunch, or you can meander around the lake and play a game by the fire in one of their lounges.  If you're lucky, there might be free entertainment in the black box theater.  And don't miss out on the ice sculptures and gingerbread village around Christmas!  Don't even get me started on the a.mazing decor...  Okay, I digress.  I'm starting to sound like a travel agent...

Aside from the fact that this chair is solidly built and boasts a smidgen of detail that I love...


it also has the perfect seat and back for reupholstering, which is something I've been dying to try ever since I fell head over heels for staple guns while covering our DIY headboard.


I plan to strip the peacock blue velvet from the chair and recover the base with upholstery from The Mill Fabric Outlet, which is my favorite fabric store in town.  I'll definitely repaint the wood as well, although I'm not sure if I'll stick with a distressed white (similar to my desk makeover) or a color of some sort.  Although I'm a teensy bit nervous to get down to the bones of this chair, I feel pretty confident that it can be done, as there are a ton of reupholstering tutorials online.  It's also comforting to know that I only spent $25, so it's not the end of the world if it doesn't turn out quite as I'm envisioning.  You know I'll keep you posted on the details--the good, the bad, and the ugly!

Have you guys found any great furniture deals lately?  It's addicting, isn't it?   I'd love to hear about them if you have a minute to leave me a comment or link to a photo.  Cheers!

Sunday, May 8, 2011

Tried & True Tips: Oven Cleaning

When I tackled my spring cleaning this year, I was determined to clean my oven, a feat never before tackled on my very own.  Fortunately, this proved not to be too difficult, considering that I only had to press a self-clean button… I did learn a few things though.

Oven Cleaning

1.)    Wait for nice weather, because you’ll need to open as many doors and windows as possible.  Also, turn on your oven fan.  My oven took over four hours to self-clean, and by the end of it my eyes were watery from the heat and smell.  Recently I heard that some people like to clean their ovens overnight, which sounds like a great way to multi-task.

2.)    Remove the racks from inside the oven first, as they may warp due to the intense heat.  (Some oven racks can probably withstand the heat, but I wasn’t sure if mine could, so I figured better safe than sorry.)

3.)    Once the oven has incinerated every last piece of burnt cheese, splotch of butter, and stray crumb, it’s simplest to suck the remnants up using a vacuum hose.  Afterward, wipe down the inside with a damp cloth.

4.)    The inside of your oven window may not come clean during the incineration process (mine didn’t).  To loosen grime, spray the window with a household cleaner and let it soak for awhile—about 30 minutes.  Then wipe it clean using a plastic scraper (don’t use anything too abrasive) and a cloth.

5.)    While you’re in cleaning mode, scrub down your stove top as well.  We have a gas stove covered by wrought iron grates.  I discovered that the best way to remove all the grime is to scrub them using a green Scotch-Brite pad.  And for those who loathe trying to fit large objects into small sink basins, you might be interested in my friend Amber’s advice.  Every so often she hauls her grates out to the backyard and scrubs them down using a garden hose.  Less wrangling = more scrubbing!

I’m here to testify that cleaning one’s oven is rather easy and quite satisfying!  I encourage you to give it a try if you’re new to the oven-cleaning-club.

Has anyone else suffered from oven-cleaning-phobia?  And if you’re a veteran holding on to a great oven cleaning tidbit or two, please share your secrets!