Showing posts with label Lighting. Show all posts

Wednesday, March 6, 2013

Brass Sass

Hunting for bargains is one of my favorite ways to while away an hour, but those are rare moments these days.  Happily, the other day I poked into Homegoods for about fifteen minutes (which is quite a feat in itself) and stumbled upon this beaut.

I know what some of you are thinking.  Brass?  Really?! 

Before you completely write me off, did I mention that it was $10?  That’s right.  Ten big ones for an extra-large, weighty, softly brushed brass (it’s even prettier and softer in real life) fixture boasting craftsman details.  I promise this is not a paid advertisement. 

I did a triple take when I saw the price tag.  The pile of stickers showed that it had been marked down about six times; my theory is that people were afraid of it because the top of the light appears unfinished…like it’s missing pieces that might be necessary for hanging. 

So I looked it up online when I got home, and it turns out this is a flush-mount light from Robert Abbey’s collection.  It normally costs (gasp!) $500, and even when sold “cheaply,” it’s typically sold in the high $300s.  That’s what I call a steal. 

My options: Leave light as is OR spray paint the metal a different finish (such as oil-rubbed bronze or even a punchy blue or red) and someday grace a laundry/mud room, porch ceiling, hallway, or bedroom with its presence (meaning it will not likely be hung in our current house).  If all else fails, I’ll sell it for more than $10 and thank my lucky stars that I didn’t dismiss it while wandering down the clearance aisle. 

If you’re still wondering about brass, here are a few ways it’s bringing charming patina back into homes.

white kitchen, gold accents

curved breakfast nook

peacock painted island, touches of brass

white kitchen, black island, brass pendant

white chairs, black pedestal, gold lantern

layered bedding, beautiful bedside chest, amazing brass swing sconce

Wednesday, July 25, 2012

Our Narnia Lamp Post

You’ve heard me mention it before.  We have a Narniaesque lamp post that just begs for Mr. Tumnus to pop over for a chat.  Where is a good faun when you need one these days?  Alas, I doubt he’ll be popping by anytime soon, but just in case the situation ever arises, I thought it high time our little lamp post got a good sprucing up. 

041

My original cry of “take it out take it out take it out” never came to pass, because when Matt and my dad checked out the wiring, they found that it connects to our detached garage wiring—meaning if we dug up the post and buried the wires, it would eliminate our garage electricity.  So no go.  While I strongly disliked the witch hat effect from day one, I got really fed up when it became a headless lamp post due to an overly ambitious game of bocce ball.  Witches, headless horsemen lamp posts, mystical fauns…things were getting creepy! 

Nursery 071

Thankfully, Matt was able to order a new topper for our post through Lowe’s.  (Why this took us months to do, I’m not sure…)  Still, I felt like the matte black paint job could use an update, as several parts of the post were beginning to rust or flake.  After doing a smidge of research online (can googling really be called research?), I did a light sanding of the post using 80 and then 120 grit paper, wiped it down with a degreasing agent (laundry detergent works well, and it’s already on hand), spray primed, and then spray painted using Rustoleum’s oil rubbed bronze.  By the way, consider this a plug for Rustoleum!  I am disappointed every time I use another brand of spray paint, but Rustoleum has yet to let me down.  I highly recommend it!  Home Depot carries the best selection of colors and seems to beat all other prices. 

Here’s our post looking all country church in its white primer…

126

And while it was difficult to capture the true color, here she is in her chic coat of oil rubbed bronze—ready for a night on the town backyard.

137

134

140

I’m very pleased with the final result and feel like it really gave our backyard a boost.  And I love that it only took a few cans of spray paint, so we didn’t shell out too much cash for a post that I have a less than stellar relationship with…but if you can’t beat ‘em, join ‘em, right? 

Thus ends the tale of our lamp post.  For the record, I think this was the first DIY project I’ve tackled since Liam’s birth.  It feels good, but it definitely took some planning, as I had to work on it during his naps.  Let’s just say that I’m learning to complete tasks in smaller chunks.  I’ve found that setting small daily goals for myself is a great way to accomplish things without overwhelming myself.  I feel productive and enjoy the creative outlet, but it leaves ample time in my day to hang with Liam. 

For those of you still reading who want more than lamp posts for eye candy, here ya go.  *WARNING—PHOTO OVERLOAD!  I had a hard time choosing…clearly this is my first child…*

157

148

076 (2)

104

106

113

122 (2)

017

020

Liam 8 Weeks 017

Liam 8 Weeks 038

Liam 8 Weeks 046

Liam 8 Weeks 049

Liam 8 Weeks 050

Liam 8 Weeks 090

Liam 8 Weeks 108

Liam 8 Weeks 113

Liam 8 Weeks 117

We started using cloth diapers last week and it’s going well so far!  Call me biased, but aren’t those colorful diaper covers cute?  Hmmm…might be worth writing a post about cloth dipes someday.  If you’re interested in learning more about cloth dipes, leave me a comment.  Cheers!

Monday, February 28, 2011

FANBOYS

Grammar, anyone?  I recently used this acronym to teach my students about coordinating conjunctions (for, and, nor, but, or, yet, so)—and what better way to start off a post about a fan that coordinates with the rest of the bathroom—and it just so happens that it was installed by a boy!  And yes, we’re starting Shakespeare this week—but since not everyone appreciates them as much as me, I promise to do my very best to hold back all the puns that will surely be racing through my mind.

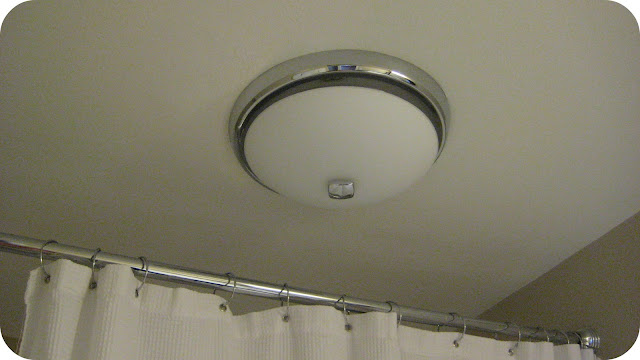
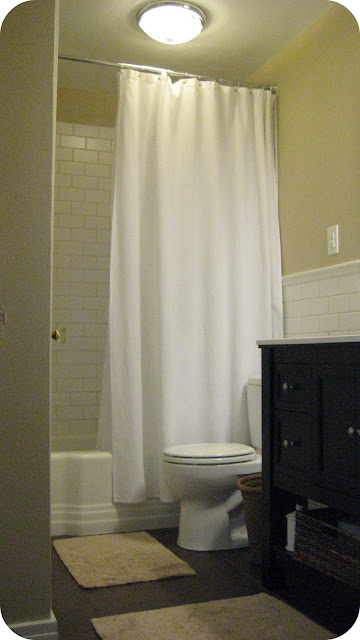
Alright, here’s the down and dirty of it.  Our bathroom had a bizarre window in the shower, so we popped it out and made a cohesive wall of subway tile instead.  Love the subway tile, by the way.  Apparently someone made a law that bathrooms must have either a window or a fan in order for air to vent, so we turned to our trusted friend, the HD.  As it turns out, fans are downright sterile looking these days.  I’m convinced that someone could make a good living just by redesigning some of the fans out there—and selling them at affordable prices.  But working within our budget, we determined to find a functional fan that was not a total eyesore.  Here were some of our options—and these are the good ones!

[gallery link="file" order="DESC" orderby="title"]

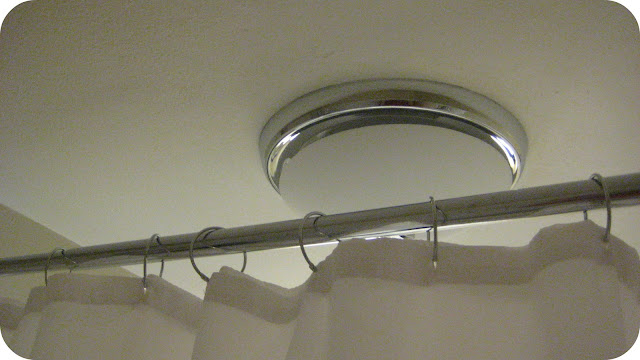
We decided to go with the simple look of this fan, since it looked more like a normal light fixture, rather than a vent cover.


Since we want our house to be people-friendly, I wanted to make sure that the sound of the fan was adequate.  Too loud and it would be annoying.  Too soft and people hanging out in the living room might hear your business…you know?  That’s when we spotted a handy little contraption right in the middle of the fan aisle that allowed us to test out the noise level of our fan.  Bingo!  We were satisfied.

Before we installed our fan light, I worried that it would interfere with our extra tall shower curtain.  While it comes pretty close to the bar, it actually doesn’t look too awkward, and there’s never been an issue of our curtain bumping up against it.


In an effort to be more energy efficient, we screwed in some CFL bulbs—only to be creeped out by the bluish lighting they emitted.  Seriously, I felt like at any moment aliens would burst out of our light fixture.  At first we thought the weird lighting was just due to the face that we’d used CFL bulbs.  But after a second trip to HD (we pretty much count on a minimum of two trips at this point—although we’re getting better at buying several types just to be sure we have what we need), we discovered that there are soft CFL bulbs that are far less harsh and offer a look similar to that of an incandescent bulb.  They worked!  (I do feel the need to make a confession, since we’re on the topic of light bulbs.  I am a huge fan of soft, cozy lighting.  Even though the soft CFL bulbs are close, I do not love them as much as an old-fashioned light bulb—they’re just a bit too bright for my taste.  The good news is that they’re getting better all the time, as companies are working to merge the soft look with energy conscious technology.)

One final look.


And we’re happy to report that the fan light correlates nicely with the Pottery Barn light that we purchased to hang over our sink.


Both have a milky glass look that we love, as it’s more opaque, giving it a fresh feel.  Yup, you could say we’re fans of the way things worked out in our bathroom.

Tuesday, February 22, 2011

Shady Business

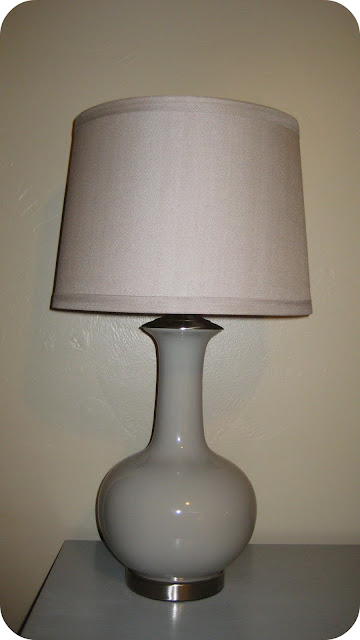
Our master bedroom has taken on a new look these days—and once it’s pieced together, I’ll be sure to share the outcome.  Since I moved our bedroom lamps into the living room (where they quickly adapted to their new home and shed some much needed light), I’ve been on the lookout for replacements.  There are so many fun bases and shades available right now, and as usual, HomeGoods/TJ Maxx and Marshall’s carry an abundant supply in a variety of prices.  Not long ago, while browsing the clearance section at HomeGoods (are you surprised?), I happened upon these beauties, marked down to $22 each.
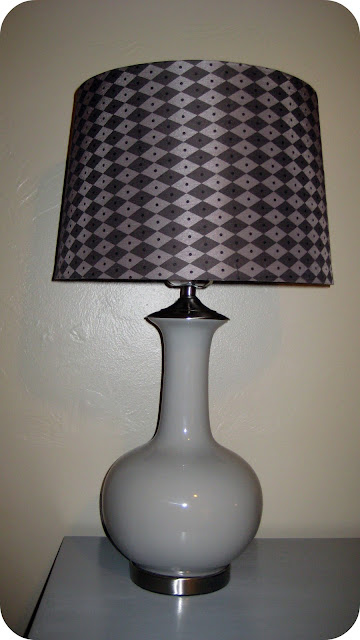

I loved the base color (it ties in with our new duvet), but I was not a huge fan of the lamp shade.  I mean, it’s kind of cool in an ugly sort of way, but it didn’t really fit my idea of a calming, soothing look, which is ultimately what I want our bedroom to be.  I decided to buy them, in hopes that I would be able to replace the shades.  In case you’re wondering, my philosophy is that if it’s a good deal, someone else will snag it, so I might as well buy it, take my purchase home to see if it “goes,” and then return it if I don’t like it.  As a habitual returnee, I have never had a problem returning purchases—I just take good care of my receipts and make sure to return items within the typical 30 day allotment.

Anyway, after popping into stores all over town (that totally makes me think of The King’s Speech—great movie, by the way—when the king’s wife says, “We don’t ‘pop’”—but I guess I do, which just solidifies my common birth), I found these understated shades at Wal-Mart.

While Wally World is not my favorite place to shop, I do like their Better Homes & Gardens line—the creator of my shades.

But once I got them home, I realized that the shades were a different style than the original lamp shades.  Clearly, I had a thing or two to learn.  After doing a quick bit of research (how did people survive before Google?), I discovered that there are two predominant types of lamp shades in the world.

The most common type of shade is a spider fitted with a harp, which looks like this.

[gallery link="file" order="DESC" columns="2" orderby="ID"]

The second type is called an uno, and it fits directly over the lamp socket, like this.


Since the lamps I bought originally were fitted with a harp, I didn’t think I would be able to use my uno shades.  But after fiddling around for a few minutes, I realized that the harp fitter was removable, and once I took it off, all I had to do was unscrew the light bulb, place the uno fitter over the socket, and tada!
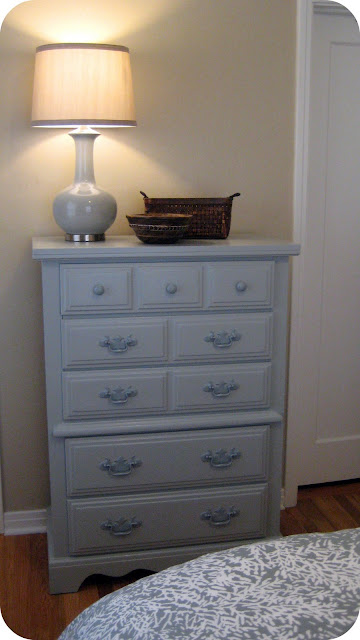

The cute knob that attached to the harp was no longer necessary, so I tossed it into a bowl with several other knobs that I’m hoping to use soon.  For now, they add a splash of color to our bookshelves all nestled in an orange bowl.


It’s possible you have a lamp base that you love, but you’re not sure if you can switch out the shade.  I can’t speak for all lamps, but after my little switcheroo, it seems like a pretty easy fix that would work for most lamps.  If you have an uno shade and want to fit it with a harp, you can purchase a saddle for underneath the socket (around $1) and a harp (around $3) for a cheap and easy solution.  And if you want to switch out a spider shade for an uno shade, all you need to do is remove the harp.  It really is amazing how such a small thing changes the look of a room.  And there you have it—customized lamps on a budget.  And while I’m not planning to do this anytime soon, I’ve wondered what it would look like if I spray painted the very base of the lamp a catchy accent color to offset the gray/blue look.  Don’t you love knowing that even if you never do it, at least you have the option?  I do.

Has anyone creatively redesigned a lamp from a thrift store?  I keep finding these adorable lamps at the ARC and Goodwill for just a few bucks, but I have nowhere to put them!  If I did, I would be spray painting them and replacing the shades like a crazy woman.  It’s probably a good thing our house doesn’t have many extra rooms.