To dispose or not to dispose…that is the question.
We chose not to dispose.
Let me clarify though. While we do care about being good stewards of our resources, we are not using cloth diapers because it’s the green thing to do, nor are we overly concerned about the chemicals used in disposable diapers. This is not our soapbox. For us, it’s about the other green—money. Saving money, that is. Because cloth dipes can be used on multiple children, we figure that we’ll save a fair amount by the time we have more than one kiddo. Since several people have asked us about our decision to use cloth dipes, we broke down our thought process and experience below.
Things to Consider Before Starting with Cloth
1. Decide what it is that matters most to you. Convenience? Cost? Environment? Natural fibers? Cuteness?
2. The cost for cloth dipes is heavy on the front end. In addition to purchasing the diapers and possibly covers for the diapers, you will eventually need a toilet sprayer for tackling solid poop (that is really weird to type…), along with nighttime inserts for heavy wetting, wet bags and/or pail liners, low-residue laundry detergent, and potentially cloth wipes (although many people opt to still use regular wipes, us included). Even though the up-front cost is far more than buying a box of disposables every few weeks, there is a wide enough range of cloth diapers to fit most budgets, plus the resale value of cloth diapers is pretty high on sites like Craigslist and Ebay.
3. There are a bazillion types of cloth dipes, so you will need to do some research to find the style you like best. We found it incredibly helpful to spend time (we’re talking several hours) chatting with the owner/employers of our local store, Baby Cotton Bottoms. We even sat through a 2-hour + class on cloth dipes—yes, giving up a good chunk of our Saturday—to hear about all the ins and outs. While it was a bit overwhelming, the information was incredibly helpful and much easier to process than trying to sift through the mountains of material on the internet. Another popular option when choosing your diaper style is to do a diaper trial. Usually trials cost between $100-$200 for a few weeks of use, and you get to try various diaper styles out on your baby, along with recouping the majority of the cost of the trial once it ends. We chose not to do a trial, mainly because I wanted to avoid too many big decisions right after Liam’s birth. I preferred to have my diapers ducks in a row well before his arrival (so much for the best laid plans…). I think I also wanted to avoid the temptation to buy the most expensive diapers, so my theory was that if I never tried them, I wouldn’t know what I was missing, ya know?
4. Cloth dipes are typically bulkier than disposables. Personally, I don’t mind it, as I kind of like the extra padding on Liam’s tush, plus some of his clothes actually seem to fit better with a little more to grab on to. It really hasn’t been an issue for us.
")
5. Washing cloth dipes requires some additional thought and care, but I haven’t found it to be overwhelming. Still, it is an extra step when you’re already busy with plenty of other baby-related details. I’ve found it helpful to just add the washing to my every other day routine. I tend to throw the diapers in the washer at night or in the early morning so that I’m not scrambling around for diapers in the middle of a hectic day. We also have an HE (high energy efficiency) washer and dryer, which keeps the extra use of water and electricity to a reasonable cost, although I’ve heard that old-school washers fill up with more water, which is actually better for scrubbing those cloth dipes clean. When our diapers need to be washed, I throw the entire wet bag and all the diapers and covers into the washer. Then I do a rinse/spin cycle. Next, I add the detergent and about 1/3 cup of vinegar (which acts as a stripping and natural softening agent) and run the washer on a cycle of warm water, normal spin, and medium load size. I do one more rinse/spin, and then I air dry the covers and either throw the diapers in the dryer or let them dry in the sun, which naturally bleaches out any stains. Your washer will dictate how you wash your diapers, so be sure to do some background research.
Our Experience
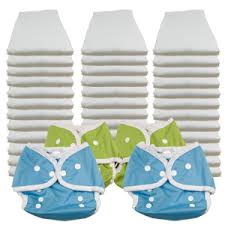
Having seen several friends use cloth diapers successfully, we decided to take the plunge and use them ourselves. Like I said before, the main incentive for us was the financial savings over time. After considering our options, we purchased prefold diapers and Thirsties brand covers, along with a slew of other equipment. Prefolds are just about the cheapest cloth diaper on the market—picture what some of you may have worn as a kid, only with safety pins and rubber covers.

While there are certainly cuter and more updated cloth diapers available, we liked the prefolds just fine and felt that they would work well for our family. And they did. For awhile. As it turns out, Liam is a super heavy wetter (TMI?), and it seemed that no matter how often we changed his diaper, he continued to wet through the prefold and was developing an annoying diaper rash. We fought the battle for awhile, but then decided that if we wanted cloth diapers to work well for us over the long haul, we needed to invest in a more absorbent diaper to avoid becoming frustrated and quitting altogether. Since we already owned several Thirsties fitted diapers for nighttime use (we stuff the nighttime diapers with a hemp insert, which is ultra absorbent—we have had zero nighttime leaks), we opted to purchase enough for a full daytime set. Thankfully, we already owned the matching covers, and since the prefolds were the cheapest option to begin with, we didn’t burn much of a hole in our wallet. The good news is that the fitteds are working great for Liam. We still have occasional leaks, but nothing like we had before. Since the diapers are softer and more absorbent, Liam’s diaper rash also seems much better.
")
*It’s probably a good thing that I’m writing this post before Liam starts eating solid foods, as I might be singing a different tune once we’re spraying off diapers. I hear that it’s quite a shock to the system…no pun intended.*
Miscellaneous Thoughts
When traveling, we use disposable diapers. In a nutshell, it’s just simpler.
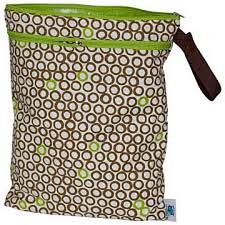
When running errands around town, I still use cloth. I just keep a medium size wet bag in our diaper bag and throw the dirty diapers in there until we get home. No mess, no smell. Easy peasy.
One of my big question was how many diapers to buy. It really seems to depend on the type of diaper you buy, along with the age of your baby. We found this information to be very helpful in deciding how many to purchase. Of course, there are loads of patterns and colors to choose from, but we opted for fairly gender neutral colors so that they can be passed down (which is the whole point for us), and we stuck with solids rather than patterns—which is totally a personal preference sort of thing. The good news is that I’ve embraced more color and pattern in our wet bags—I may have a slight obsession…


And just to make it even more fun, you get to choose between diapers with snaps or Velcro.

We went the snaps route because they tend to last longer and then we don’t have to mess with remembering to cover the Velcro during washes to protect its longevity. Some people love Velcro because you can fit the diapers to the exact size of your child, but Velcro never seems to hold up well under lots of washing and drying, so we figured that it might lose some of its grip and make for looser diapers down the road. We’ve heard that it’s not hard to send in your diapers to get the Velcro replaced, but then you have a waiting period and it costs more money. Liam has obviously grown quite a bit, so we’ve moved through several snap stages, and so far they’re working great for us.
The big question many of you may have, though, is whether or not there are more blowouts in cloth. I’m happy to report that our cloth dipes hold in the poop super well. We have not had any poopy blowouts in cloth, although we’ve dealt with several in disposables. One of the keys is that our cloth dipes have an inner leg gusset, which keeps everything inside where it needs to be. According to the owner of our local cloth diaper store, the key is in having good gussets (this is also one of the main reasons we purchased Thirsties brand).
Honestly, I was nervous when the day came to use cloth diapers. Since Liam was born a month early, he was on the smaller side, so we used disposables for the first month of his life. I worried that the switch to cloth would be a nightmare, but it wasn’t. Below is Liam first day in cloth. He wasn’t as upset as he looks in the photo…promise!

While using cloth requires more thought (which never hurts anyone) and does bring with it the occasional frustrating diaper rash, ultimately we’ve been pleased with our choice. Liam seems pretty happy with it too, and maybe he’ll even be potty trained a smidge earlier. We’re crossing our fingers!
Where do you fall on the diaper spectrum? Feel free to add to the conversation and definitely let me know if you have any specific questions!
")
")
")
")
")
")
")
")
")


")
")
")
")
")
")
")
")
")
")
")
")
")
")
")
")
")
")
")
")
")
")
")
")
")
")
")
")
")
