Showing posts with label Bedroom. Show all posts

Thursday, April 12, 2012

Closet Combining

Nesting.  It’s apparently all the rage when you’re pregnant, although I think that I tend to nest even when I’m not with child…which means my nesting is slightly more neurotic than most…hence, my freakish desire to combine closets. 

Whoever built our little 1947 house decided that closet size wasn’t a major necessity, and while I would love to say that closet space isn’t important to me because our material possessions are not our priority, I have to admit that I like having space for my shoes.  And clothes.  Bags.  Belts.  You know…girly stuff.  But at the same time, I love that having smaller closets forces us to pare down and not hoard tons of extra junk.  If I buy something new, I tend to donate something old.  But I’m rambling.  The point is that we have two bedrooms with small closets, so when we moved into our bungalow, Matt took the back bedroom closet and graciously allowed me to take the master bedroom closet.  This system worked fine for quite awhile, but now that the back bedroom is being converted into a nursery, I decided it was time to truly unite as a married couple—it was time to share a closet. 

Now some of you might say that a newborn doesn’t need a closet all to themselves, that we could get away with keeping separate closets for awhile longer, yadda yadda yadda.  But I’m not good at doing things halfway.  It bothers me.  At some point there might be two kiddos sharing that back bedroom and then we’d definitely have to make the switch, so why not do it now and learn to live with it?  Even if the closet isn’t loaded with clothing, I already have lots of baby items that will be making it their home, as there is nowhere else in our house to put them.  So last weekend we bit the bullet and spent a good portion of Saturday morning paring down, moving seasonal clothing items to the basement for storage, and rearranging the master closet. 

Here’s what the master closet looked like when it was just little ole’ me using it.

image

016

014

018

The back bedroom closet when Matt was using it… 

012

And the combined master closet…

002

005

003

017 (2)

016 (2)

Here’s the now empty nursery closet (notice that the hubs converted that funky removable plumbing wall into a hinged door—yay!).

010 (2)

013 (2)

012 (2)

My goal is to paint the nursery closet a fun color (actually, I’m planning to have my mom paint it when she comes out to paint the rest of the nursery), so we’re not filling it up yet.  We’re also replacing that nasty bar with a new white one, since we’re removing the closet door and hanging a curtain instead.  The door doesn’t shut completely, takes up valuable wall space, and I like the idea of a cute curtain hanging in its place. 

014 (2)

As for our newly combined master closet, I have to say I LOVE it!   I’m not sure if Matt would agree with me, but I really like storing only the clothes I actually wear in the closet at one time.  I was shocked to find that extra space existed after we combined our clothes, belts, bags, and shoes.  That deserves a woot woot!  We do have two dressers plus a stand of wicker baskets that hold stuff like t-shirts, socks, and our unmentionables, but I was even able to give up two of my wicker baskets so that Matt could store his socks in them. 

018 (2)

Ahhh…freedom from clutter. 

So a few tips for organizing/combining closets:

1.  Have garbage bags on hand, that way you can create a stash of items for the thrift or consignment store.  My rule of thumb is that if I haven’t worn it within the last year, I’m not likely to wear it again.  Out it goes.  Last year I experimented with hanging my clothes on backwards hangars; any hangars that were still facing backwards were clearly clothes I hadn’t worn in the past year, so they were thrown out (I made a few exceptions, but not many). 

2.  If combining closets with your significant other, be flexible and willing to share.  This can be challenging, ladies, as you likely have a lot more stuff than your man.  Thankfully, we were able to work together so it wasn’t too difficult.  It also helped that we pared down to the items we are wearing this season and this season only.  For Matt, that doesn’t change all that much throughout the year (guys have it so easy), but I definitely have different items for warm and cold months.  At the moment, our closet pretty much contains only my prego clothes.  Also keep in mind that you change over time, and therefore things that you used to wear may not be as important to you.  For example, in college I wore a ton of bulky sweatshirts because I was always trying to keep warm on campus and in our old school apartment (love that tiny place).  Now that we live in Colorado, I find that I wear more fitted fleece items which take up less space, keep me warmer because they’re designed better, and have basically replaced my sweatshirts.  When I went through my stash, I ended up tossing several because I realized that my lifestyle has changed enough that I won’t likely be going back to sweatshirts anytime soon.  I kept a few and ditched the rest. 

3.  Use the space underneath the hanging clothes.  Several years ago we installed wire shelves on the lower half of the master closet, which provides space for stacking jeans and sweaters, along with stashing a few bins filled with hats, scarves, belts, etc.  There’s even enough space underneath the shelves for storing a few pairs of shoes.

4.  Don’t forget about closet walls.  There are several inches of space around the edge of our closet, and we plan to either hammer in a few nails or a rack for belts and ties.  It’s the perfect amount of space for hanging those long and skinny items.

5.  Leave some extra space in your closet for adding items in the case of unexpected weather changes, the occasional new purchase, and simply because it’s far easier to find what you’re looking for when you’re not shoving aside a bazillion items every morning.  A little breathing room also keeps clothes from getting wrinkled, which is certainly a plus in my book. 

I was a bit ruthless when it came to my own clothing, but keep in mind that we’re still storing plenty of seasonal items in our basement, so I didn’t get rid of as much as you might think.  Still, Matt did take an entire SUV full of stuff to the local thrift store (we pared down a few more items in the basement in addition to clothes and shoes).  Part of me wanted to keep everything for a summer yard sale, but who am I kidding?  I have a feeling a yard sale won’t be at the forefront of my mind when this child arrives… So we got rid of it. 

And that’s the end—or perhaps the beginning—of our closet organizing adventure. 

Thursday, March 10, 2011

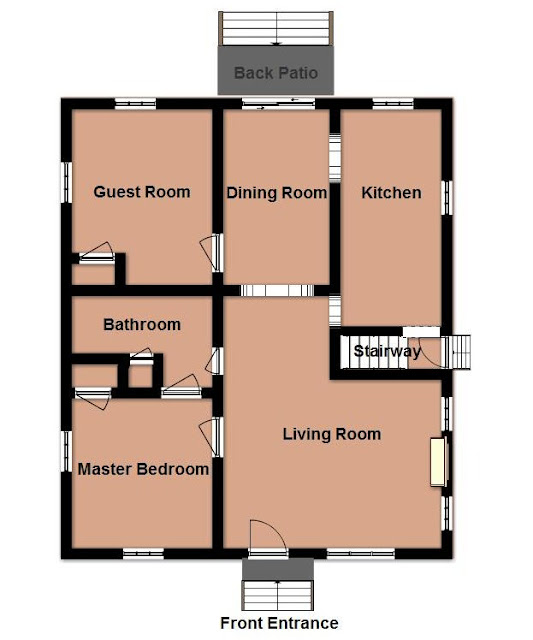
Floor Plan

Here you have it folks.  The main level floor plan of our house.  This drawing was made possible by a really cool website www.floorplanner.com. We hope that this helps you visualize our house when looking through our house tour.


We will be referencing this drawing often when doing updates to our house.  We will also update this drawing with a few more details over the next few days.

Wednesday, March 9, 2011

Vent Vendetta

Seemingly small and insignificant things really do matter.  At least they matter to me.  Sunlight slanting softly through our curtains has the ability to delight me for hours.  On the flip side, little things can be incredibly annoying, which is why there is something so satisfying about making a positive change, even if no one else ever notices.  This past weekend, I did just that.  You see, every time I looked at our floor vents, I got that irked feeling.  Like something just wasn’t right.

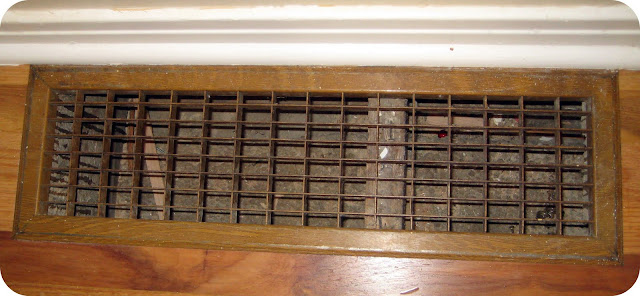
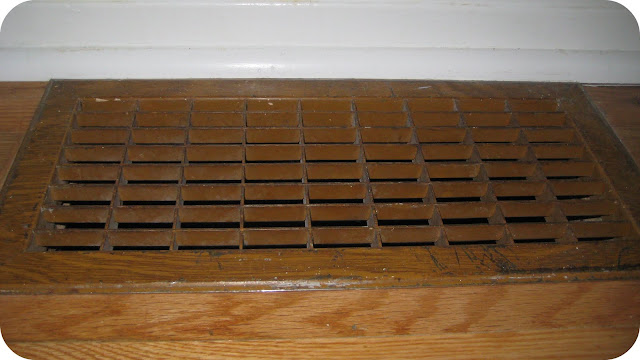
Maybe it was due to their fake wood veneer…


Or their ancient battle wounds…


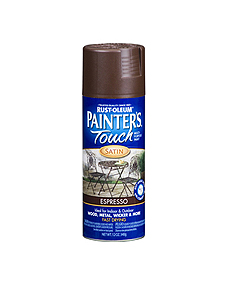
Whatever the case, I finally took charge.  After uprooting the vents, I doused them off in the kitchen sink.  Then I simply sprayed on a few layers of Rust-Oleum’s espresso paint.  Since I wanted to be sure paint covered each groove and slat, I first sprayed the bottom, let it dry, and then gave the top a few coats.


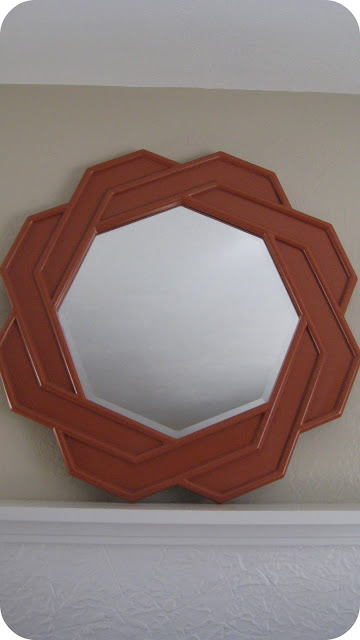
The dark espresso color jives perfectly with our rich curtain rods and bedroom mirror, and it gives the vents a sleek look.  This was one of the fastest projects I’ve done, and I’m loving the results!


What have you done lately to bring a subtle shine to your space?

Saturday, March 5, 2011

HomeGoods Trio

Just when I thought I’d exhausted my unabashed love for HomeGoods, I realized that every mirror we own is from there!  Granted, we only have three mirrors to our name, but considering that each mirror acts as a focal point, I’d say it’s pretty sweet that we were able to score them at such low prices.

We posted about the first mirror here.  It sits above our fireplace and, after a bit of TLC, adds a burst of color to our living room.  The best news—it only cost $25!


The second mirror lives in our bathroom.  We wanted an espresso mirror to tie in with our espresso vanity.  We wanted something proportional to our vanity, which meant it would be fairly large.  But since there is no natural light in our bathroom—and since we want to make the most of our one and only bathroom—a large mirror would make the space feel lighter and roomier.  After browsing a million mirrors online, I was feeling like we might never find the right one.  We even checked with Lowe’s and Home Depot, only to be disappointed by the limited options that all looked pretty standard.  Not to mention the fact that they seemed a bit pricey to us.  And as always seems to be the case, just when we were ready to give up, we eyed this beauty lingering in the aisle of HomeGoods—for just $60.


For such a large mirror that met all of our desires, we were ecstatic.  Plus, the frame has a really cool texture, which sets it apart from all the other ho-hum mirrors out there.

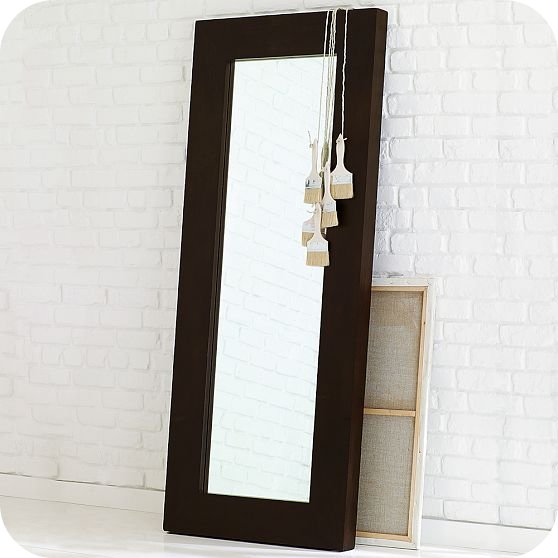
Lastly, I’d been looking for something to define the space between my dresser and one of our bedroom windows.  I hadn’t enjoyed the luxury of a full length mirror since my college days when I shared a tiny apartment with three other girls (good memories of crowding in front of the mirror hooked to the bathroom closet door), I was excited that it might be an option.  Because our bedroom isn’t very large, we knew a mirror would open up the space.  I loved this one at West Elm, but it definitely didn’t fit our budget.


Still, I realized that a floor mirror—one that sits on the floor and leans against the wall—would be a great option for our bedroom.  Once again, good old HG came into play.  My mom and sisters were visiting, and they ended up buying it for us as a housewarming gift.  This mirror really brings distinction to our bedroom, and we like how it ties in with our oil-rubbed curtain rods.


And there you have it!  What have been your best HomeGoods finds?

Sunday, February 27, 2011

Moving From Warm to Cool

Snippets of our master bedroom have been posted over the past few weeks, but I think it’s time to reveal the whole room—all 10x12 feet of it.

When we first painted our house, I wanted to work with our original bedding, which was chocolate brown.  I liked the idea of a warm and insulated bedroom—it seemed more intimate for some reason.  So I boldly forged ahead and painted it this color.


We didn’t mind it for awhile.  In fact, I never really disliked the orange, but I began to feel boxed in by color scheme.  There were days when I felt like our room was something out of the Brady Bunch.  But since we hadn’t even lived in our house for a year, I felt guilty about repainting, and instead, I made up my mind to live with it.

This is where I virtually hug generous relatives.  Matt’s Aunt Kathy gave us a sweet Pottery Bard gift card for Christmas.  We decided to use the gift card to purchase something substantial—something that would really make a difference in a room.  In a way, we were looking for a focal point to build off of.  And that is when we discovered that West Elm, Pottery Barn’s sister store, was having a sale on their bedding.  It certainly didn’t hurt that my cousin works at West Elm and was able to get us an additional 40% discount off the sale price!  So we threw caution to the wind and ordered the winter pine duvet in sage blue—pattern and color!


I was sort of hopeful that the duvet would match the orange color on our walls—you know, in that eclectic sort of way that feels purposefully thrown together.  Alas, it was not a match made in heaven.

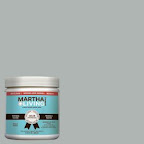
That’s when I remembered my roots—my mother is the queen of redecorating and repainting—and I decided that if a gallon of paint could transform our bedroom for around $20, then I was not going to let a timeline stop me.  I debated over paint colors for awhile, vacillating between a very light blue (Martha Stewart's Driftwood Gray) and the neutral tan (Valspar’s Oat Bran) we have throughout the rest of our house.  After painting a swatch of the blue on the walls, I felt like it would be too much blue everywhere—it felt a little cold, too—so I went with the tan, since I knew that there would be plenty of other opportunities to bring in soft shades of color in our accessories.

[gallery link="file" order="DESC" columns="2" orderby="title"]

A few days later, Matt helped me prep the room by taking down the curtain rods and hauling furniture out to the living room.  Since we don’t have tons of furniture anyway, it wasn’t an overly taxing process.  (If our room was bigger, I probably would have just moved everything to the middle and covered it with a drop cloth.)  To break up the job, I edged the room on Friday night after we moved all the furniture out, and I spent Saturday rolling paint.  Because it’s not a large room, I even had time to paint our dressers Martha Stewart’s Winter Day.  Check out the matching hardware I spray painted here.


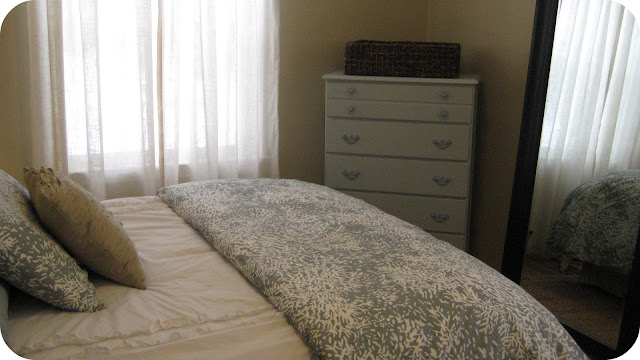
When we pieced the room back together, I was sorely disappointed to realize that the full/queen size duvet we had ordered barely covered the entire bed (note to self: try out bed covers before redesigning entire room around them).  Thankfully, my faithful husband was there to calm me down (me—panic?).  When I was able to think straight, I realized that while I love the pattern of our duvet, it is pretty busy.  That’s when I ran back to the guest bedroom and grabbed the white shabby chic comforter off the bed and threw it onto ours.  It made a huge difference, as it completely covered the bed and tied all of the tan, blue/grey, and white together.  Here’s what it looks like all together.


We are loving the calm and relaxed vibe of our bedroom; I wake up feeling soothed by the cool colors.  It really is crazy that changing the colors of a room can completely change the way it makes you feel.  I’m sure that some of you are thinking, yeah, but what about the guest bedroom?  It’s true that our green guest bedroom isn’t looking quite so pulled together these days, but my thought is that a home’s master bedroom should be a place where you feel completely at ease.  Since we spend far more time in the master bedroom than the guest bedroom, I’m okay with making it feel plush at the expense of another room.  And who knows—maybe I’ll spy a great deal on bedding for the guest room down the road.

For those of you who love a breakdown, here was our total cost:

  • West Elm duvet set—way discounted and covered by the gift card from Aunt Kathy

  • Target shabby chic white bedding & throw pillow—stolen from guest room at no extra cost

  • Lamps from HomeGoods—$22 each for a total of $44

  • Uno lamp shades from Wal-Mart—$15 each for a total of $30

  • Quart of paint for the dressers—$12

  • Spray paint for the dresser hardware—just under $4

  • Gallon of paint for the walls—$22

  • Total cost for room makeover—$112 (yay for birthday money!)


Not bad for a weekend’s work!  The lamps were the most expensive part of the whole makeover, but since I repurposed the lamps that used to live in our bedroom and gave them a new home in our living room, I suppose you could say that we would have spent about that much on lamps for the living room at some point.

Keep in mind that the room isn’t completely finished.  We’re working on a DIY headboard at this very moment, plus we’d really like to add some sort of wall art to add a little character to our neutral walls.  We’ll be sure to post it when we finally get around to it.  By the way, does anyone know of a great resource for finding wall art?

What have you guys been up to?  Has anyone else tackled a weekend makeover recently?  Feel free to link up to any photos you have!