Monday, February 28, 2011

FANBOYS

Grammar, anyone?  I recently used this acronym to teach my students about coordinating conjunctions (for, and, nor, but, or, yet, so)—and what better way to start off a post about a fan that coordinates with the rest of the bathroom—and it just so happens that it was installed by a boy!  And yes, we’re starting Shakespeare this week—but since not everyone appreciates them as much as me, I promise to do my very best to hold back all the puns that will surely be racing through my mind.

Alright, here’s the down and dirty of it.  Our bathroom had a bizarre window in the shower, so we popped it out and made a cohesive wall of subway tile instead.  Love the subway tile, by the way.  Apparently someone made a law that bathrooms must have either a window or a fan in order for air to vent, so we turned to our trusted friend, the HD.  As it turns out, fans are downright sterile looking these days.  I’m convinced that someone could make a good living just by redesigning some of the fans out there—and selling them at affordable prices.  But working within our budget, we determined to find a functional fan that was not a total eyesore.  Here were some of our options—and these are the good ones!

[gallery link="file" order="DESC" orderby="title"]

We decided to go with the simple look of this fan, since it looked more like a normal light fixture, rather than a vent cover.
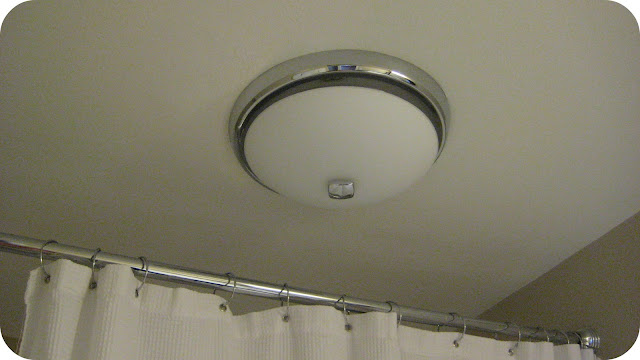

Since we want our house to be people-friendly, I wanted to make sure that the sound of the fan was adequate.  Too loud and it would be annoying.  Too soft and people hanging out in the living room might hear your business…you know?  That’s when we spotted a handy little contraption right in the middle of the fan aisle that allowed us to test out the noise level of our fan.  Bingo!  We were satisfied.

Before we installed our fan light, I worried that it would interfere with our extra tall shower curtain.  While it comes pretty close to the bar, it actually doesn’t look too awkward, and there’s never been an issue of our curtain bumping up against it.
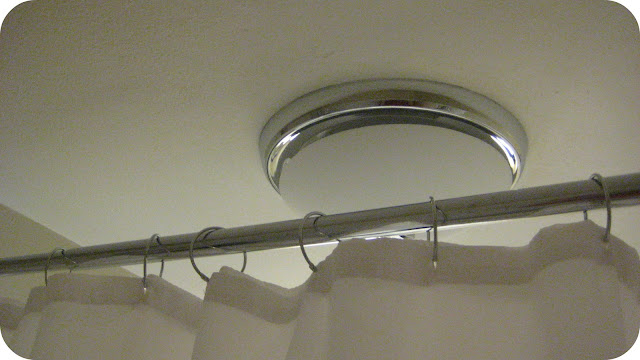

In an effort to be more energy efficient, we screwed in some CFL bulbs—only to be creeped out by the bluish lighting they emitted.  Seriously, I felt like at any moment aliens would burst out of our light fixture.  At first we thought the weird lighting was just due to the face that we’d used CFL bulbs.  But after a second trip to HD (we pretty much count on a minimum of two trips at this point—although we’re getting better at buying several types just to be sure we have what we need), we discovered that there are soft CFL bulbs that are far less harsh and offer a look similar to that of an incandescent bulb.  They worked!  (I do feel the need to make a confession, since we’re on the topic of light bulbs.  I am a huge fan of soft, cozy lighting.  Even though the soft CFL bulbs are close, I do not love them as much as an old-fashioned light bulb—they’re just a bit too bright for my taste.  The good news is that they’re getting better all the time, as companies are working to merge the soft look with energy conscious technology.)

One final look.
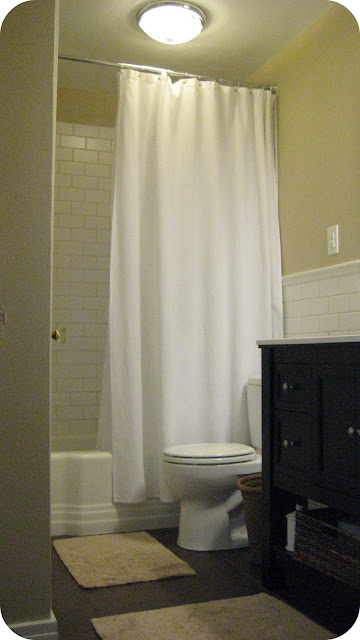

And we’re happy to report that the fan light correlates nicely with the Pottery Barn light that we purchased to hang over our sink.


Both have a milky glass look that we love, as it’s more opaque, giving it a fresh feel.  Yup, you could say we’re fans of the way things worked out in our bathroom.

Sunday, February 27, 2011

Moving From Warm to Cool

Snippets of our master bedroom have been posted over the past few weeks, but I think it’s time to reveal the whole room—all 10x12 feet of it.

When we first painted our house, I wanted to work with our original bedding, which was chocolate brown.  I liked the idea of a warm and insulated bedroom—it seemed more intimate for some reason.  So I boldly forged ahead and painted it this color.


We didn’t mind it for awhile.  In fact, I never really disliked the orange, but I began to feel boxed in by color scheme.  There were days when I felt like our room was something out of the Brady Bunch.  But since we hadn’t even lived in our house for a year, I felt guilty about repainting, and instead, I made up my mind to live with it.

This is where I virtually hug generous relatives.  Matt’s Aunt Kathy gave us a sweet Pottery Bard gift card for Christmas.  We decided to use the gift card to purchase something substantial—something that would really make a difference in a room.  In a way, we were looking for a focal point to build off of.  And that is when we discovered that West Elm, Pottery Barn’s sister store, was having a sale on their bedding.  It certainly didn’t hurt that my cousin works at West Elm and was able to get us an additional 40% discount off the sale price!  So we threw caution to the wind and ordered the winter pine duvet in sage blue—pattern and color!


I was sort of hopeful that the duvet would match the orange color on our walls—you know, in that eclectic sort of way that feels purposefully thrown together.  Alas, it was not a match made in heaven.

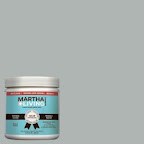
That’s when I remembered my roots—my mother is the queen of redecorating and repainting—and I decided that if a gallon of paint could transform our bedroom for around $20, then I was not going to let a timeline stop me.  I debated over paint colors for awhile, vacillating between a very light blue (Martha Stewart's Driftwood Gray) and the neutral tan (Valspar’s Oat Bran) we have throughout the rest of our house.  After painting a swatch of the blue on the walls, I felt like it would be too much blue everywhere—it felt a little cold, too—so I went with the tan, since I knew that there would be plenty of other opportunities to bring in soft shades of color in our accessories.

[gallery link="file" order="DESC" columns="2" orderby="title"]

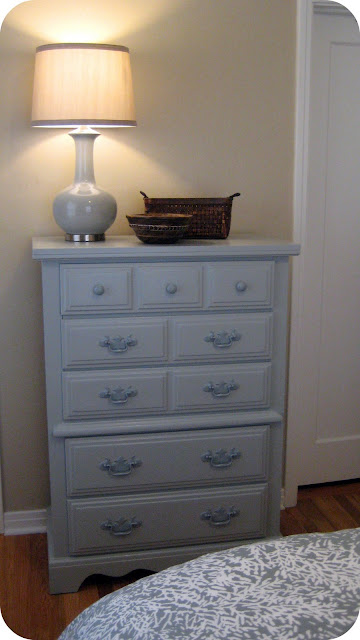
A few days later, Matt helped me prep the room by taking down the curtain rods and hauling furniture out to the living room.  Since we don’t have tons of furniture anyway, it wasn’t an overly taxing process.  (If our room was bigger, I probably would have just moved everything to the middle and covered it with a drop cloth.)  To break up the job, I edged the room on Friday night after we moved all the furniture out, and I spent Saturday rolling paint.  Because it’s not a large room, I even had time to paint our dressers Martha Stewart’s Winter Day.  Check out the matching hardware I spray painted here.


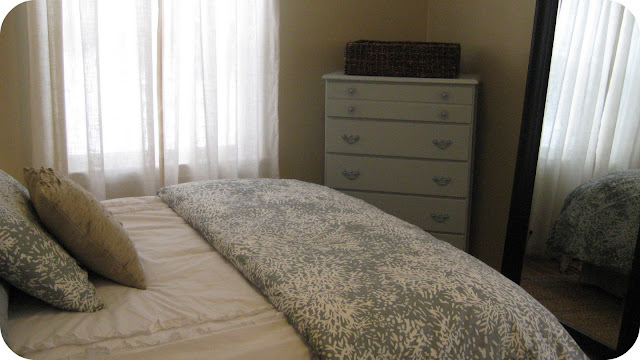
When we pieced the room back together, I was sorely disappointed to realize that the full/queen size duvet we had ordered barely covered the entire bed (note to self: try out bed covers before redesigning entire room around them).  Thankfully, my faithful husband was there to calm me down (me—panic?).  When I was able to think straight, I realized that while I love the pattern of our duvet, it is pretty busy.  That’s when I ran back to the guest bedroom and grabbed the white shabby chic comforter off the bed and threw it onto ours.  It made a huge difference, as it completely covered the bed and tied all of the tan, blue/grey, and white together.  Here’s what it looks like all together.


We are loving the calm and relaxed vibe of our bedroom; I wake up feeling soothed by the cool colors.  It really is crazy that changing the colors of a room can completely change the way it makes you feel.  I’m sure that some of you are thinking, yeah, but what about the guest bedroom?  It’s true that our green guest bedroom isn’t looking quite so pulled together these days, but my thought is that a home’s master bedroom should be a place where you feel completely at ease.  Since we spend far more time in the master bedroom than the guest bedroom, I’m okay with making it feel plush at the expense of another room.  And who knows—maybe I’ll spy a great deal on bedding for the guest room down the road.

For those of you who love a breakdown, here was our total cost:

  • West Elm duvet set—way discounted and covered by the gift card from Aunt Kathy

  • Target shabby chic white bedding & throw pillow—stolen from guest room at no extra cost

  • Lamps from HomeGoods—$22 each for a total of $44

  • Uno lamp shades from Wal-Mart—$15 each for a total of $30

  • Quart of paint for the dressers—$12

  • Spray paint for the dresser hardware—just under $4

  • Gallon of paint for the walls—$22

  • Total cost for room makeover—$112 (yay for birthday money!)


Not bad for a weekend’s work!  The lamps were the most expensive part of the whole makeover, but since I repurposed the lamps that used to live in our bedroom and gave them a new home in our living room, I suppose you could say that we would have spent about that much on lamps for the living room at some point.

Keep in mind that the room isn’t completely finished.  We’re working on a DIY headboard at this very moment, plus we’d really like to add some sort of wall art to add a little character to our neutral walls.  We’ll be sure to post it when we finally get around to it.  By the way, does anyone know of a great resource for finding wall art?

What have you guys been up to?  Has anyone else tackled a weekend makeover recently?  Feel free to link up to any photos you have!

Friday, February 25, 2011

Blog Updates


We have recently updated a few features to make this blog more user friendly.  The most important update now allows our readers to create and read comments much easier.  We really value the conversation aspect of this site and are excited that it just got a little boost.  We will continue to make improvements in this area.

Also, if you look under our house tour tab you will find more pictures related to our kitchen remodel.  We finally got them up.

Lastly, due to many requests we will soon have a layout of our house posted which will hopefully help you visualize everything.  Keep an eye out for this.  Know that we are listening to you.

If you have any more ideas that might be helpful in making our blog better please share them with us.

Thursday, February 24, 2011

Mirror, Mirror On The Wall…

In its black and gold glory, ours was definitely not the fairest of them all…

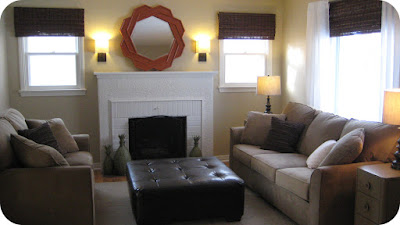
I’m feeling the need to defend my ugly purchase, so let me back up a bit.  To start, I’d been searching for a piece of art to hang above our fireplace mantle.  I wanted something large—a focal point that would add some color and drama to the room without feeling too busy.  And of course, I wanted it to be as affordable as possible.  And maybe even something that I could tweak over time…you know, just in case my mood changes and I want to play with another color scheme down the road.

And that, my friends, is why I love love love HomeGoods/TJ Maxx.  Not only do they sell quality merchandise at way lower prices than department stores—they have clearance sales on top of their already low-prices!  (I promise that I was not paid for my shameless advertising.)  So as I was browsing the sale aisles one afternoon, I stumbled across this mirror.


At first glance, I almost passed it up, because the paint job was so hideous.  But then I looked at the price tag: $25 bucks!  I think they marked it down mainly due to a crack in the frame...and maybe the color combo.  Still, that’s a tough deal to pass up, especially since it met all of the qualifications on my wish list, plus the added bonus of its octagon shape and raised edges.  I was swooning.  Since I’ve been trying to look at old or odd pieces with an eye for their potential, I realized this was the prime opportunity to get my hands dirty.  Into the cart it went.

When I got home, I stuck the mirror on the mantle, just to make sure that I liked it in that spot.  After gazing at its gilded glory for a few weeks, I finally decided that the mantle provided the perfect home for our mirror.  Now I was ready to give it a makeover.  It was actually very simple.

First, I filled the crack in the frame with wood putty.  Since we have plaster walls and had to do some repair work before we painted, we already had putty mixed in to our stash of tools.  You can see that I didn’t do a perfect job filling and sanding the crack, but unless you’re looking for imperfection, it’s not noticeable.

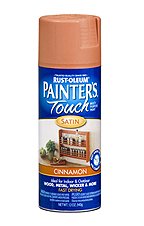
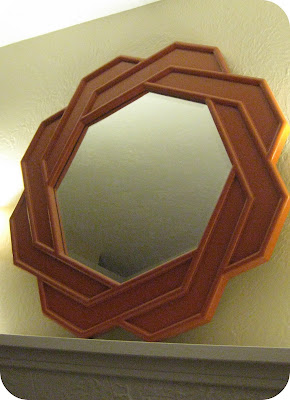
Next, I taped paper to the actual mirror so that it would stay clean when I started spray painting the frame.  Then, I laid it out in our garage over some plastic (I always use garbage bags if I don’t have any plastic sheets available) and went to work spray painting it RustOleum’s Cinnamon, which I chalk up to a combo of burnt orange with a hint of coral mixed in.


I let it dry for a full 24 hours so it would have plenty of time to cure.  As my finishing touch, I removed the paper from the mirror and scraped away any excess paint with a razor blade; it flaked off easily and left a nice clean edge.


And here she is—a fun pop of color in our living room.


You might be wondering why we haven’t officially hung her up yet.  We actually think that we might just let her sit on the mantle.  It feels a little less formal that way, and then we can switch things up whenever we feel like it.  Oh, and remember how I said I wanted some flexibility?  I’m loving the orangey look right now, but if I ever want to incorporate other tones, all it takes is a can of spray paint—simple as that.  I love that this project was so quick and inexpensive, yet it completely changes the look of the room.

What about you?  We love inspiration, so feel free to link up to a photo of a piece that you’ve overhauled or are even just debating over.

Tuesday, February 22, 2011

Shady Business

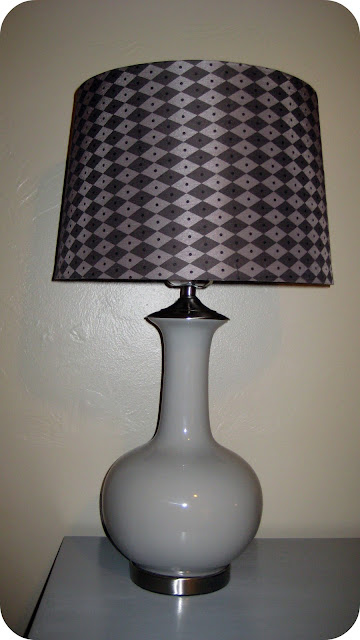
Our master bedroom has taken on a new look these days—and once it’s pieced together, I’ll be sure to share the outcome.  Since I moved our bedroom lamps into the living room (where they quickly adapted to their new home and shed some much needed light), I’ve been on the lookout for replacements.  There are so many fun bases and shades available right now, and as usual, HomeGoods/TJ Maxx and Marshall’s carry an abundant supply in a variety of prices.  Not long ago, while browsing the clearance section at HomeGoods (are you surprised?), I happened upon these beauties, marked down to $22 each.


I loved the base color (it ties in with our new duvet), but I was not a huge fan of the lamp shade.  I mean, it’s kind of cool in an ugly sort of way, but it didn’t really fit my idea of a calming, soothing look, which is ultimately what I want our bedroom to be.  I decided to buy them, in hopes that I would be able to replace the shades.  In case you’re wondering, my philosophy is that if it’s a good deal, someone else will snag it, so I might as well buy it, take my purchase home to see if it “goes,” and then return it if I don’t like it.  As a habitual returnee, I have never had a problem returning purchases—I just take good care of my receipts and make sure to return items within the typical 30 day allotment.

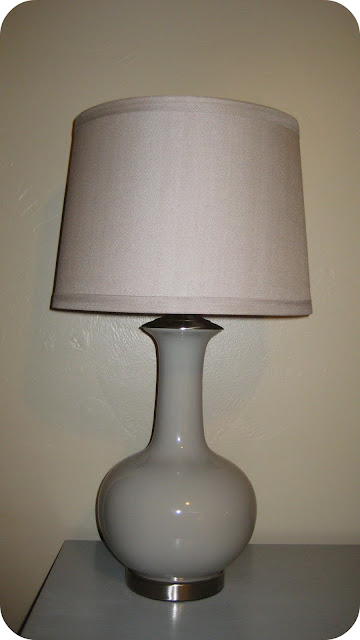
Anyway, after popping into stores all over town (that totally makes me think of The King’s Speech—great movie, by the way—when the king’s wife says, “We don’t ‘pop’”—but I guess I do, which just solidifies my common birth), I found these understated shades at Wal-Mart.


While Wally World is not my favorite place to shop, I do like their Better Homes & Gardens line—the creator of my shades.

But once I got them home, I realized that the shades were a different style than the original lamp shades.  Clearly, I had a thing or two to learn.  After doing a quick bit of research (how did people survive before Google?), I discovered that there are two predominant types of lamp shades in the world.

The most common type of shade is a spider fitted with a harp, which looks like this.

[gallery link="file" order="DESC" columns="2" orderby="ID"]

The second type is called an uno, and it fits directly over the lamp socket, like this.


Since the lamps I bought originally were fitted with a harp, I didn’t think I would be able to use my uno shades.  But after fiddling around for a few minutes, I realized that the harp fitter was removable, and once I took it off, all I had to do was unscrew the light bulb, place the uno fitter over the socket, and tada!


The cute knob that attached to the harp was no longer necessary, so I tossed it into a bowl with several other knobs that I’m hoping to use soon.  For now, they add a splash of color to our bookshelves all nestled in an orange bowl.


It’s possible you have a lamp base that you love, but you’re not sure if you can switch out the shade.  I can’t speak for all lamps, but after my little switcheroo, it seems like a pretty easy fix that would work for most lamps.  If you have an uno shade and want to fit it with a harp, you can purchase a saddle for underneath the socket (around $1) and a harp (around $3) for a cheap and easy solution.  And if you want to switch out a spider shade for an uno shade, all you need to do is remove the harp.  It really is amazing how such a small thing changes the look of a room.  And there you have it—customized lamps on a budget.  And while I’m not planning to do this anytime soon, I’ve wondered what it would look like if I spray painted the very base of the lamp a catchy accent color to offset the gray/blue look.  Don’t you love knowing that even if you never do it, at least you have the option?  I do.

Has anyone creatively redesigned a lamp from a thrift store?  I keep finding these adorable lamps at the ARC and Goodwill for just a few bucks, but I have nowhere to put them!  If I did, I would be spray painting them and replacing the shades like a crazy woman.  It’s probably a good thing our house doesn’t have many extra rooms.

Monday, February 21, 2011

Ahoy Mate!

We promised that we would give you the details on finding a mate for our vanity, so here’s the scoop on our bathroom counter top.  Because we reconfigured our bathroom layout after knocking out the awkward third door, we suddenly found ourselves faced with more decisions.  Once we finally committed to a vanity, we began exploring our counter top options—and there are a lot of options out there, people.  Laminate, porcelain, granite, corian, cement, butcher block, glass, stainless steel, cast iron, tile,…the list could go on.  What about counter top edges: beveled, bullnose, waterfall, eased, etc.  And that doesn’t even take into account the type of sink!  Under mounts, drop-ins, vessels…I digress.


In a nutshell, my dream bathroom sink consists of a white cast iron counter top with a seamless cast iron bowl.  No back splash.  No weird indentation or rim around the sink.  Sounds so simple, right?  It is.  I love the idea of a classic look that I won’t get sick of—one that doesn’t have all the bells and whistles attached to it.  Sadly, my dream quickly shattered once I looked them up online (click here)—we’re talking close to $1,000…yeah.  Why is it that the simple things are often the most expensive?


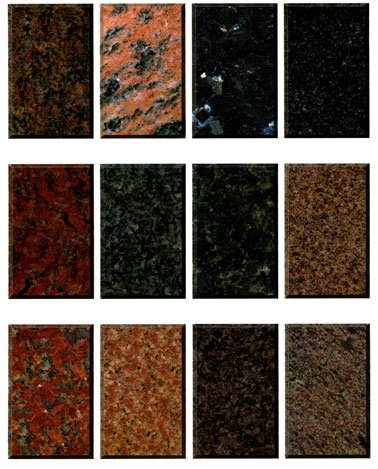
After my bubble burst and I floated back down to earth, I determined that I would find an alternate plan—one that combined the right look with the right price.  So I started with the obvious question: What’s hot right now?  It seems that lately everyone is raving about granite.  But have you looked at those price tags?  To give it a fair shot, I buzzed over to Planet Granite and look a good look at their remnants, which are essentially leftover pieces of granite that typically sell for less.  A bathroom counter is a good home for a remnant, because bathrooms don’t require nearly as much square footage as kitchens.  No matter though, because even though these pieces are priced lower, they are still expensive.  Plus, we hadn’t bought a sink yet!  You have to take into consideration your personality, too.  Most granite patterns are fairly busy.  Are you going to tire of it within a few years?  What if you want to change your décor?  Will the granite pattern bother you when you decide that your neutral tan walls would look better dressed in a shade of lime green?  I tend to like a more classic style that I can dress up or down, depending on my mood, so I decided to nix the granite idea.


The second option we looked at was a faux natural stone sold at Home Depot.  They had some more subtle designs that seemed a bit more of what we were looking for at a lower price, but it still seemed like an extravagant amount of money to spend.  After staring at the samples for about an hour, Matt finally insisted that I call my mom to get her thoughts on the decision—he knows me too well.  After some serious resistance, I suppressed my pride and dialed.  Within about two minutes, I knew what I had to do.

In a nutshell, my mom brought me back to the basics (as is often the case).  What was it that I loved about Pottery Barn and Restoration Hardware vanities and sinks?  Their simplicity.  Their clean and classic look.  But what about the fact that were lots of white sinks out there, but they all had rims and indentations around them, not to mention the unavoidable back splash?  She encouraged me to look again to see if I could compromise by finding a counter top with only one of those—and even thought it might not be exactly what I had been hoping for, it would be pretty close and within budget.  And being within budget is worth it to us, especially if it meets most of the requirements on our wish list.

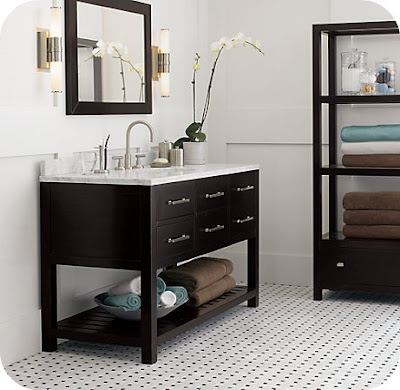
Check out the similarities between this vanity from Restoration Hardware and our own...


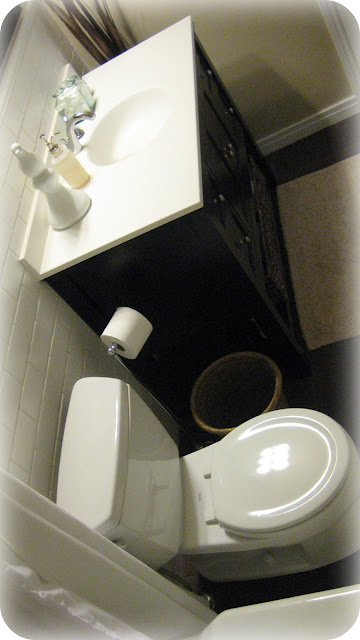
That’s when I stumbled upon a Swanstone counter top—a matte (I’m a matte lover for its subdued look—and the fact that he’s my hubby…pun intended!), white counter top, seamless bowl with no rim/indentation—and a back splash (no way to remove it—grrr)—all for under $200.  And that resolved it for us.  I know that some people are willing to spend big bucks to get the perfect look, but life is just too short to lose sleep over blowing your budget, so stick to your guns and find something that works within your price range.  The great news is that you can usually find something close or even DIY it!

Here is our vanity with its new mate...


We replaced our entire vanity and counter top, but what about the rest of you?  I’d love to see your bathroom solutions—be it a painted vanity, updated sink, or complete overhaul.   

Thursday, February 17, 2011

Real Life Shark Bites

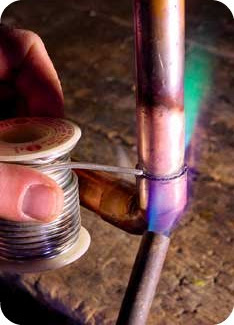
What did you think we were talking about? Plumbing, of course! When it comes to soldering copper pipes, we get an “A” for effort, but a “D” for results. So if you’re like the rest of us and struggle with this complicated task, know that you’re not alone. During the few times we’ve taken our torch to the pipes, we only seem to get about 75% of the soldering to work. Clearly this is why plumbing is a skilled trade. With that said, I still think that it’s worth it to try soldering first, but if you just can’t seem to get it, or you need a quick fix, then Shark Bites (aka Gator Bites at Lowe’s) are the way to go.


When we bought our house, the plumbing barely worked. The house had basically been abandoned for a year, and the galvanized pipes had literally corroded so badly inside that when we turned on the faucets, we were lucky to squeeze out a drip of water. So we did what most people do and hired a plumber. Eventually we decided to upgrade to copper piping, because it is still the best option available. Herman’s Plumbing, a local company, had our house re-plumbed in a matter of hours. Plumbers are truly amazing to watch. They make it look so easy!


Several months later, during our bathroom remodel, we had to move the water supply lines over for our new sink and vanity. This simple sounding project quickly became a daunting task. We tried soldering pipes for literally two hours before we called a plumber to come to the rescue. We were amazed when even the plumber couldn’t get the joint to hold—that was a first. He finally gave up using his torch and solder, and ran out to his truck. When he came back, he enlightened us by introducing what may be one of the best inventions in this modern age: the Shark Bite. We were mesmerized at the ease in which it was placed. In a matter of seconds, the job was finished—hours of work resolved in a blink of an eye. Who knew?

Since that day, I have been a firm believer in the Shark Bite phenomenon. It may seem a bit pricey, but will be completely worth the cost if it saves you a call to the plumber. We actually bought a few extra to keep on hand just in case we encounter a plumbing emergency down the road.

We’re all about being honest about the good, the bad, and the ugly—and the truth is that most DIY projects require a “learn as you go” attitude. Before buying our house, we had zero experience in these areas, but during our limited time as home owners, we’ve found that the best way to figure it out is to just give it a whirl—the only thing you have to lose is some time and maybe a bit of your pride. In the end, you could save a wad, in addition to tucking some more experience under your tool belt. And before you know it, you’ll have added some invaluable skills to your growing repertoire! To all of you DIY plumbers out there, we tip our hats off to you—and if you have ever used a Shark Bite, we’d love to hear about your experience.

Good Resources:

Shark Bite Warranty

Click here and here to read more about Shark Bites.

Click here for a step by step tutorial on how to solder copper pipes.