Friday, August 26, 2011

Chair Flair

You may recall these lovely legs…


Well, I finally got around to clothing them in some fresh paint and starchy linens!  Because I’m not an expert in upholstery (that’s the understatement of the year…), and since Little Green Notebook recently posted  a fantastic DIY upholstery series on her blog, I decided to simply give you a rundown of the whole process in photos with just a few comments, rather than trying to reinvent the wheel by explaining all the steps I went through.  But, since I’ve decided that I need to be completely (sometimes painfully) honest about our DIY projects, I will be sure to drop a few tidbits that I learned along the way. 

*If you plan to upholster a piece anytime soon, you must check out these awesome tutorials by Little Green Notebook: Step 1, Step 2, Step 3, Step 4, and Step 5.*

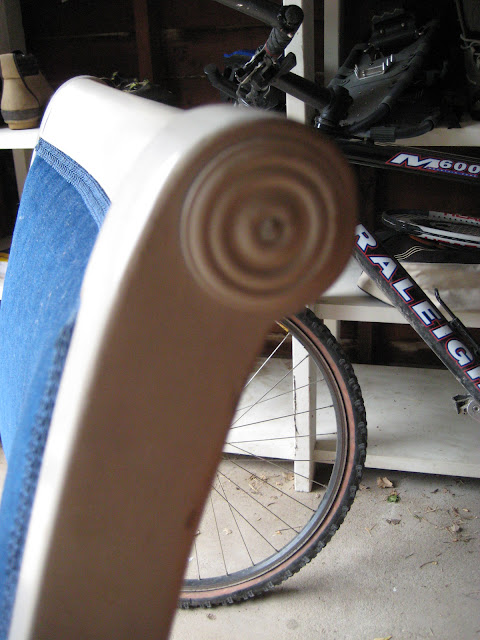
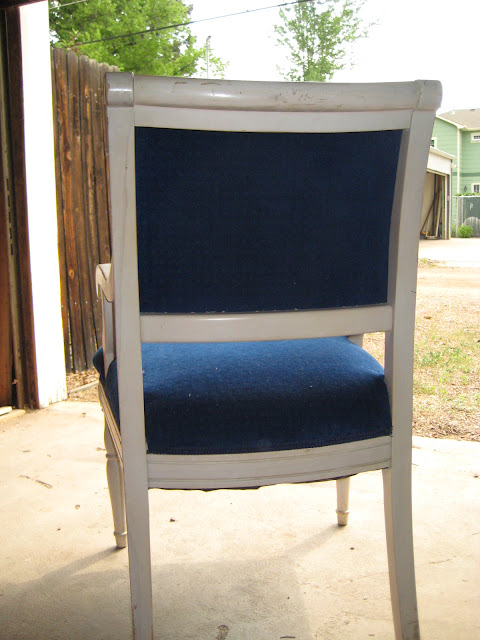
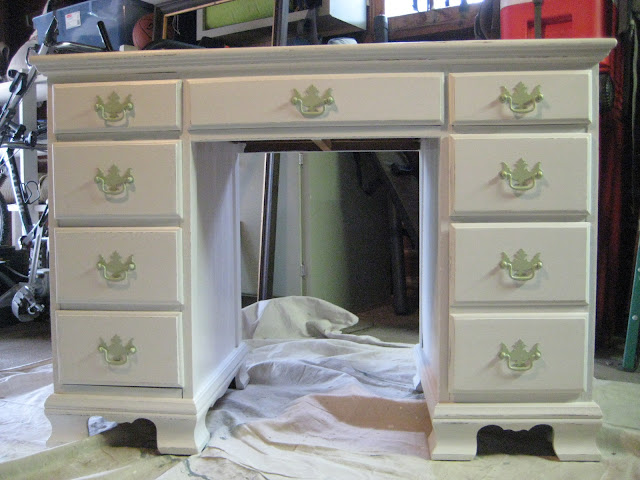
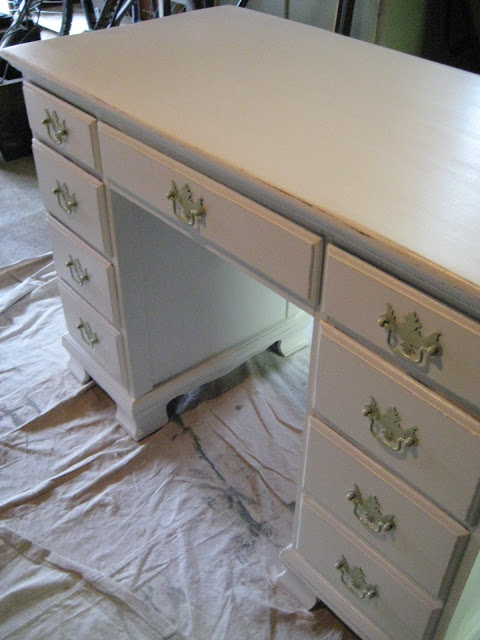
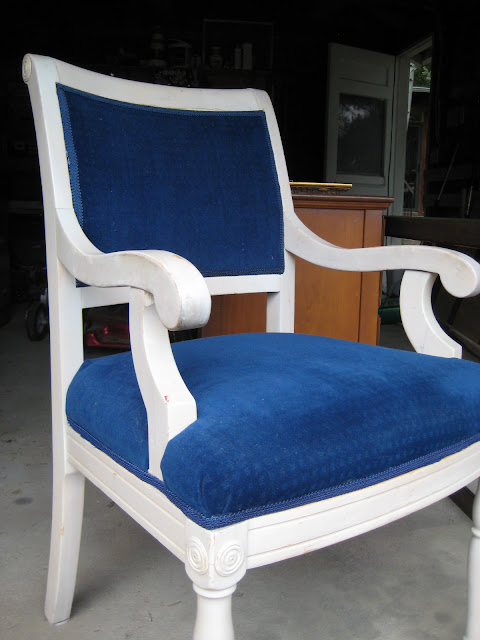
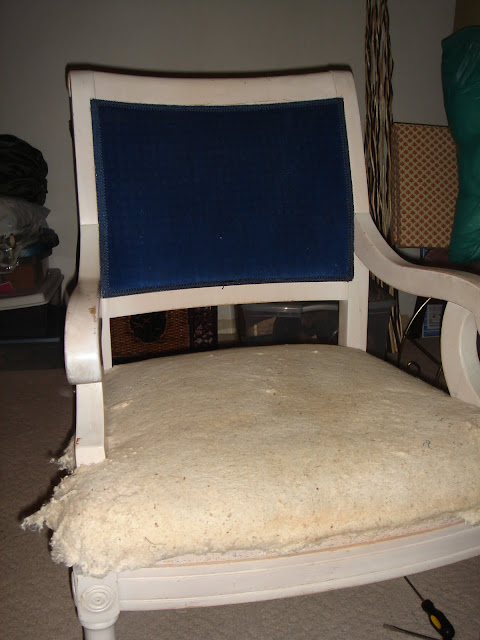
First, I snapped a bunch of “before” pictures—mainly so I would have a reference point in case I forgot something important in the middle of everything.  Believe me—once you are in the throes of it all, you might feel slightly disoriented.


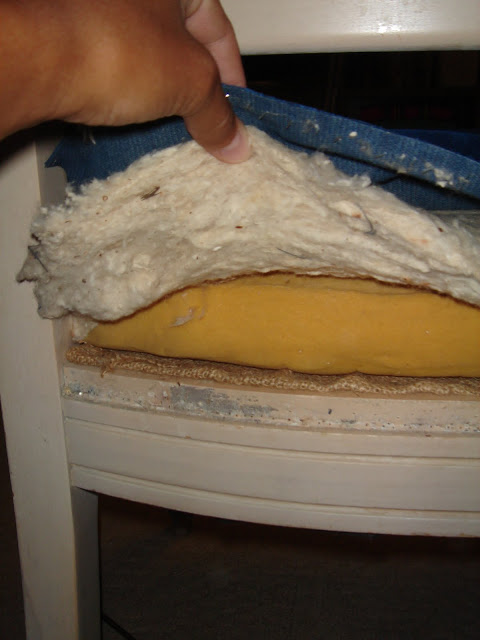
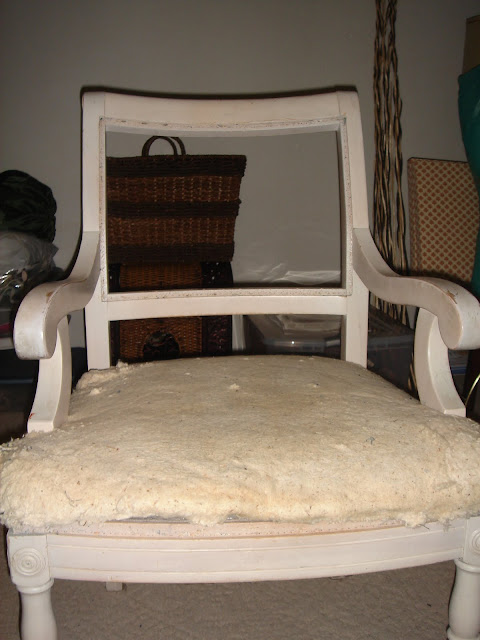
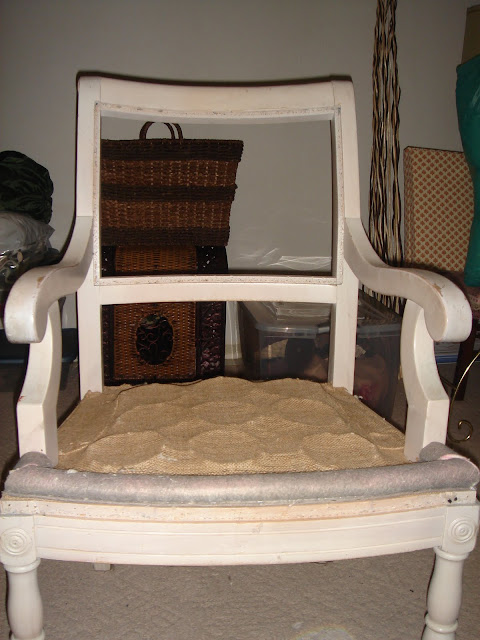
Then, I stripped her down to the bare bones.  If you have never done this with a piece of furniture, I encourage you to give it a try.  It’s amazing how often we sit on furniture but have no idea what lurks beneath the surface!  Trust me—it will make for an interesting afternoon!   


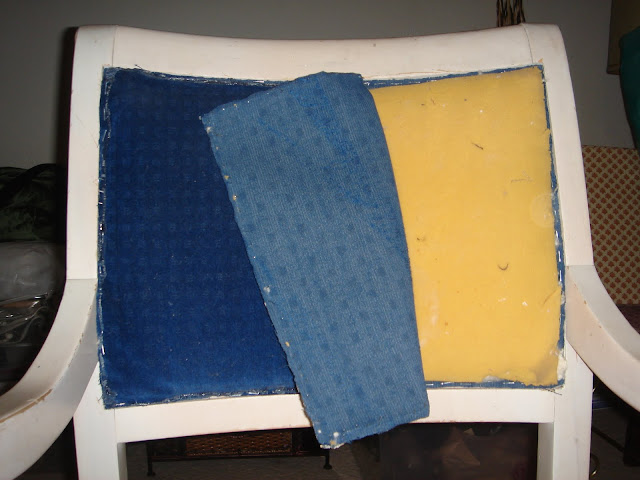
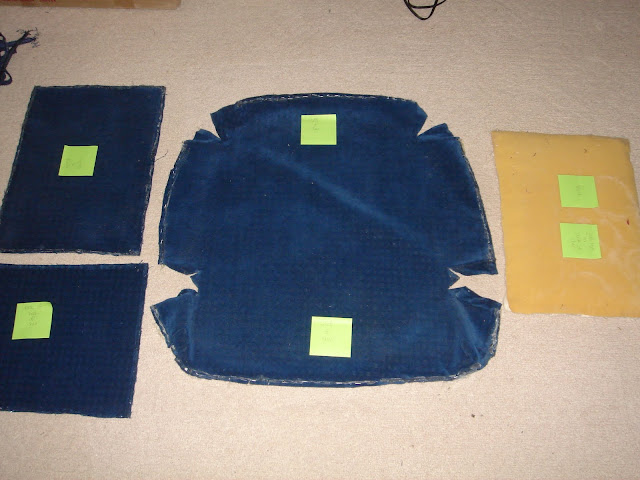
To keep things running smoothly, I labeled each piece of old upholstery with a sticky note reminding me which piece was for the back, front, etc. 


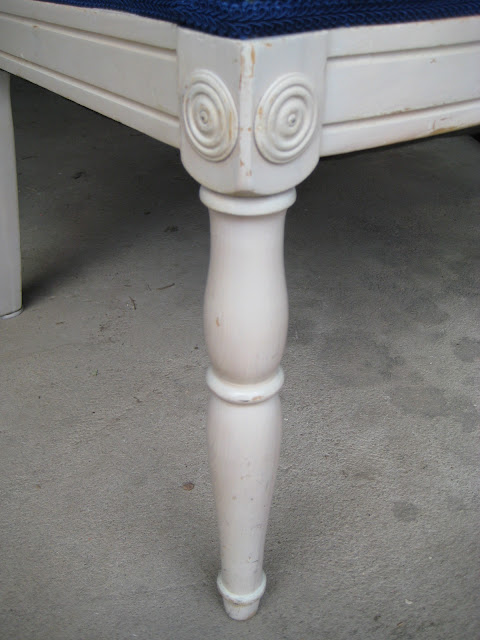
After freshening her up with several coats of paint and some poly (for a good protective measure), I came to the point of no return—cutting the fabric.  Eek!  Basically, I just traced the outline of the old upholstery and used that as my guide.  And this is where I made my first big mistake… I thought since I was using a linen fabric with no obvious pattern that I didn’t need to think about the direction of the fabric.  Wrong!  All fabrics have a pattern—or at least a texture—so be sure you don’t let your brain wander during this phase!  Thankfully, I had enough fabric left to cut another piece.  Whew!  It was nip and tuck, but in the end I averted disaster by the skin of my teeth (pardon the gross expression).   Disaster being that my fabric on the seat of the chair would have been horizontal, while the back of the chair would have been vertical.  I know—a harrowing afternoon at the Braham house. 

Once my fabric was cut, I kind of stared at the chair not knowing how to proceed.  I went back and read through the tutorial again, but I still felt a sort of paralysis.  That’s when I started having that odd back and forth conversation in my head about putting on my big girl panties and such… Can you relate?  So I pulled out the stapler and just started in.  After my first few staples were in place, the project took on a life of its own and I just followed suit.  I’ve done enough projects by now to know that I’m never going to be 100% comfortable trying my hand at something new; usually I have to just begin and everything falls into place after that. 


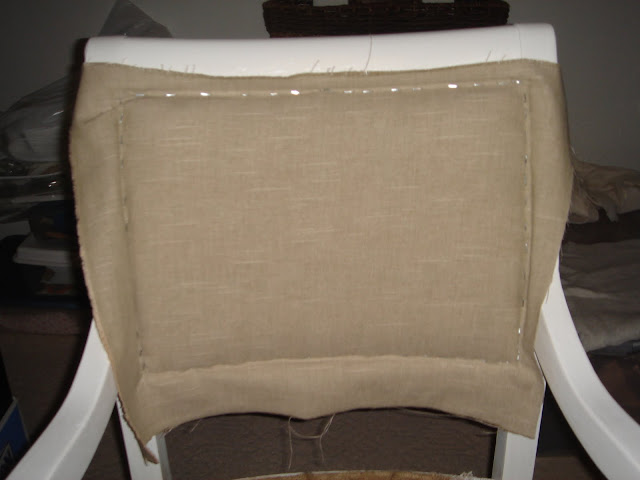
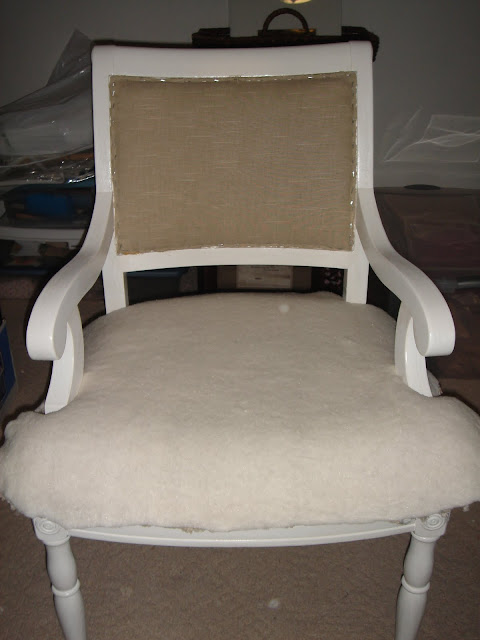
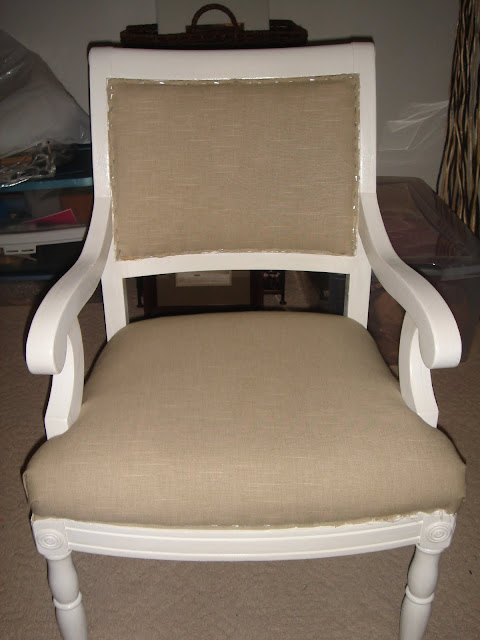
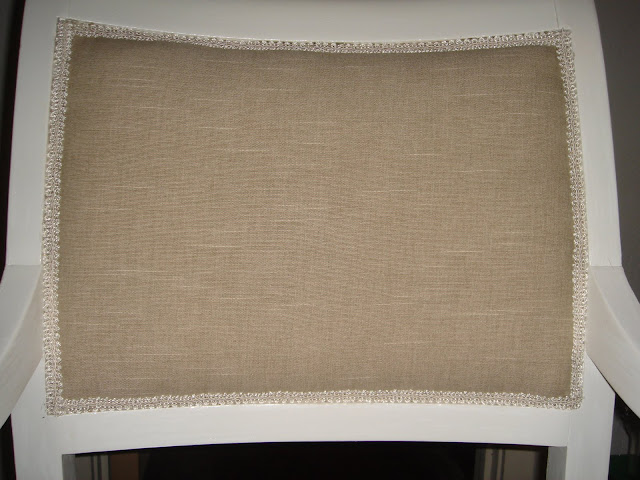
Once I stapled all of the fabric in place, I hot-glued trim around the unfinished edges for a clean look.  Originally I wanted to use nail head trim, but it was pretty expensive, and I actually like the soft finish of the trim I ended up with. 


Now for the confessions… I had read in a tutorial that it’s possible to “damage the integrity of the wood” when stapling.  Sadly, this happened to me while stapling to the back of the chair.  There was a tiny lip that I was stapling into, and some of the wood splintered.  Thankfully, it didn’t compromise the stability of the chair, and since it’s on the back it’s not noticeable.  But still.  It was unfortunate.  I’m not exactly sure how to avoid this, but I imagine a nicer stapler and a tad more care might have helped.  


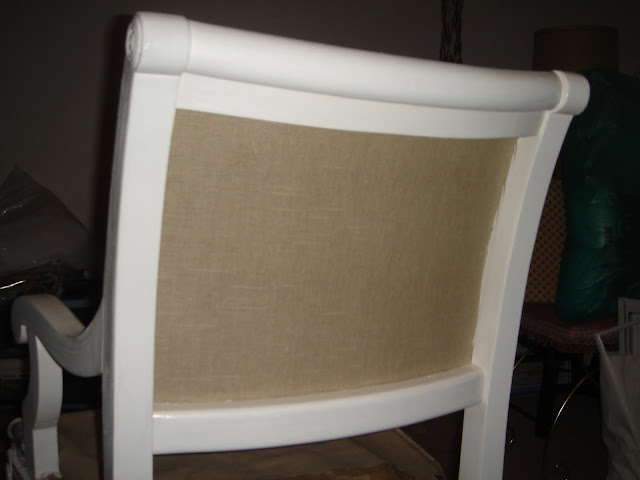
Can you see it along the right edge?

While we're on the topic of stapling, I must admit that I used the wrong size staple at first.  I thought maybe the wood was just really hard wood...until my husband gently informed me that my staple size was too big--hence the reason they weren't fully penetrating the wood.  It's never just one trip to the hardware store, is it?   

The second (or is this really the third?) confession is that I bought fabric and didn’t like it, so I ended up purchasing different fabric.  Because I always try to do projects on the cheap, I was a little frustrated, but I decided to make pillows out of the original fabric (which will be another “first” for me)—and since the second fabric was on clearance, it wasn’t a huge deal. 

After moving her into the kitchen, I realized that the ugly black fabric on her underside could be seen from certain angles.  I ended up covering the bottom with extra fabric simply by tacking it around the edges. 
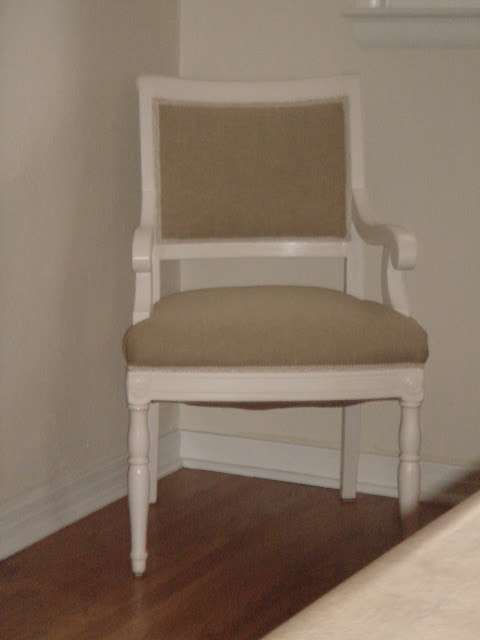


A last look…


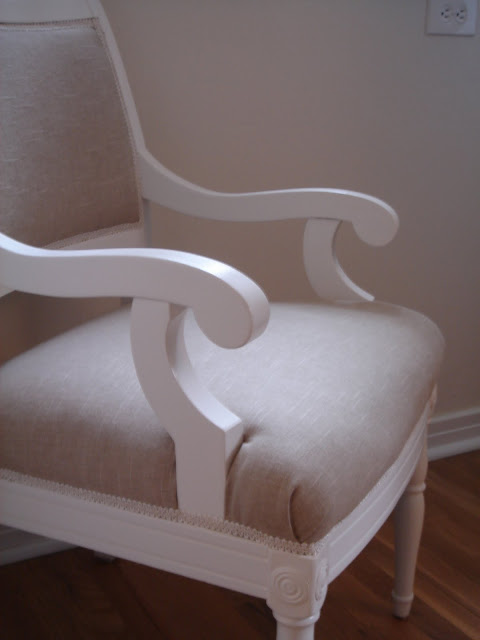
Overall, it was a good experience!  You’ll definitely want to go into it with a large dose of common sense sprinkled with bits of humor and some courage, but this is a project that anyone can tackle.  I mean, people, the internet has all the answers!  Just kidding—kinda. 

What about you guys?  Have you upholstered anything?  Did you freeze when you came to the point of no return?  Do you know of any amazing tutorials floating around in cyberspace?

Wednesday, August 10, 2011

We're Those Neighbors...

One of our summer goals was to paint the stucco exterior of our house and possibly redo the exterior window trim in the process.  And yes, we do realize that summer is dwindling down to the nubbins... It really is unbelievable how time seems to slip away, isn't it?  The good news is that we've been able to spend quality time with friends and family, so even though the ole' to do list isn't exactly shrinking, we know our priorities are in order.  Unfortunately, that also means our neighbors are probably ready to strangle us...

Several weeks ago, we decided to remove the old wood shutters with plans to clean and paint them.  To our surprise, the underlying stucco was pink!


Our best guess is that when the house was last painted, they got lazy and just painted around the shutters.  Tsk tsk.  We weren't too worried about it, because we thought we would be painting later that week and covering those crazy colors up.  But as you know, house projects never seem to go quite as planned.  The good news is that we're hoping to get our house restuccoed, rather than just repainted.  More on that later.  We're also hoping to thicken the trim without actually removing it, which requires a bit of finagling and some outside help.  Again, more on that later.

For now, enjoy the view that our neighbors have been seeing for awhile now...


Most ghetto house on the street?  Check.

Tuesday, July 19, 2011

Yes, We're Still Alive...

Hi friends!  Sorry for the long blogging pause.  We took a road trip to Yellowstone and the Grand Tetons (which were absolutely stunning), and along the way…we lost our camera.  Yup.  It’s a trip of all mental snapshots for us.  If you’re interested in the whole story, see my “P.S.” at the bottom of this post.  Needless to say, it’s difficult to blog without a camera, and while I probably could have dug up some old photos, I decided that since I’m on summer vaca it couldn’t hurt to take some additional time off.

Now that I’m done rummaging up excuses for my absence, I have some exciting news to share!  Remember the desk I scored at the ARC (which is a killer thrift store in the Springs, similar to Goodwill, but better)?


Well, I finally posted it on Craigslist and it sold today!  I literally waved goodbye to it not ten minutes ago.

As it turns out, the desk was pretty popular.  I had lots of people emailing and asking if it was still available.  Unfortunately, as many of you know, Craigslisters tend to be a bit wishy washy.  One minute they’re “very interested” in your stuff, the next they’re not even returning your emails.  I suppose you could say I have a love/hate relationship with good ole’ Craigster.  In the end though, it was worth it to be patient.  Julia, a beautiful, sweet college gal had apparently been hankering for a desk of this type for months, and she was smitten by this one.  She said it’s going to be the “apartment desk,” which I’m guessing means it’ll be used communally by all her roommates—love that idea.  She kept running her hands over it and saying how perfect it was.  Yay, right?!  When she and her mom drove off after picking up the desk, I could still hear her squealing with delight over her find.  Honestly, I think she was the perfect person to buy it.  Julia, if you’re out there, it was so fun to meet you!  Wishing you the best as you enter college!

We didn’t make out too badly in the end either.  I bought the desk for $15, purchased paint supplies (which I’m not counting, since I have tons of product leftover and will definitely use those supplies for a plethora of projects in the future), and sold it for $75.  Not too shabby!

Really, I’m thrilled with the way this experiment went.  A few things I learned along the way:

1.)    Painting/updating furniture is fun for me, so it didn’t feel like work—that’s a plus when you consider that time is money.

2.)    I learned new painting techniques (see this post for more details); even though it’s going to be a continual learning process, I had to start somewhere.

3.)    Having a decent storage space is essential.  Fortunately, we have a detached garage and a basement, so the project didn’t encroach on our personal space.  Still, I realized that I probably should sell the desk before buying too many other potential projects…

4.)    There are loads of people who liked the style of the desk—let’s call it slightly distressed shabby chic.  You might even say it has a cottage feel.

5.)    Being patient and waiting for the right person to come along on Craigslist is a must!

6.)    It was worth taking the risk.  Now I have the courage to try again!

Some of you may be wondering what I plan to do with the $75.  My plan is to give 10% of what I earn via refinishing furniture to a home related cause or charity.  There are a lot of ways this could go.  I’ve considered Habitat for Humanity, The Alma Project, Casa Vida y Esperanza in Magdalena, Mexico, and Gateway Woods.  I’m leaning towards Gateway Woods, which provides a home for “lost and wounded children.”  My family has been strongly involved in Gateway Woods for many years, and I truly believe in the work they’re doing.  The rest of it will go back into our home, which supports my DIY hobby, helps complete our home, and provides a bit of blog fodder.  One of the reasons I wanted to sell something on Craigslist in the first place is due to the fact that we have a limited budget, and I have to be creative in finding the $$ to splurge on my wish list.  While that can be challenging and sometimes frustrating, I think it gives me a greater appreciation for what I earn.  You know—like when you had to save your pennies as a kid.

About an hour before Julia came to claim her “new” desk, I decided that it would be fun to snap a few photos of the desk, so I ran around our house grabbing random items, which I then arranged on the desk in an attempt to make it a functional, yet cozy and personalized, workspace.

The first arrangement has a clean, breezy feel.  (Pardon the washed out look against the wall...twas a bummer I didn't have a colorful flower handy to pop in the white bottle.)


The second one is a bit more rustic and warm.


Hmmm…I’m feeling inspired to tackle the desk in our guest bedroom.  (Sorry, but I don't have a good shot of the inside.)


We don’t currently use this desk much, but in the fall I start a new teaching job where I will teach a few days in the regular classroom and the rest online.  It’s completely new for me—so exciting and so scary—but I can’t wait to try on more flexible hours.  All that to say, I think having a comfortable and inviting workspace is really important, so I’ve been brainstorming ways to make that a reality in my own work-from-home-space.  More on that later…

P.S. So here’s the missing camera scoop… Our third year anniversary fell over our trip to Yellowstone, so Matt sweetly planned a surprise overnight stay at the Lake Hotel, complete with a romantic dinner and dressy clothes to boot.  (We were camping, so a shower sounded like bliss!)  Since we were traveling with another couple and their 14 month old daughter, they were going to drop us off at the hotel and pick us up the next morning—such great friends!  We had spent the entire day taking in the geysers and mineral basins, and we were running a tad late for our dinner reservation.  As we careened down a curvy road trying to make up for lost time, our friend’s poor daughter threw up her entire day’s worth of food…all over everything.  Needless to say, we pulled over and it was all hands on deck as we cleaned everything up.  After fifteen minutes we were back on the road, and about two miles later we spotted our first grizzly bear!  I was freaking out, because I wanted so badly to see a bear on our trip.  Of course, I’m screaming, “Get out the camera, get out the camera!”  *Crickets.*  No. camera. to. be. found.  Long story short, we went back to look for the camera multiple times on the side of the road.  Nothing.  We even filled out a lost and found report, but so far we haven’t heard anything.  Our final conclusion is that during the crazy puke pullover, we probably placed the camera on top of the vehicle and drove off with an unsecured camera.  So sad.  The good news is that we still had a great anniversary, and now our friend is lending us a camera that her brother won.  But that’s actually another story for another day…

Thursday, June 23, 2011

Simple Pleasures

Our backyard is blooming!  Actually, it's been blooming for awhile now, but the irises are at their peak.


These lovely ladies just arrived, and their fragrance is a delight to the senses.  If you were to take a guess, what do you think they smell like?


As it turns out, they smell just like a bunch of grapes!   It tickles me purple pink that they're the same color and scent as grapes...

If you haven't taken the time to smell the roses yet, be sure to lean in and enjoy God's creation this summer.

Monday, June 20, 2011

Another Thrifty Find

Our kitchen has an odd corner that used to baffle me.  It's not very large, and it's near a window, which limits the kind of furniture that might fit there.  But one evening when I was making dinner, the proverbial light bulb clicked on.  A chair.  A cute little chair for the odd corner of our kitchen.  A place for friends to sit and chat.  A surface for bags laden with groceries.  A dash of texture (and--gasp--possibly even some color) for our kitchen.  A chair!

Of course, I wasn't about to spend lots of money on an expensive chair, so I turned to a girl's best friend--Craigslist.  Within a few days I spotted this beauty for a mere $25.


According to the seller, this chair once graced the halls of The Broadmoor, which is an absolutely fabulous (and outrageously expensive) resort in Colorado Springs.  If you live in the area, The Broadmoor makes for a great date with your special someone.  You can go high class and enjoy their delectable Sunday brunch, or you can meander around the lake and play a game by the fire in one of their lounges.  If you're lucky, there might be free entertainment in the black box theater.  And don't miss out on the ice sculptures and gingerbread village around Christmas!  Don't even get me started on the a.mazing decor...  Okay, I digress.  I'm starting to sound like a travel agent...

Aside from the fact that this chair is solidly built and boasts a smidgen of detail that I love...


it also has the perfect seat and back for reupholstering, which is something I've been dying to try ever since I fell head over heels for staple guns while covering our DIY headboard.


I plan to strip the peacock blue velvet from the chair and recover the base with upholstery from The Mill Fabric Outlet, which is my favorite fabric store in town.  I'll definitely repaint the wood as well, although I'm not sure if I'll stick with a distressed white (similar to my desk makeover) or a color of some sort.  Although I'm a teensy bit nervous to get down to the bones of this chair, I feel pretty confident that it can be done, as there are a ton of reupholstering tutorials online.  It's also comforting to know that I only spent $25, so it's not the end of the world if it doesn't turn out quite as I'm envisioning.  You know I'll keep you posted on the details--the good, the bad, and the ugly!

Have you guys found any great furniture deals lately?  It's addicting, isn't it?   I'd love to hear about them if you have a minute to leave me a comment or link to a photo.  Cheers!

Friday, June 17, 2011

Desk Makeover

Remember this bad boy?


After a few coats of paint, a bit of distress on the edges, and some poly, an adorable desk emerged!


Talk about a face lift!

Please pardon the drop cloth and garage mess.  I don't have a great place to stage photos, and since I'm going to attempt to sell this desk at our yard sale tomorrow, I didn't want to make a big fuss over it.  Here are a few more angles for ya...


Some of you know that I work at a local golf course over my summers.  And when I say "local," I mean literally one block behind our house!  Anyway, I have to get there by 5 am, which means I'm usually pretty tuckered out when I get home at 1:30 pm.  But I found that by painting this desk in stages, I was able to paint a layer each day after work which made the project more enjoyable since I wasn't forcing it all to happen in one day.  It also allowed each coat to dry thoroughly, which eliminated stickiness.

Before painting, I primed the desk using Zinsser's oil-based primer, which is supposed to be the best (at least according to blog authorities Centsational Girl and Young House Love--and the friendly sales associates at Home Depot).  The paint color is Benjamin Moore's White Dove in an eggshell finish.  I topped it with a coat of polyurethane in satin (which is the same finish as eggshell).  Then I spray painted the hardware using Krylon's Celery, which adds a cheery touch of color to the neutral base.  I've never painted furniture using so many layers, so I was a tad skeptical about whether or not each step was truly necessary.  Happily, the desk turned out great.  It will definitely hold up to some serious use without scratching thanks to the adhesive primer and the protective topcoat (I cannot say the same for our dressers that I painted this winter...although I love they way they turned out, they were a get-it-done paint job with little thought regarding longevity or paint adhesion).

I would love for this desk to end up in the room of a young girl or even the entryway of a home.  I'm crossing my fingers that it will catch someone's eye at our yard sale tomorrow!  As a back up, I'm also posting it on Craigslist.  I'll let you know what happens.

Happy Friday!

Friday, June 10, 2011

Setting the Stage

When I get really excited I tend to say, “Oh my word, oh my word, oh my word!!!”  Sometimes I even jump up and down and do a little happy dance.  So you can imagine how I felt when a realtor in town who is a friend of ours called on Tuesday asking me to help her stage a house that’s going on the market in a few days!  Holy cats!  As it turns out, my friend has not been overly happy with her current stager; apparently she’s somewhat pricey and struggles to be flexible in her staging design.  Since I’ve worked with my realtor friend in planning a baby shower and buying a house, she has a pretty good idea of what my style is and decided to see if I would join her in executing our very own stage.

I got the call at 3 pm on Tuesday, and she needed the house staged by 12 noon on Thursday.  Within about 30 minutes of her initial phone call, she showed me the house layout and then handed me a wad of cash to go out and purchase furniture!  She kept saying, “I trust you and I really like your style—I want you to do this for me.”  Picture my jaw practically hitting the ground as I mentally freaked out.  Yes, I was on cloud nine, but I was definitely sweating the super short time frame—and the fact that I’ve never staged a house before!  Of course I had to call my mom and practically scream the good news to her—hardly letting her get a word in edgewise—as I flew across town to look for a sofa/love seat, chair, area rug, and ottoman.  The funny thing is that my mom always helps me pick things out and actually purchase them, because sometimes I get stage fright (pun definitely intended) and hem and haw without being able to make up my mind.  I knew this time I would have to be more decisive…eek!

There are many confusing details to this staging story which I won’t bother to share, but just know that finding great furniture at a reasonable price at the last minute is…difficult.  For example, I really thought I had found the perfect linen sofa—modern, clean lines, fantastic price, ready to be sold on the spot—when a sales lady informed me that the sofa was actually located in the wrong area of the store, which meant it had to be ordered and wouldn’t be available for at least a week. (In case you're wondering, that's not the price of the sofa--that was the price for a three piece set.)


Yeah, that wasn’t happening.  I needed to be able to walk out with a sofa in one hand and a chair in the other.  In the end, we found a sofa and chair on super clearance at a local furniture chain, so they were willing to sell them to us off the floor.  It didn’t hurt that they had two of each piece in stock.  I snapped a photo of the sofa, but I didn't get one of the chair.  You'll see it all together in the staged photos below.


As it turned out, my friend needed a few more pieces that we couldn’t find on such late notice, so she ended up renting some of our furniture—so fun, right?  You might recognize our dining room table and parsons chairs, along with our ottoman, tray, glass hurricane, and wicker end table.  If the layout feels a little sparse, that was intentional.  You can’t necessarily tell from my photos, but the house is actually quite modern.  We wanted to keep the space open, rather than feeling cluttered or overly traditional.  Also, the table was used to serve wine and appetizers, so it wasn’t quite so bare on the day of the initial showing.  And don't you just love those huge, bright white plantation shutters?


Oooo--I can't forget to mention the cool light fixture hanging above the dining room table.  After seeing our dining room light, my friend decided she needed something similar for this house.  I think it's fantastic.  While my friend had already purchased several of the accessories and some furniture herself, I was able to do some of the hard and fast searching for her when it came down to crunch time.  Often the thrill of the hunt is my favorite part of shopping, and this challenge was no exception.  I can’t wait to help her out in the future—yes, there might be a future to this!  And it involves being paid!  So.totally.awesome.and.unexpected.

Although these pieces may not be exactly what I would have picked out had I had a bit more time, they were available and worked great for the staging.  I spoke with my friend today about the initial showing to the realtors, and she said they loved it!  And...she even mentioned that a local real estate agency asked who had staged it for her!  Can you believe it?  I know…me neither.

While I’m certainly not counting on this to be a regular thing, I am so happy that I had a chance to try my hand at it.  I have lots more to learn, but the opportunity fell into my lap and I was able to jump on it.  Now here’s hoping the house sells in a snap when it goes on the market!