Thursday, March 31, 2011

Paint Colors


Despite the fact that we haven’t been homeowners for long, we’ve already run the gamut of paint colors.  When it came time to choose a color palate for our home, I threw caution to the wind.  After living in dull apartments for so long, I was determined to be bold in our paint choices.

Unfortunately, in trying to step outside of my comfort zone, I strayed from my true self and quickly realized that the rainbow of colors made our house feel chopped up.  It was too stimulating and too hard to decorate.  It was not me.  The good news is that paint is not permanent, and while I was determined to live with the colors for at least one year, we experienced somewhat of a catastrophe in the middle of working on our house last summer.  (More details on that later—it’s quite the story.)  While it was devastating at the time, it provided another opportunity to paint—guilt free!

Below is a list of all our current colors, along with one other color that we really liked from our kitchen cabinets the first time around.  And it’s completely okay to laugh at this list, since the color Oat Bran is listed five times—and it’s a neutral, so some of you probably don’t even consider it a color.  But we do!  We love the calm that neutrals have brought to our home.  I’ve also included a few other paint colors that we like, because the truth is that we won’t remember their names or where we found them when it’s crunch time if they’re not written down.  My goal is to add colors to this list anytime something strikes my fancy.  I’ve found that taking the time to look at pictures of what others have done is very helpful in deciding if you’ll like it in your own home.  For those looking to paint soon, find some inspiration at this site.

Overall, I think it’s a good idea for homeowners to keep a list of rooms and their paint colors, that way, if a paint can is lost or the label becomes unreadable, you still have a resource and you’re not digging through cans in the garage.  It can be difficult to remember which shade of white you used on your trim!  Plus it might be fun to see the different colors that have graced your home over time.  By the way, our very first colors aren’t listed here—I kind of want to forget about them.  We’re starting fresh with the palate that revived our home.


Paint Colors

Living room

  • Oat Bran, by Valspar, semi-gloss, colored matched at Sherwin Williams in Super Paint


Dining room

  • Oat Bran, by Valspar, semi-gloss, colored matched at Sherwin Williams in Super Paint


Kitchen Walls

  • Bone Folder, by Martha Stewart, color matched at Sherwin Williams in Duration


Kitchen Cabinets

  • First paint color: Dried Thyme, by Benjamin Moore, semi-gloss, color matched at Sherwin Williams in Pro Classic

  • Second paint color: Ocean Floor, by Martha Stewart, semi-gloss, mixed at Home Depot in Martha Stewart


Master bedroom

  • Oat Bran, by Valspar, semi-gloss, color matched at Home Depot in Behr Premium Plus


Back bedroom

  • Northern Pear Tree, a Lowe’s brand, semi-gloss, color matched at Sherwin Williams in Super Paint


Bathroom

  • Oat Bran, by Valspar, semi-gloss, colored matched at Sherwin Williams in Duration


Stairwell

  • Oat Bran, by Valspar, semi-gloss, colored matched at Sherwin Williams in Super Paint


Ceiling

  • Pure White, by Sherwin Williams, flat, mixed at Sherwin Williams in Classic 99


Trim

  • Pure White, by Sherwin Williams, gloss, mixed at Sherwin Williams in Pro Classic


Wood floor

  • Natural, by Varathane Wood Stain, bought at KWAL


Other Paint Colors We Like

What’s your go-to color?

P.S. Sherwin Williams in Colorado Springs is having a 40% off paints and stains sale April 8-10th!  Check your local store for promos!

Tuesday, March 29, 2011

Making Some Headway

Our bed has always been bare bones—metal frame, box spring, mattress.  No trendy headboard for us.  But we finally finished our DIY headboard, and we’re spilling all the details, along with the ups and downs we faced along the way…

I’ve been itching to cover a headboard ever since seeing our friends take on the project, telling us that they wished they had attempted it sooner, since it was super easy.  Considering that headboards can pack a big punch, we were excited at the prospect of giving our master bedroom a more complete look without breaking the bank.  Endless tutorials on covering headboards exist online, so we thought we would follow the typical route of covering a rectangular piece of plywood with foam, batting, and fabric using a staple gun.

Before buying plywood, we decided to check out the price of foam and batting.  Thanks to a 30% off sale at Hobby Lobby, we found ourselves mulling over whether to piece squares of foam together or just buy a huge length of it.  Then there was the question of two-inch vs. one-inch foam (I really liked the idea of two-inch foam, since it would create a chunkier headboard—alas, it’s more expensive).  And soft cotton batting vs. scritchy scratchy batting… In the end, we bought tons of foam and batting, paid way more than I thought was necessary (and we hadn’t even looked at fabric yet!), and left the store feeling a little disappointed (that’s what happens when you go over budget).


Then, on a whim, I popped into the Restore and found this curvy headboard hanging out for only $15!  Apparently the lovely Cheyenne Mountain Resort donated all their old headboards to the Restore.


That’s when we hit the proverbial fork in the road.  I ended up returning all the other supplies—adios expensive foam and batting—and decided to start back at square one.  Since spray paint has been on my radar recently, I decided that I was going to let go of my dream of a covered headboard and just paint this wooden beauty to match our room.

Sadly, the lovely blue/grey that I used to paint our dresser hardware was a little overwhelming on a headboard—and it just felt like too many blues going on.  Plus I couldn’t get the sheen to look even, despite using primer and a spray gun.  Half of the paint looked shiny, while the other half looked matte.


Sigh.  Back to square one—only now I had a curvy headboard on my hands.  What’s a girl to do?  My options were:  1.) Use a regular brush and paint on a better color.  2.) Try to sell the curvy headboard on Craigslist and buy a regular old piece of plywood for another go at a covered board.  3.) Attempt covering the curved headboard.  4.) Give up on having a headboard altogether and just toss a picture above our bed.

After consulting with the boyfriend, I tucked my tail between my legs and decided to cover the curvy headboard.  Since it was already thick, we wouldn’t need to buy expensive foam, and we liked the unique, soft edges.  And then I remembered The Mill Outlet, which is an off-the-beaten-path fabric store that carries tons of great fabric at discount prices.  Bingo!


As it turns out, they have an amazing upholstery section in the back of the store and I found the perfect nubby linen upholstery to use on our headboard (Note: I first picked up regular linen fabric, but after speaking with a Mill employee, she informed me that regular linen would wrinkle like crazy.  If you prefer the linen/natural look, your best bet is to find it in the upholstery section.).


The best part?  They stock huge rolls of batting, which they were able to cut to size to fit our headboard.


Oh, and they cover buttons for cheap.  I still haven’t decided if I’m going to add buttons or not, but you know I like having options, so I’m tucking that info away for a rainy day.

Here’s the rundown:

1.)    Place the batting underneath the headboard.  The headboard should be face down.


2.)    Pull the batting tight over the edges of the headboard and staple.


3.)    I chose to use two layers of batting.  The bottom was thicker batting, and I went over it with soft cotton batting, just in case we might feel it poke through the fabric.  I simply placed the headboard (now covered in one layer of batting) over the soft batting, pulled the batting tight, and stapled.  I worried that having so many layers of batting, plus fabric, would make it difficult to staple, but I had no problems.

4.)    Finally, I ironed the upholstery and then laid it underneath the headboard, pulling it tight around the edges, and stapled.  I decided not to pull the batting and fabric tight over the curves; I simply rounded the edges softly.


5.)    Matt then screwed a metal plate to the headboard and a metal plate to the wall, which made it easy to hang the headboard.  And when you have plaster walls, that’s saying something!


6.)    Lean back and enjoy!


When it came time to commit to the first staples, I’ll admit I was a little nervous.  But once I started, the project just seemed to unfold naturally, and it was really fun!  I borrowed the staple gun, but ended up loving it so much that I really want to own one!

How have you dealt with that strange space above your bed?  We’d love to hear your creative ideas!

P.S. Go Butler!!  We’re officially rooting for the underdogs.  Gotta love March Madness upsets!

P.P.S. We’ve been enjoying spring break, but we’re ready to get back into the swing of things with regular posts.  Never fear—we have lots more to share!

Thursday, March 17, 2011

The Book-It List

Spring break is just around the corner (next week, actually!), and I’m looking forward to snoozing longer, puttering around on a few house projects, grabbing coffee with friends, hiking local trails, and reading to my heart’s content.  There is almost nothing better than curling up with a delicious book, so I thought I would share some of the best books I’ve read recently (in no particular order), many which were recommended to me by my wonderful teaching colleagues and a few of my students!

1.        The Sweetness at the Bottom of the Pie, by Alan Bradley

2.       Still Alice, by Lisa Genova

3.       The Power of One, by Bryce Courtenay

4.       A Walk in the Woods, by Bill Bryson

5.       Born to Run, by Christopher McDougall

6.       We Were the Mulvaney’s, by Joyce Carol Oates

7.       The Book Thief, by Markus Zusak

8.       I Capture the Castle, by Dodie Smith

9.       Seabiscuit, by Laura Hillenbrand

10.   The Count of Monte Cristo, by Alexandre Dumas

11.   The Good Earth, by Pearl S. Buck

12.   Cry, the Beloved Country, by Alan Paton

Books are some of my dearest friends, so it almost feels wrong not to include all of them.  I suppose I’ll just have to spotlight books more often, right?  In keeping with our house theme, I just picked up a Bill Bryson book from the library, At Home.


I’m a big Bryson fan, so I hope it doesn’t disappoint!

What books are you loving right now?  Or what classic do you read over and over again?  Fill me in!

Wednesday, March 16, 2011

Seeded & Mossified

We may have just created a new word.  Mossified.  That’s right.  On this absolutely divine day (somewhere in the 70s, which is a record high for March), we’re in the thick of yard work—namely, trying to grow grass.  As it turns out, this is quite a difficult task in Colorado, due to the minimal amount of rainfall and the arid climate.  It’s like the old adage, “The grass is always greener on the other side of the fence.”  (Quite a fitting phrase for this post, eh?)  I was just thinking of home sweet Indiana, where grass grows so quickly and ferociously in the spring and summer that it’s nearly impossible to keep up with the mowing, which is the total opposite of what we deal with in the west.  And I would know, because growing up, my summer job consisted of mowing our entire yard (several acres), as well as the local cemetery, which happened to be adjacent to the house I grew up in.  You might be thinking that it’s creepy to grow up near a cemetery, but I adored it.  It boasted beautiful trees, some lovely rustic gravestones, and since it was a township cemetery, few people ever came there, so it was a peaceful place.  But my trip down memory lane is leading me off topic…

Last year we spent most of our time updating the inside of our home, but in the middle of it all, some of our awesome friends came over to help de-jungalize our yard, which looked like this.


After some serious pruning, trimming, and weeding, it perked right up!


Can you believe how many branches we hacked off of our blue spruce?  Thanks to a borrowed truck, we were able to haul them to a local place that mulches branches for free.


Our goal this summer is to tackle the lawn, along with painting the outside of our house.  Of course, I’m all giddy about my little pet projects, like painting the Adirondack chair we scored for dirt cheap during a winter sale, and maybe even giving our seen-better-days wicker chair a facelift.  I’m excited to add pops of color to the outside of our house and make it a true haven.  Is anyone else craving grilled shish-ka-bobs and burgers yet?


To prepare for warm weather, Matt raked up all the leftover leaves in our yard, and now he’s patching worn out areas with a mossy substance, along with grass seed and fertilizer.  Little did we know how expensive it can be to purchase one bag of grass seed—yow!  Our hope is that we can get our grass under control this summer, and then we won’t have to spend as much money maintaining it in the future.  We’re crossing our fingers!  Since we’re certainly new at the lawn care side of things, we’re open to any advice you might have, and since we bought our fixer-upper with no previous remodeling experience, we’re okay with the whole learn-as-you-go methodology.


Many people have told us that it will take several years for our yard to truly come into its own, so we’re trying not to get our hopes up too high, but at the same time, we’d like to shoot for accomplishing most of the following projects this summer:

1.        Simplifying our lawn.  The woman who lived here before us must have loved gardening, because she grew every plant known to man in a fairly small space.  Unfortunately, we’re not quite as devoted to lawn care as she must have been, so while we’d like the space to be beautiful, we just can’t imagine spending all of our waking hours weeding and maintaining the myriad of plants that sprout out of nearly every nook and cranny.  We hope to dig out some of the plants and replace them with low maintenance grass or rock.  In coming years, we’ll add bushes and flowers, but for now, we just need to purge.  I’ve heard it’s possible to give plants away for free on Craigslist, so we might go that route when we get there.

2.       Digging out stumps—can’t wait to get rid of those eyesores!


3.       Repairing the fence.  We’re not sure how long our fence will hold up, but for now, we plan to fill in gaps where we can and nail down loose pickets.


4.       Find a new light cover for our Narnia light post—can’t you just picture C.S. Lewis’ fawn, Mr. Tumnus, leaning against it?  I seriously wanted to yank this light post out of the ground last year, but one of my more practical friends said it might be nice to have an outside light when we’re hanging out in the backyard on balmy summer evenings.  If we can get rid of the witch hat top, I might be able to live with it.


5.       Repair or replace stoop railings.  This one may not happen this summer…


6.       Paint the outside of our house and detached garage.  We’d also like to replace the window trim with thicker pieces, and since some of the stucco needs to be repaired, we’ll probably try to do it all together.  As always, we’ll take into account where we’re at with our budget.


There are tons of other outside projects that I’m tempted to list, but it’s likely they will have to wait a few more years before they come to fruition.  Have I told you that patience is not my strong suit?  For now, let’s raise a glass to greener thumbs and St. Patty’s Day—cheers!

Entryway Transformation: Part II

After ogling some unique mounted coat racks and wondering if it would be possible to replicate them…


we decided to stick to the basics, which seems to be our strong suit.  I wanted a chunky coat rack—one that could support loads of coats and bags when friends visit, and one that looks substantial hanging on our wall—but after browsing around for an affordable option, I was disappointed by the weak selection.

That’s when we opted to DIY—or should that be DIO (do it ourselves)?  It’s only a piece of wood and a few hooks, right?  As it turns out, making a coat rack is super easy and allows for plenty of creativity along the way.  Here’s what we did:

1.        First we brainstormed designs.  Matt was the brain behind ours, as he capitalized on my insistence that it be “chunky” and suggested layering two pieces of wood to gain depth.

2.       Then we made a quick run to Home Depot and picked out two pieces of wood that were slightly different in width, along with five oil-rubbed coat hooks and a couple of keyhole hooks for securing our coat rack to the wall.  Bonus:  Because they have a huge saw in the back of the store, HD was able to cut my wood to the correct length right then and there—make sure you know your measurements!  No dragging out a saw for us!  When we got home we sanded down the rough edges to make each piece of wood smooth to the touch.

3.       After dumping supplies all over our living room, we lined the wood up to our liking, outlined our placement in pencil for good measure, and then nailed the pieces together from the backside using a trim nail gun and wood clamps.  A nail gun isn’t a requirement here, but it sped up the process for us.


4.       Next we painted our coat rack a clean white using a leftover paint in our basement.  I’ll admit that it’s not the most exciting choice, but I love the crisp look it brings, and it kept our cost down.  We both agreed that down the road it would be fun to paint it a bolder color, and since it only requires removing the hooks, it’ll be an easy project should we decide to go that route in the future.

5.       As a final touch, we screwed in our oil-rubbed coat hooks, being sure to measure the distance between them.  These aren’t my dream hooks, but I really like the simple look of them, plus the fact that they hold several items at one time.  I didn’t want to sacrifice function for style, and even though I held back from buying more expensive hooks like these from West Elm, I like the way it turned out—a lot!

6.       Finally, the keyhole hooks were screwed into the back of our coat rack, which allowed it to mount directly to the wall.  Simple as that!  Note: Make sure that you mount the rack into some studs, at least two, to make it sturdy.


To complete the entryway, we tossed a hearty basket in the corner for shoes and lined a trio of favorite photos (in cheap IKEA frames) above the coat rack.


At some point, we might add a bit more detail to this area, but for now, we’re loving the additional storage space, along with the way it completes our home.  The best part?  Seeing about 17 coats piled on it during a weekend brunch with friends.  It held up beautifully!

Sunday, March 13, 2011

Entryway Creation: Part I

Happy Monday!  We just came off a great weekend, which included a few DIY projects (yup, lawn care has begun—is anyone else trying to grow a green thumb?), along with a trip to the Denver Aquarium, followed by a delicious seafood dinner.  I love weekends where work and play intermingle.  It leaves me feeling mission accomplished, yet relaxed—a lovely combination, don’t you think?

Today we’re happy to reveal the first part of our new and improved entryway.  There was a time when I didn’t know if we would ever have a functional, yet easy on the eyes, entryway.  Because our house was built in 1947, it isn’t the most closet friendly place, nor is there a foyer, or even a hallway.  You are either in or out.  This left us with quite a dilemma, as we desired a nook to drop our coats and shoes, but wanted to avoid disorganized piles and the random, tottering coat tree hanging out in the corner.  I envisioned a chunky mounted coat rack, bench or buffet table, and a few baskets where we could toss hats, gloves, shoes, and such.  The question was how to do it without breaking the bank.

Enter Christmas vacation (Did you catch that?  Enter…).  During our break, we spent several days with my family in Indiana, but we drove out this year, which meant we had a lot more space for items we wanted to bring back with us.  So naturally, I raided my parents’ storage room and begged my mom for items she was no longer using.  Sleek World Market bench gathering dust?  Check!   As it turns out, we had plenty of room for our favorite new-to-us bench in the back of Matt’s Nissan Xterra.  The best part (on top of the free part) is that it had space underneath the bench for some baskets—woot for built in storage!


After surviving a 17 hour trek back to Colorado Springs, we were very thankful the bench fit perfectly along the wall space we deem our entryway.  After giving ourselves several days to hang out with just the bench, we decided a coat rack addition was needed.  Next up: Part II of our entryway saga!

P.S. This was Matt’s first time at an aquarium—hard to believe, huh?  Turns out that he is an expert at seeing hidden sea creatures!  We both agreed that our favorite exhibit was the green eel.  Check it out!

Thursday, March 10, 2011

Floor Plan

Here you have it folks.  The main level floor plan of our house.  This drawing was made possible by a really cool website www.floorplanner.com. We hope that this helps you visualize our house when looking through our house tour.


We will be referencing this drawing often when doing updates to our house.  We will also update this drawing with a few more details over the next few days.

Wednesday, March 9, 2011

Vent Vendetta

Seemingly small and insignificant things really do matter.  At least they matter to me.  Sunlight slanting softly through our curtains has the ability to delight me for hours.  On the flip side, little things can be incredibly annoying, which is why there is something so satisfying about making a positive change, even if no one else ever notices.  This past weekend, I did just that.  You see, every time I looked at our floor vents, I got that irked feeling.  Like something just wasn’t right.

Maybe it was due to their fake wood veneer…


Or their ancient battle wounds…


Whatever the case, I finally took charge.  After uprooting the vents, I doused them off in the kitchen sink.  Then I simply sprayed on a few layers of Rust-Oleum’s espresso paint.  Since I wanted to be sure paint covered each groove and slat, I first sprayed the bottom, let it dry, and then gave the top a few coats.


The dark espresso color jives perfectly with our rich curtain rods and bedroom mirror, and it gives the vents a sleek look.  This was one of the fastest projects I’ve done, and I’m loving the results!


What have you done lately to bring a subtle shine to your space?

Sunday, March 6, 2011

Organizing 101

Due to the massive amount of material on this subject, I feel slightly like an impostor trying to write anything even somewhat authoritative on the subject.  But because I am passionate about organization, and because my mom sweetly asked me to (although most of what I know I learned from her!), I thought I’d share a few golden nuggets that I’ve learned over time.

If you’re wondering why I’m passionate about organization, I’d have to say it really comes down to creating more space and time for the things and people I love most.  When organization exists in our home, we have less stress and more time to spend with loved ones.  Being organized allows me to prioritize, and it removes some of the chaos from life.  I believe that it’s actually quite freeing.  Yes, it requires some time and effort up front, but in the long run, it gives back far more than it takes.  All that said, this post will deal with a variety of topics that I believe all run in a similar vein, but it’s more of an overview of organization.

Before you read any further, know that if you were to look in my basement, you might not believe a word I’m saying—I don’t have this all figured out.  Still, one day at a time I seek to conquer this thing we call organization.  Here it goes…

1.        Pare down.  That means no matter how much you love it, if you haven’t used/worn it in over a year, you probably don’t need it.  Last year I hosted a yard sale, and it was a total blast.  Not only did I clear out my closets and earn a decent chunk of money, but I got to know some of my new neighbors in the process.  Within a few months, I already had more items that I wanted to sell at a future yard sale, so I assigned a bin in our basement the duty of holding all items for the next sale, that way I won’t forget anything I want to sell, and it makes it easy to find everything when the next sale rolls around.

2.       Designate a home base for everything.  If you know where it belongs—and if you’re disciplined enough to put it there—you won’t have to wrack your brain wondering where you placed X.  Nor will you have to waste time and energy thinking about where to put things.  One of my dear friends recently told me that sometimes when she’s getting ready for last minute guests, she panics and just shoves things in random places.  By creating a home for your stuff, you avoid stress and can simply enjoy it when friends pop in just to say hello.  Tip: If you can’t organize it, hide it.  Buy furniture that has drawers or doors.  For example, the end tables in our living room have drawers, so I can bury books and magazines in them, rather than piling them on top.  Also, my desk has doors that close, so my computer and office materials are hidden from sight, which is simply more pleasing to the eye.

3.       Since there will always be a few items pesky items that don’t have a home, I have a catch-all basket in my closet.  It’s where I drop my purse after a long day of teaching, or where I put mail that needs to be sent out.  It’s where I throw library books and anything that needs to be returned to a store.  Because it’s somewhat hidden, and because I look in it every morning when I grab my purse, it doesn’t become too junky—and it keeps my counter tops clear.

4.       Develop a routine.  I’m not implying that you should forget spontaneity (being organized actually allows 
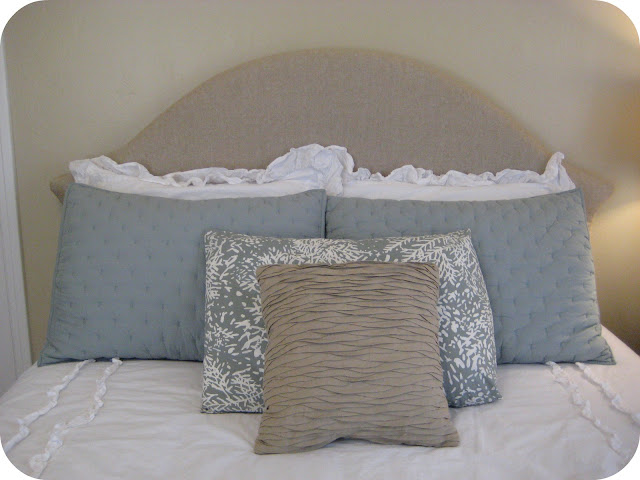
more room for those whimsical moments), but having a routine helps you deal with the minor details of life—in a sense, it clears your mind so that you can think about the larger and more important arenas.  For example, I make the bed almost every morning.  My mom always said you sleep better in a made bed, and while I agree, I also feel like I have a clean room once the bed is made.  It brings a sense of closure, which helps me move onto the next part of my day.  I also think it’s a good idea to form a quick spruce routine for when guests are coming over.  For example, I don’t usually clean the house from top to bottom when we’re having company, but I do like to wipe down the bathroom counter, lay out a fresh hand towel, fluff the pillows on the couch, and light a candle or two.  Just a few final touches can make a big difference.


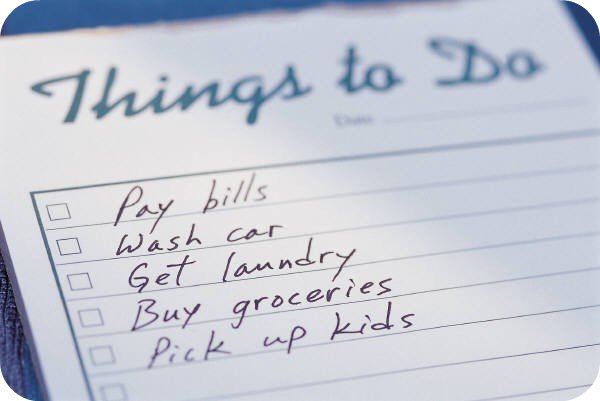
5.       Keep a list.  Or several.  When I was in high school, I had trouble sleeping, because as soon as I tried to get some zzzzs, my brain started trying to remember everything I had to do the next day.  Finally, my mom encouraged me to start writing things down, and it was as if my brain could finally relax—once it was on paper, I didn’t have to keep thinking about it.  These days, I feel like a wandering nomad with no destination in sight without my lists.  Last year I decided that although sticky notes are a fantastic invention, I was tired of having to rewrite my lists all the time.  So I started keeping a list in a Word document on my computer (many new computers incorporate list makers in their software).  I simply typed out all of the days of the week and wrote in my to-do list under each day.  I like this for several reasons:  1.) I’m not constantly tracking down slips of paper.  2.) When I finish something, I just delete it and don’t have to rewrite the entire list because my paper is too full.  I can also highlight top priorities or cut and paste to change the order of events.  3.)  I can add in things to do under Monday when it’s only Thursday.  4.)  If I need to take my list with me, I can easily print it off.


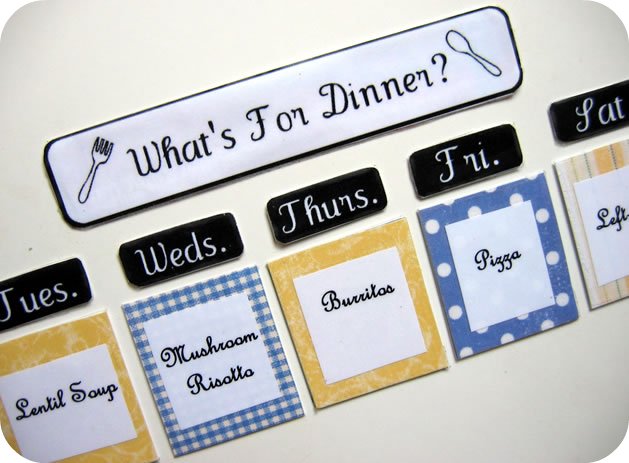
6.       Keep a calendar.  Matt and I started using a Gmail calendar when we got engaged, and we like how it enables us to see what the other person has posted.  For example, Matt can post his new work schedule, and I can see it on my calendar whenever I open my email.  While hanging a calendar on the fridge works well for many people, I love having the ability to add things to it from work, rather than waiting until I get home.  I also keep a weekly menu calendar.  Each weekend I create a menu for the week.  There are tons of reasons why creating a menu is a good idea—one being that it saves you from multiple grocery trips, which saves you money in the end.  Recently, I decided to start saving my weekly menus, as I’d like to eventually type up a list of go-to meals, or even start planning my menus by the month.  Since we like to eat fresh, and since coupons change weekly, our weekly grocery run works for now.

7.       Deal with things ASAP.  In other words, don’t procrastinate.  When something needs to be returned to a store, put the item in your car and return it within the week.  If you have a bag of clothes that needs to go to Goodwill, put it in your car so that you won’t forget to drop it off after work.  Rather than letting receipts pile up, file them into a recipe box or pitch them out.  If you deal with things in small doses, it removes the dread that builds at the same rate as the piles.  A daily spruce is a great way to avoid build-up.  I like to do a quick clean-up right before bed, that way I don’t wake up to a mess.


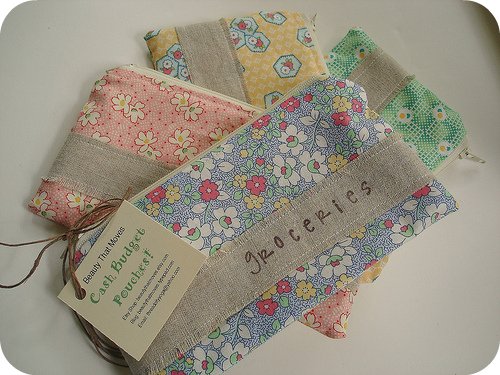
8.       Create a budget that fits your family.  I won’t go into great detail, as this topic really requires a post to itself, but we use a cash wallet system that allows us to organize our expenses.  I like knowing exactly how much money I have left to spend on groceries for the month after just a quick glance through the wallet.  If you can stick to your budget, it frees you to save well and live generously, rather than being enslaved to debt.  For more information, check out the following resources: Crown Financial Ministries and Dave Ramsey.

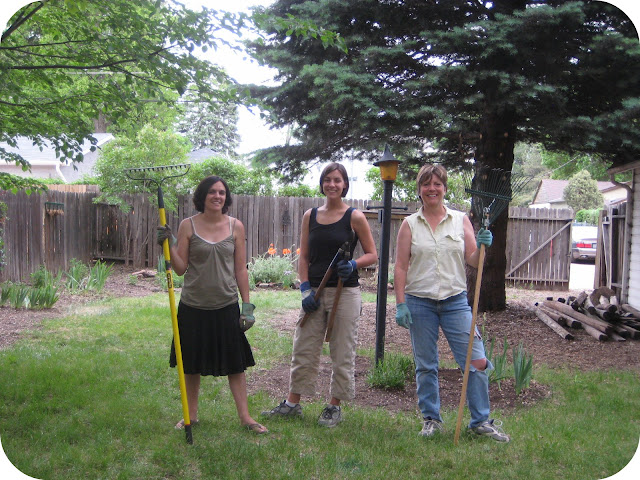
9.       Keep it fun!  Before I tackle cleaning the bathroom or organizing a closet, I always make sure I’ve got some good tunes playing in the background.  Without fail, it lifts my spirits and helps me find my cleaning mode.  Find something that makes the job more enjoyable for you—whether it’s working with a friend, opening the windows to let the sun stream in, or rewarding yourself with a sweet treat afterward.

10.   Break the rules occasionally.  There are days when we don’t make the bed.  There are moments when I just can’t stand the thought of doing one more chore.  By breaking the rules every once in awhile, I give myself a break and remember that it’s okay to live with the mess sometimes.  And in a way, it’s like the phrase, “Absence makes the heart grow fonder.”  When I get back into my routine of keeping things organized after a weekend of letting things go, I’m refreshed by it, rather than bogged down.

There are so many ways to organize things, and so many specific areas that can be tackled.  Check out these other posts here and here for more ideas.  And in the near future on the Shant, I’ll be posting about several specific things we’ve done in our own home, including how to maximize storage in small spaces and how to create organizational spaces when none seem to exist.  My hope is that you will find a system that works for you, and that it will free you to live well.

Now your challenge is to find one area that you can tackle within the next 24 hours—go to it!