Can I get a WOOT WOOT for Friday? TGIF is right!
I'll keep this post short n' sweet, but I was thinking about The Book-It List, and I realized that I forgot to list a fantastic book called The Help. It's a story about Southern maids who finally gather the courage to tell their side of the story. You will love these characters! Plus, the historical fiction is fascinating. Reserve it quick at your local library! And yes, I am a huge fan of libraries. Can you imagine how broke I would be if I purchased every book I read? Not to mention that I adore the Old Colorado City Library. Apparently it's a Carnegie Library, which means layers of history are tucked behind its doors. Close your eyes and breathe in the scent of books, soft wood floors, and lofty ceilings laced with thick molding. Heavenly.
On a completely different note, we hit 1,000 unique blog readers today! That's 1,000 completely new visitors to our little shanty. We decided that we're going to celebrate...which really just means we get to eat out tonight! I'm torn between the fresh and feisty Salsa Brava and the hole-in-the-wall-make-their-own-pasta-goodness Roman Villa. Decisions, decisions.
More importantly, we're sending a big shout out to all of our faithful readers, curious clickers, and DIY friends. That means you. Many thanks for your kind thoughts and constant encouragement. We heart you. And DIY. Aww shucks. Thanks for being great.
Friday, April 29, 2011
Wednesday, April 27, 2011
A Backwards Way Of Thinking
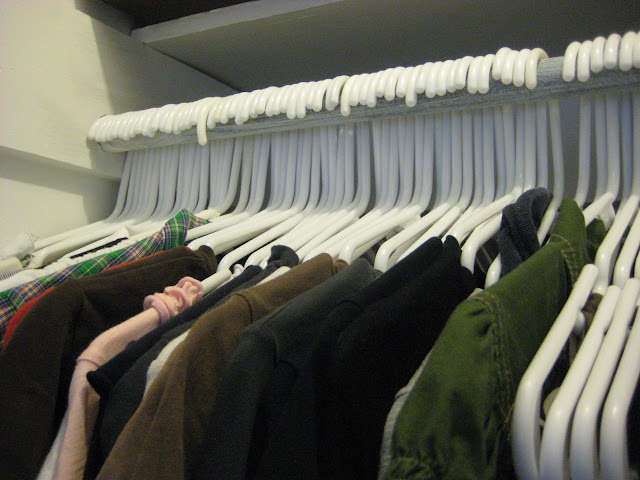
When it comes to cleaning out my closet, which I usually do once in the spring and once in the fall, I have the best of intentions. I really do. But for some reason when it comes to downsizing my wardrobe, I often falter. Why the weak will, you ask? I really believe it comes down to the whole, “Well, maybe I’ll wear it next year…” mumbo jumbo. The truth is that most of us will not wear it again if we haven’t worn it in over a year. While I try to live by this rule, sometimes I simply can’t remember when I last wore it (which should be a hint in itself), and therefore, I stuff it back into my closet where it takes up precious space (have you seen the size of our 1947 closets?) and patiently waits for another year to pass.
This year I decided it was time for a change. After all, the definition of insanity—according to Albert Einstein—is continuing to do the same thing over and over again expecting different results. As it turns out, I’ve been reading about these wonderfully organized people who hang their clothes on backwards hangars at the start of the new year. For each item of clothing they wear throughout the year, they face the hangar forward. When it comes time to clean out the old closet, they pitch everything that is still hanging on a backwards hangar into the Goodwill pile and merrily go about their business without stressing over whether or not it was worn during the year. So I’m giving it a shot.
I’m crossing my fingers and hoping that this solves my biannual dilemma. I’ll let you know if this backwards way of thinking actually turns out to be a winner!
Monday, April 25, 2011
It’s A Boy!
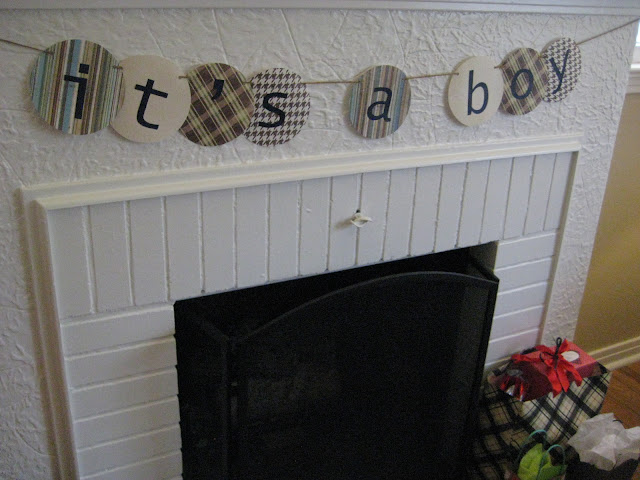
Ummm…what were you thinking?! That I’d tactlessly announce my pregnancy over our blog before giving you a personal heads up? I know some of you will be sorely disappointed, but this blogger is not prego. On the flip side, I did host my first official baby shower last Saturday! I keep saying that I feel like I’m a real adult now. Anyone else ever feel like that? My dad said the umbilical cord was truly severed when I finally was removed from the family plan and Matt and I started paying our own cell phone bill. Don’t worry—we didn’t mooch off my parents for too long…
I hosted the baby shower with a slew of others who did just as much prep work as I did. Thanks to Brandi, Hannah, Tiffani, Sarah, and Beth for pitching in and making the shower a success! And of course, congrats are in line for Ellen, the delightful guest of honor with a bun in her oven. You wouldn’t believe it if I told you, but we crammed fit 25 lovely ladies into our little bungalow! That’s right. It was a tight squeeze, but in the end everyone pretty much found a space to claim as their own. A table laden with goodies, old acquaintances chatting happily, and lots of laughter—all the ingredients needed for a baby shower.
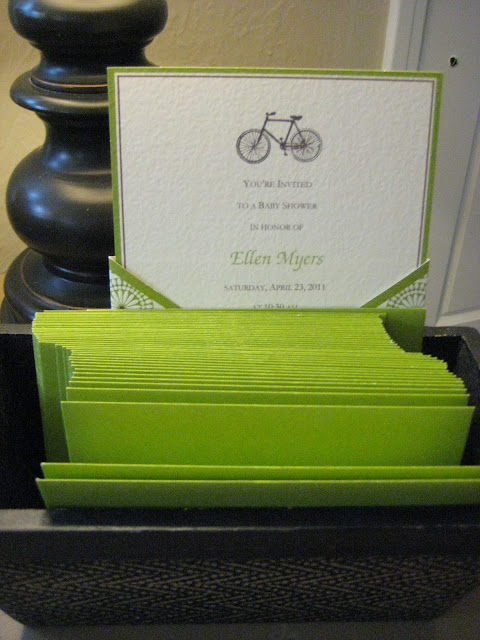
We themed the shower after Ellen’s nursery—vintage bicycles. Isn’t that just the best idea? I suppose it would be weird to steal the nursery theme of a good friend, so when we eventually enter that season of life I’ll just have to find new inspiration.
Although the invitations were store-bought, the colors were just right and we were able to personalize them with a bicycle stamp.
Since I was in charge of décor, I tried to keep things sweet and simple—and cheap. I started by looking online for images of vintage bicycles. I found more than I bargained for! Then I printed them off and popped them into our newly hung frames (good timing!) for a subtle backdrop.
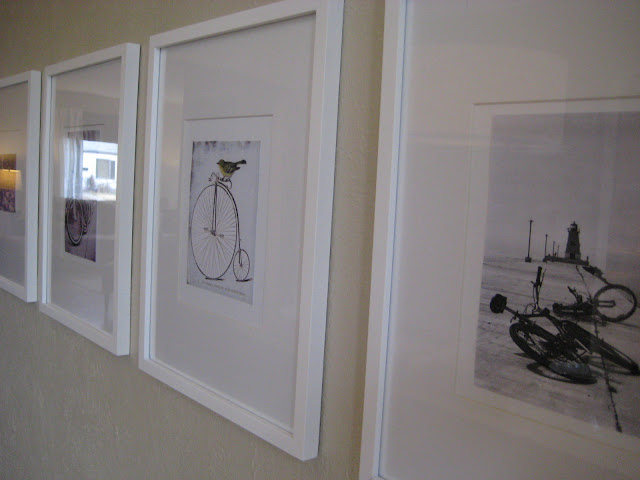
Since I wanted the bike theme to carry beyond just one wall, I added a few photos to frames (that normally house our wedding photos) and settled them down beside all the plates and serving ware—which happened to fit snugly into our built ins, creating more space on our dining room table to display food and flowers.
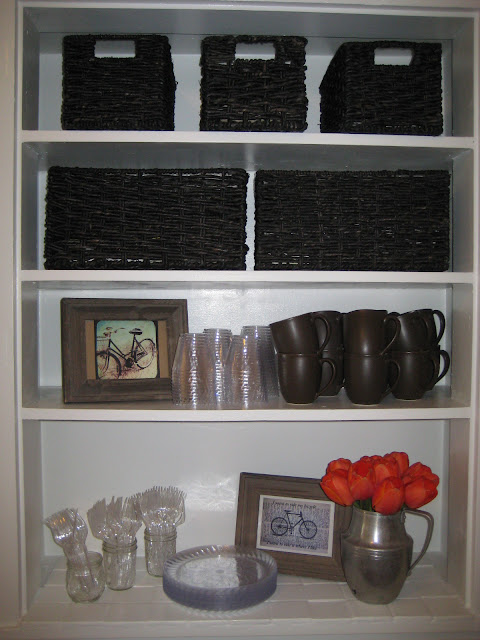
Speaking of flowers, we bought ours at Costco. For vases, we used vintage steel pitchers that I happened to pick up at a local antique store last year. Since we wanted to send flowers home with some of the guests, we just popped a few into mason jars for easy transportation.
And I can’t forget to showcase the darling watering can that my sister Hannah picked out specially for me a few years ago.
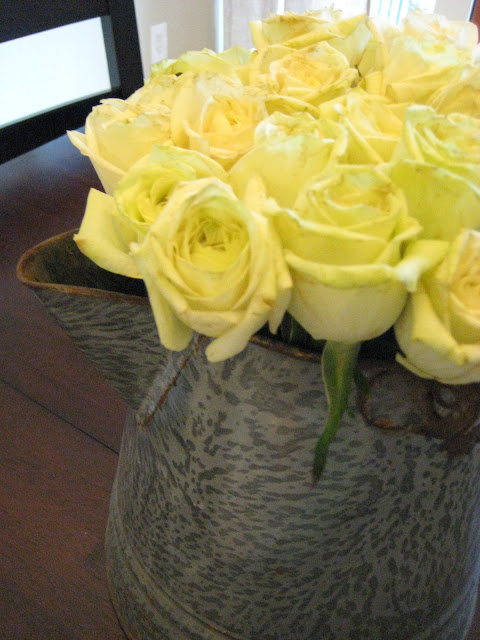
Doesn’t it look like it was made for these roses? I love the tightly packed look and their slightly nostalgic color. We actually gave the flowers away as a gift after playing a trivia game about the mom-to-be, but I won! (Is that wrong? I know…I wasn’t sure about it either, but I must admit that I’m loving the fresh flowers! And no, I didn’t create the game, so I had no idea what the answers were ahead of time.)
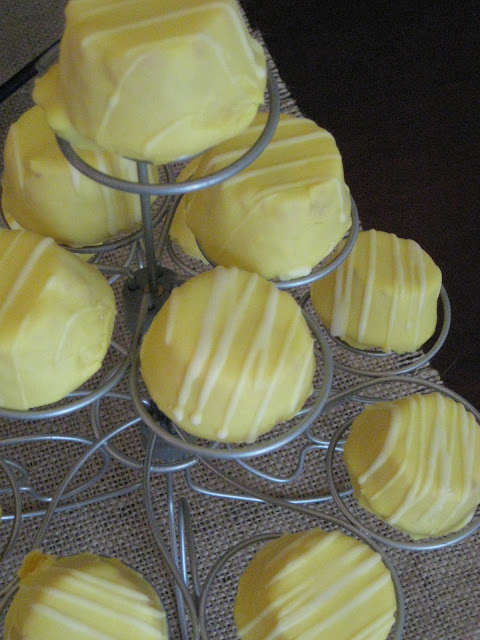
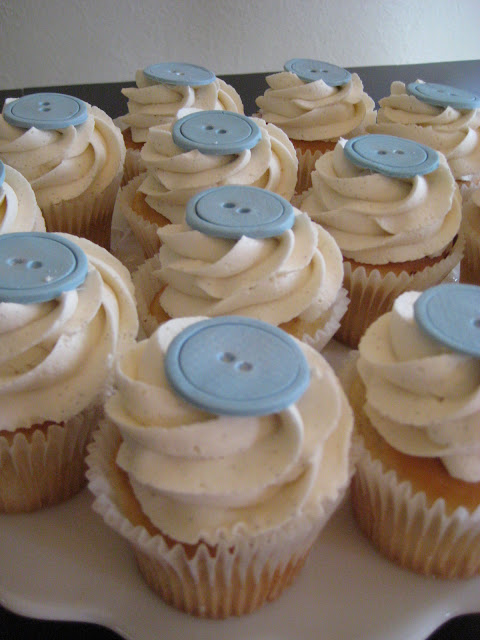
Warning! Food pictures below! Since it was a mid-morning shower, we opted for an array of breakfast foods, like quiches, baked blue berry French toast, scones with cream and berries, fresh fruit, petite lemon cakes, and some delicious cup cakes (which aren’t officially a breakfast food, but what’s a shower without a little celebratory cake?).
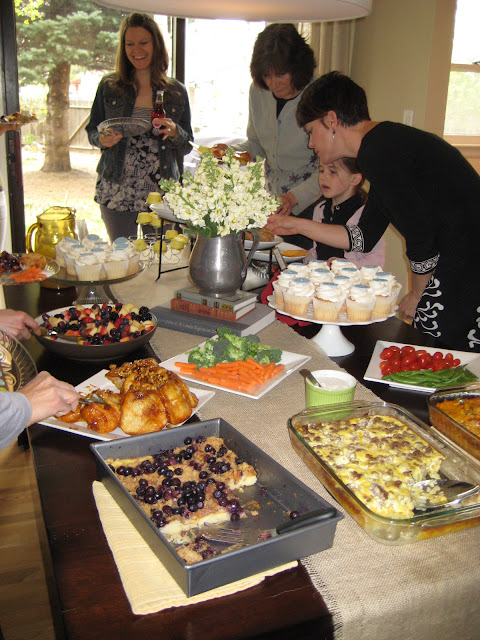
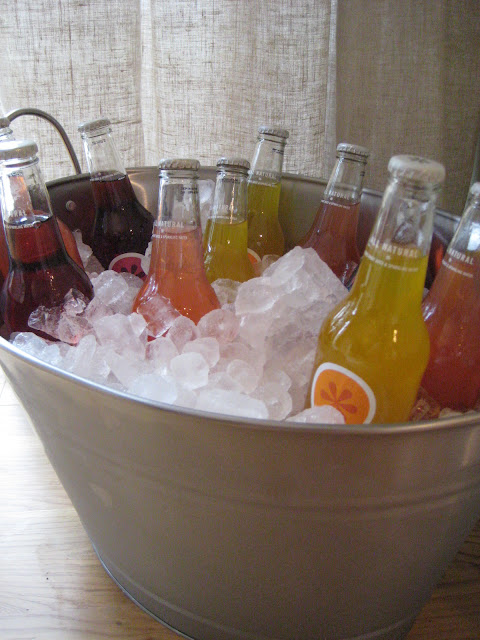
One of my favorite things was the tub chock full of Izzes. Ellen loves Izzes, plus we thought it added a bit of vintage flair.
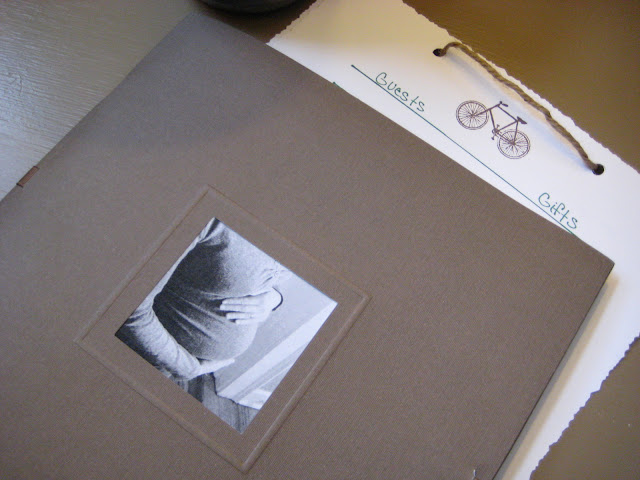
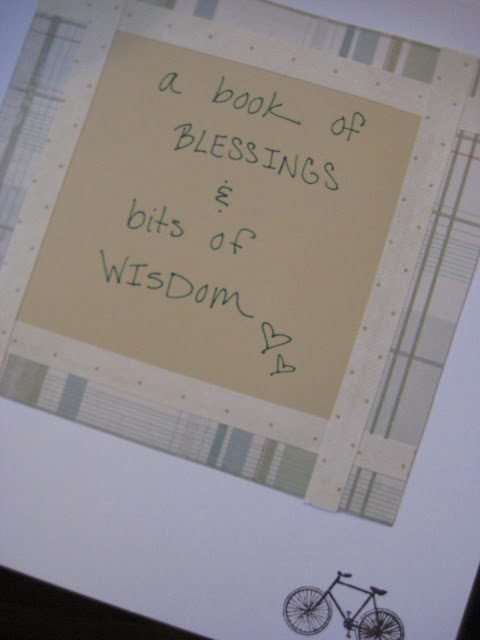
Lastly, we passed around a blessing book where friends could leave Ellen with a blessing or bit of wisdom about motherhood.
If you’re looking for baby shower inspiration, I recommend Pinterest, an addictive site loaded with images for your imagination to feast on. Don’t say I didn’t warn you when you find that it’s midnight and you’re still browsing…
Thursday, April 21, 2011
A Blank Canvas…
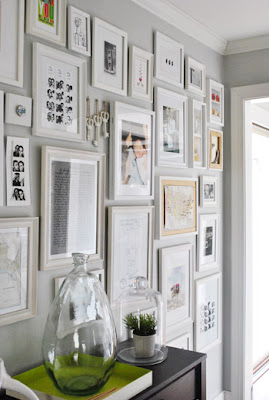
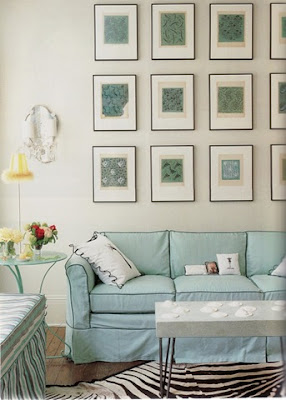
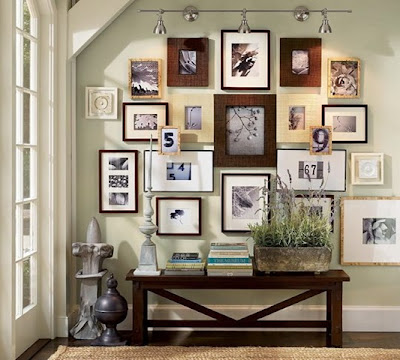
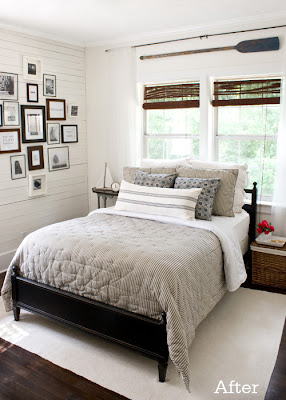
That’s how I feel about our dining room walls, especially the large one that’s just ripe for décor. Here at the Shant we are slow to hang things on our walls (we’ve lived here over a year!), probably because they’re plaster (although the dining room walls are dry wall since we gutted the old sun room and turned it into a great eating space), which is way more finicky than dry wall, but also because we like to live in our space awhile before spending lots of time and/or money on décor. But I subscribe wholeheartedly to the “hustle while you wait” mentality, so of course I’ve been keeping my eyes peeled for any inspiring wall décor I come across. Here are a few of my favorites…
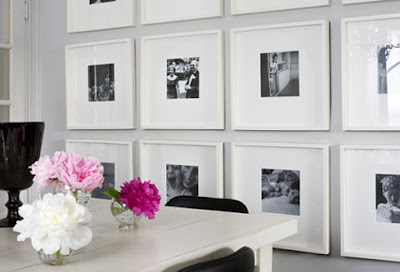
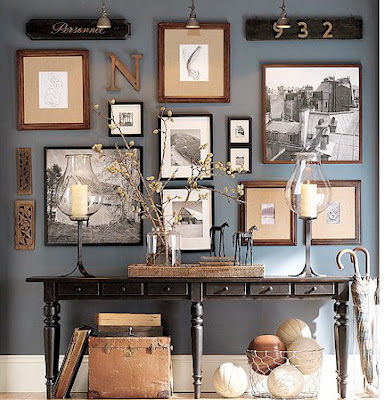
Akk. I was really torn over all the stellar ideas out there, especially the slightly eclectic gallery wall that seems to be all the rage. I’ve been itching to try my hand at this, and our dining room is the perfect place for it. The room is simple enough to handle a busy arrangement and because it’s dry wall we can afford to make a few mistakes while we’re figuring out how to hang a bazillion pictures.
Alas, we chose to go the simpler, cleaner route for now. As I write this post, I wonder if we made the right decision. I mean, how cool would it be to have a gallery wall?! But if you know anything about us by now, we’re committed to our budget. The reality is that even if we were to buy used frames and DIY all the artwork, it would still take some serious cash to make it look decent. And since we were getting ants in our pants to do something with the dining room walls, we opted for the safer route.
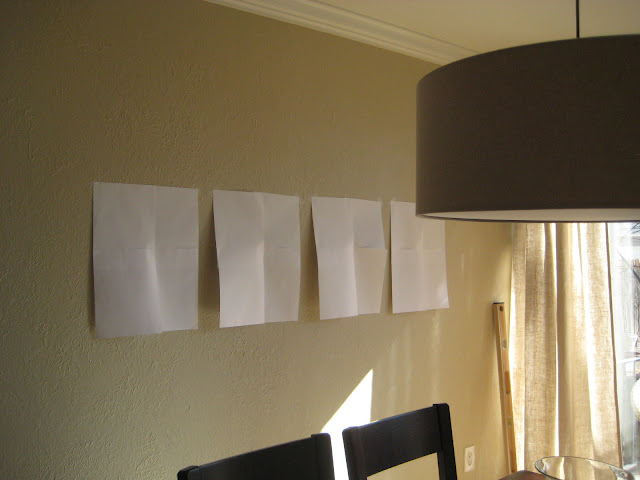
Before hanging, we hung paper on the walls in place of frames to figure out our spacing.
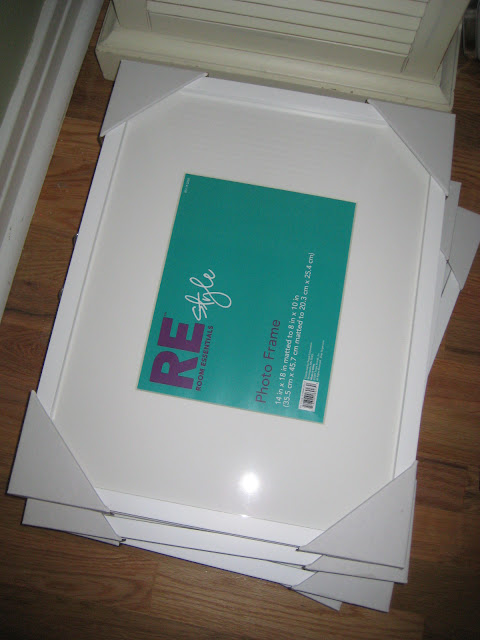
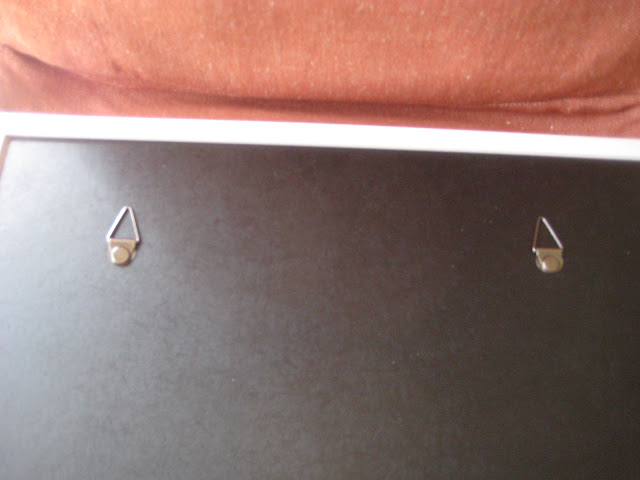
While I love these Target frames...
I would love them even more if they didn't have such difficult hanging hardware...
This required some extra measuring (thank goodness this English major married a man who understands all kinds of math), but eventually Matt figured it out.
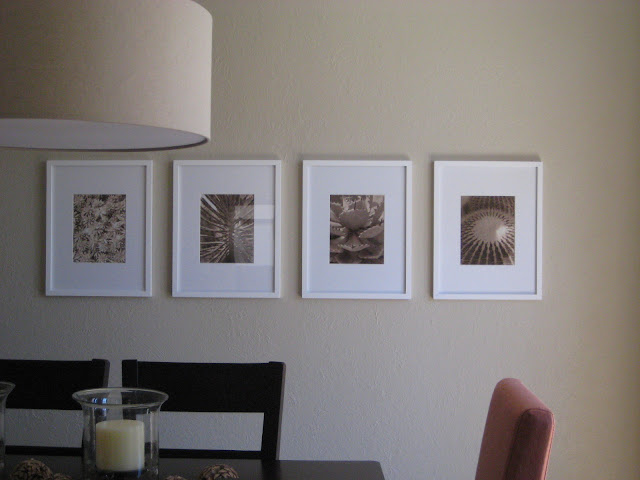
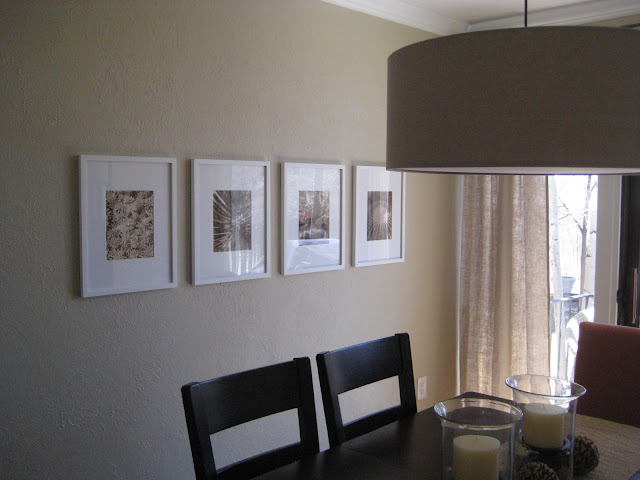
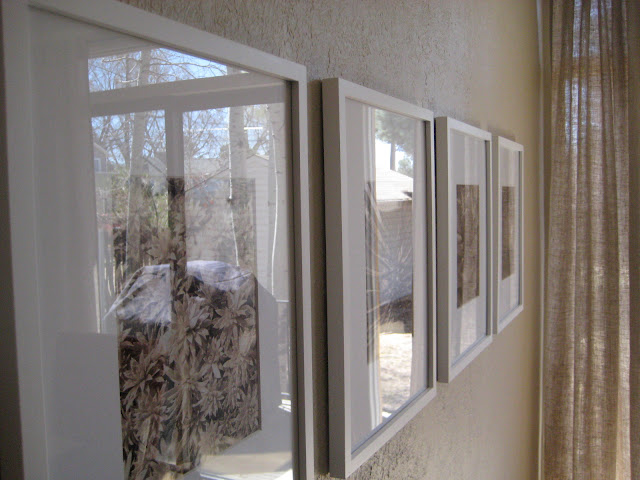
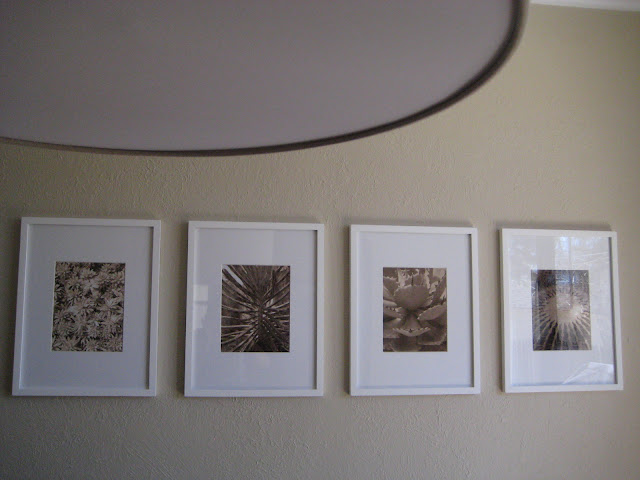
Take a look at the final product!
Versatility is a great thing, which is one of many reasons why I love love love white frames. Ultimately, we came to the conclusion that when we have the energy, time, and money (do those ever all line up at the same time?), we’ll simply move the frames to another spot in the house (perhaps right over our living room loveseat) and settle them in a new home.
For now, they’re filled with photos of succulents that Matt snapped at the Denver Botanical Gardens—which we recently visited for free with my cousin Andy—and after googling around for a coupon, we snagged a deal at Walgreen’s and got four 8x10 photos for under $7 total! We both agree that this art is not permanent, but it’s great for now.
We’re pretty happy with our crisp and clean frames. It makes me even happier that my husband’s handiwork is framed inside them!
Oh, and if you think the frames look small on the wall, they really don't when you see them in person. I'm a total amateur when it comes to photography...
Young House Love
Style Court
Pottery Barn
The Lettered Cottage
High-Heeled Foot In The Door
Pottery Barn
Akk. I was really torn over all the stellar ideas out there, especially the slightly eclectic gallery wall that seems to be all the rage. I’ve been itching to try my hand at this, and our dining room is the perfect place for it. The room is simple enough to handle a busy arrangement and because it’s dry wall we can afford to make a few mistakes while we’re figuring out how to hang a bazillion pictures.
Alas, we chose to go the simpler, cleaner route for now. As I write this post, I wonder if we made the right decision. I mean, how cool would it be to have a gallery wall?! But if you know anything about us by now, we’re committed to our budget. The reality is that even if we were to buy used frames and DIY all the artwork, it would still take some serious cash to make it look decent. And since we were getting ants in our pants to do something with the dining room walls, we opted for the safer route.
Before hanging, we hung paper on the walls in place of frames to figure out our spacing.
While I love these Target frames...
I would love them even more if they didn't have such difficult hanging hardware...
This required some extra measuring (thank goodness this English major married a man who understands all kinds of math), but eventually Matt figured it out.

Take a look at the final product!
Versatility is a great thing, which is one of many reasons why I love love love white frames. Ultimately, we came to the conclusion that when we have the energy, time, and money (do those ever all line up at the same time?), we’ll simply move the frames to another spot in the house (perhaps right over our living room loveseat) and settle them in a new home.
For now, they’re filled with photos of succulents that Matt snapped at the Denver Botanical Gardens—which we recently visited for free with my cousin Andy—and after googling around for a coupon, we snagged a deal at Walgreen’s and got four 8x10 photos for under $7 total! We both agree that this art is not permanent, but it’s great for now.
We’re pretty happy with our crisp and clean frames. It makes me even happier that my husband’s handiwork is framed inside them!
Oh, and if you think the frames look small on the wall, they really don't when you see them in person. I'm a total amateur when it comes to photography...
Wednesday, April 20, 2011
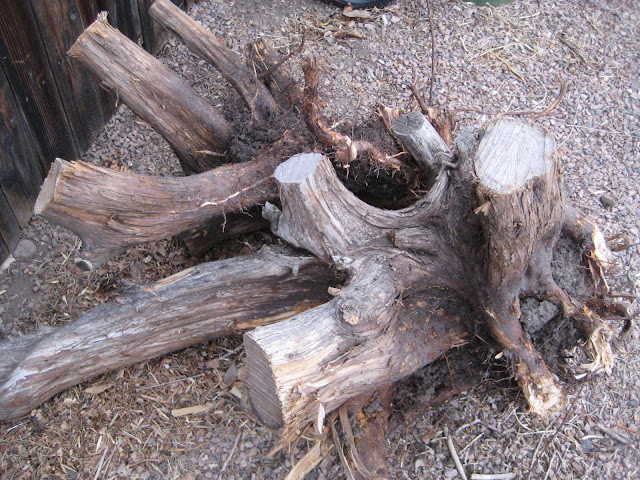
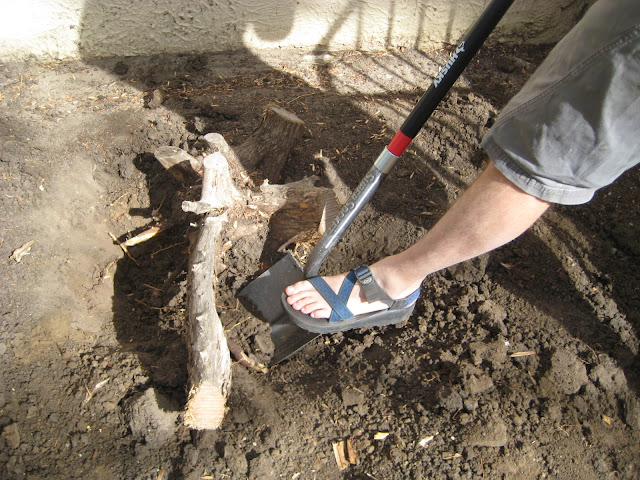
Stumps Be Gone!
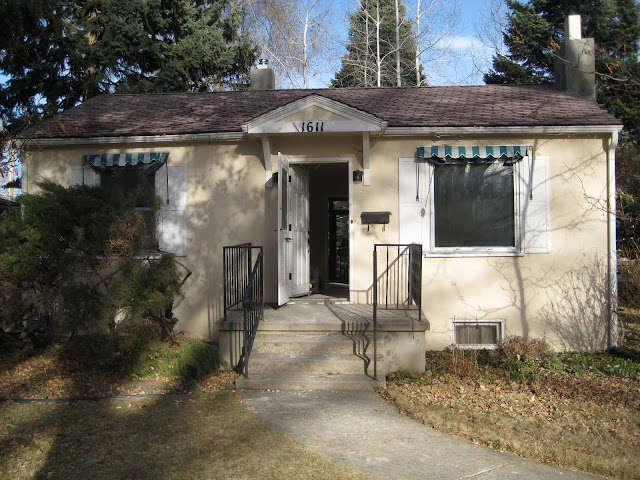
Remember the dreadful stumps in our front yard? Thanks to my boyfriend’s muscles, they’re gone! Sayonara baby!
While the huge dirt patch in front of our house isn’t all that attractive, I must admit that it looks much better sans stumps. Now if we could just do the same thing to our Narnia light post… You know, I’m not even sure if it works or not. Hmmm…I probably should add that to our list. I’ll let you know what I find out!
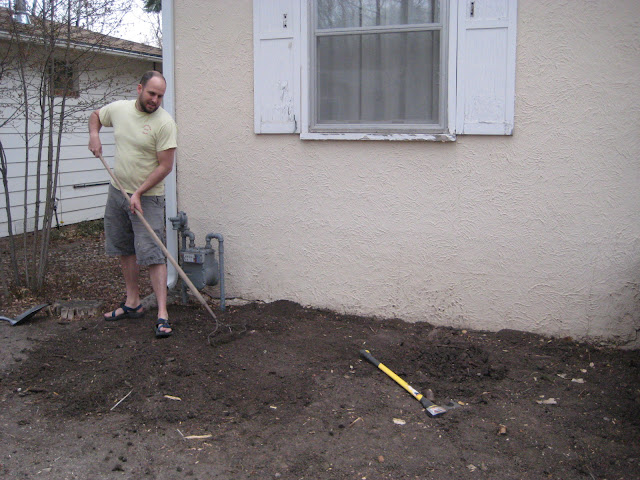
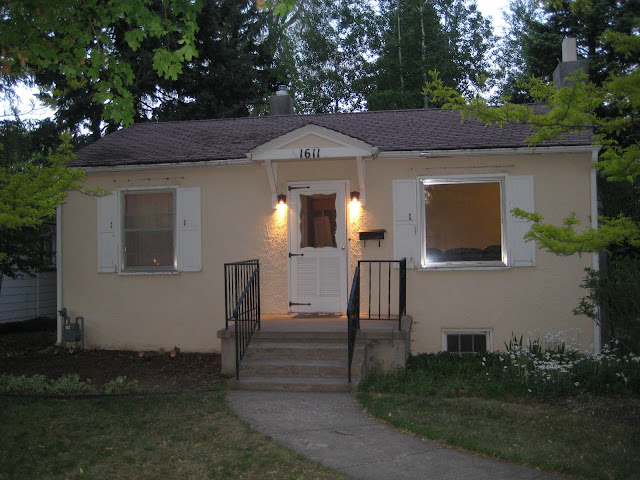
Here's what the outside of our house looked like a year ago...
And although this picture was taken prior to the stumps being removed, it's a decent shot of what our house looks like today...
Clearly the outside needs some TLC. But eliminating the awnings and all-consuming bush helped, right? Once summer arrives we hope to do some serious sprucing, along with backpacking Four Pass Loop in the Maroon Bells and taking a road trip to Yellowstone. We're determined to enjoy the West on a dime this summer. Can't wait!
P.S. In the previous post where I’m spray painting the clay pot, there is a white bottle hanging out in the background. Just in case you were curious, it’s a wine bottle that I spray painted white and then added to our new bathroom shelf—read about that splurge here. I think it’ll make a cute vase someday—and hopefully sooner rather than later, as I’d like to plunk a few flowers from our yard in it. Now if they would just grow…
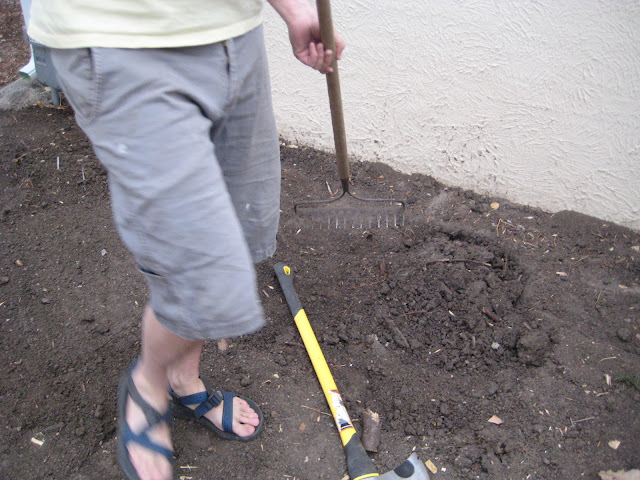
While the huge dirt patch in front of our house isn’t all that attractive, I must admit that it looks much better sans stumps. Now if we could just do the same thing to our Narnia light post… You know, I’m not even sure if it works or not. Hmmm…I probably should add that to our list. I’ll let you know what I find out!
Here's what the outside of our house looked like a year ago...
And although this picture was taken prior to the stumps being removed, it's a decent shot of what our house looks like today...

Clearly the outside needs some TLC. But eliminating the awnings and all-consuming bush helped, right? Once summer arrives we hope to do some serious sprucing, along with backpacking Four Pass Loop in the Maroon Bells and taking a road trip to Yellowstone. We're determined to enjoy the West on a dime this summer. Can't wait!
P.S. In the previous post where I’m spray painting the clay pot, there is a white bottle hanging out in the background. Just in case you were curious, it’s a wine bottle that I spray painted white and then added to our new bathroom shelf—read about that splurge here. I think it’ll make a cute vase someday—and hopefully sooner rather than later, as I’d like to plunk a few flowers from our yard in it. Now if they would just grow…
Tuesday, April 19, 2011
Crafty Centerpiece
Lately it seems that I’ve been doing lots of crafty projects. In fact, I’ve been hoarding coupons for Michael’s and JoAnn’s! It’s true. When I was younger I loved arts and crafts time at school; I was the nerdy kid known to stay inside during recess messing with pieces of colorful construction paper while everyone else played kickball. Apparently the bug has bitten me again—although I do enjoy getting outside to play these days.
My latest project is a use-what-you-have DIY centerpiece. While I really liked our table décor, it felt too fallish in the midst of the budding trees and bright colors popping up all over our neighborhood.
Plus, I was a little tired of moving everything on and off the table every time we eat dinner with a large group—something that is becoming more and more common (hurray for friends and the ability to host events!). I wanted something simple and springy. Most of my DIY inspiration comes from other bloggers these days, and I’ve been eyeing these mini topiaries over at Little Blue Prints for awhile now.
Aren’t they adorable? But since we’re trying to save money to work on the outside of our house (paint, landscaping, etc.), I wanted to use materials that I had on hand. That’s when my brain finally registered the large clay pot that’s been sitting empty in our backyard for over a year—whaalaa! It turns out that the woman who previously owned our house was a serious gardener who loved clay pots. Last summer my mom and I found a bajillion of them nestled beneath the pine needles in our backyard. Turns out that she also never raked up her pine needles… While we gave away most of the pots for free, we did keep a few of the nicer ones. I decided that it was the perfect size for a chunky tabletop centerpiece.
This is seriously one of the easiest projects ever. I feel a little awkward even giving you the instructions, lest you think I’m insulting your intelligence. All that said, a little tutorial never hurt anyone, right?
So here’s what I did:
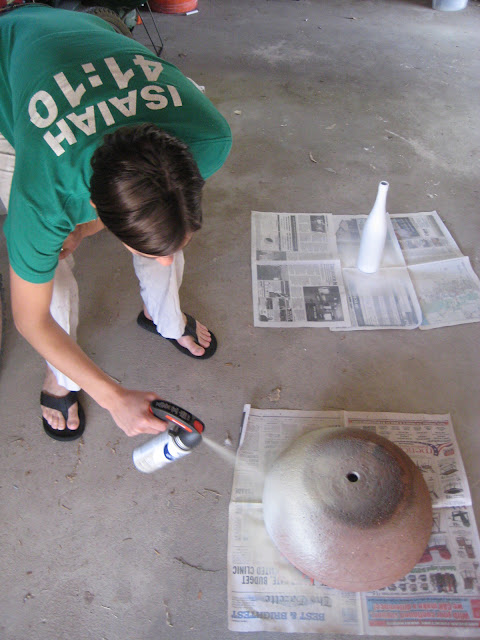
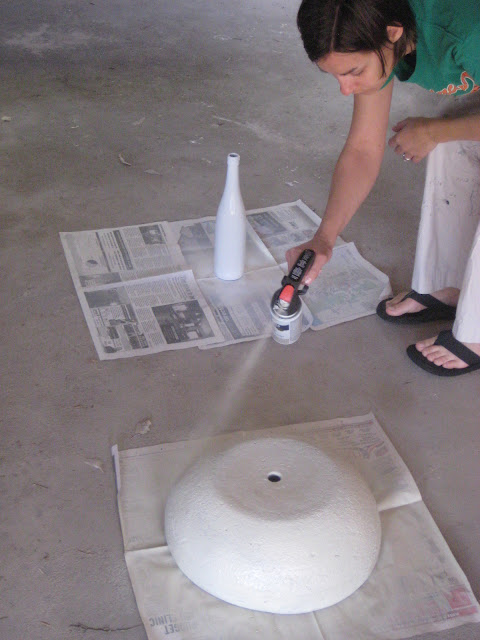
1.) Sprayed off said clay pot using a hose in the backyard
2.) Perked it up with a few coats of Rust-Oleum Almond Gloss spray paint that we had leftover in our basement
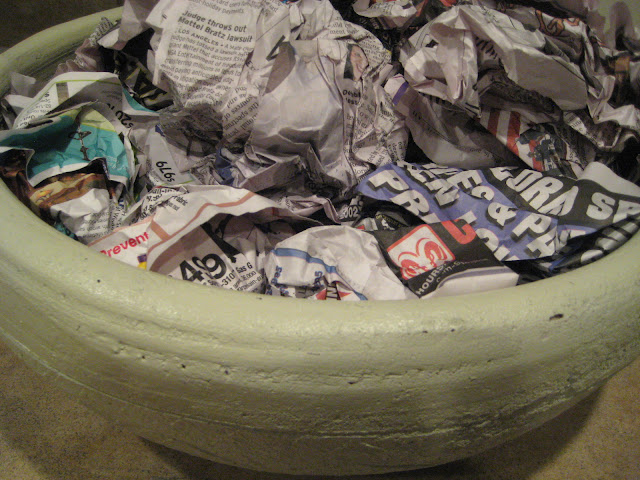
3.) Crumpled up old newspaper to create a thick base layer in the bottom of the pot
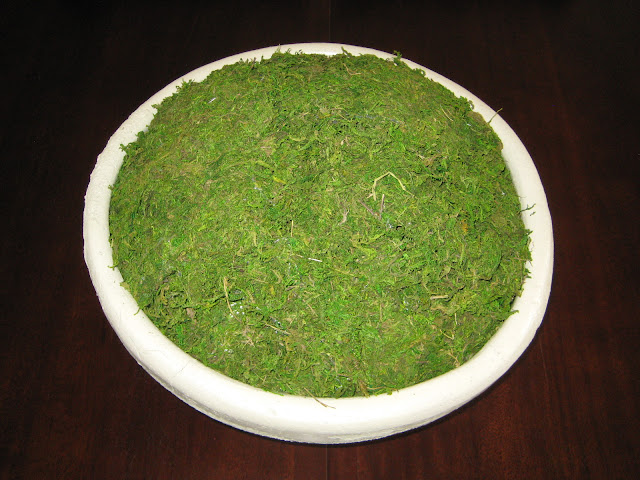
4.) Glued fake (would it sound better to say “faux,” or is that completely dorky?) moss that I bought with a 50% off coupon at Michael’s to the top of the newspaper
5.) Stuck a few felt pads on the bottom of the pot to keep it from scratching the heck out of our table
6.) Ooohed and ahhhed over our fresh new centerpiece!
A few things to keep in mind… First, never buy anything full price at Michael’s or JoAnn’s, because they always have coupons available in the mail or online. Before heading to Michael’s for the moss, I did a quick Google search to see if there were any coupons available. I saved 50% just by taking a few minutes to look around the web. Second, I ended up buying the moss table runner instead of several separate packages of moss. By cutting it up, I gained a lot more moss for my money. I also realized that I could peel the table runner apart, which thinned out my moss, but also made it more pliable and expanded the amount I had to work with. Finally, table runner moss is held together by a piece of green netting which unfortunately shows through at times. To hide the netting, I simply glued miscellaneous pieces of moss over it. I did the same thing over any seams that showed. Trust me—this is a messy project and you will have plenty of rebellious moss to cover any imperfections that you find.
Cost breakdown:
This project took a bit of finagling, but with a few minutes of extra work I was able to create a unique and inexpensive centerpiece just in time for spring!
P.S. I also bought a hot glue gun at JoAnn’s for this very project, but I didn’t count it in the cost breakdown since I’ll use it forever. Luckily I had another 50% coupon, so it cost me less than $7!
My latest project is a use-what-you-have DIY centerpiece. While I really liked our table décor, it felt too fallish in the midst of the budding trees and bright colors popping up all over our neighborhood.
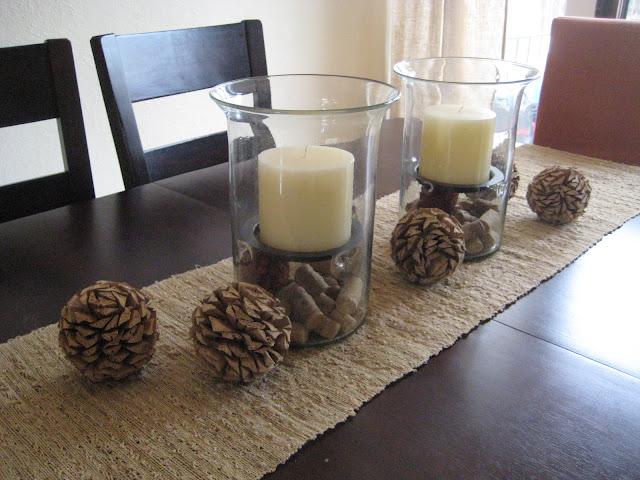
Plus, I was a little tired of moving everything on and off the table every time we eat dinner with a large group—something that is becoming more and more common (hurray for friends and the ability to host events!). I wanted something simple and springy. Most of my DIY inspiration comes from other bloggers these days, and I’ve been eyeing these mini topiaries over at Little Blue Prints for awhile now.
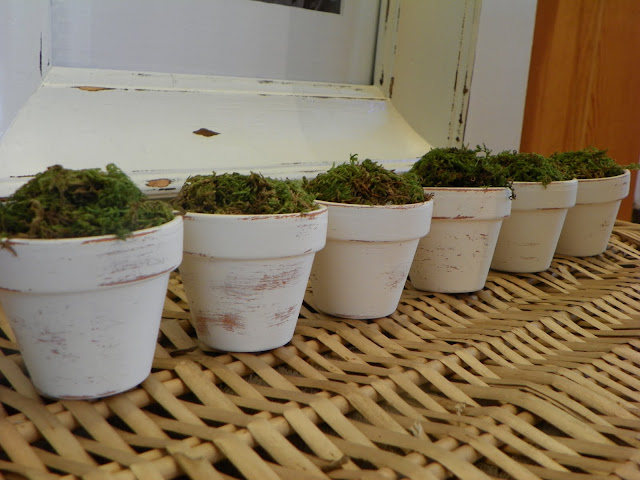
Aren’t they adorable? But since we’re trying to save money to work on the outside of our house (paint, landscaping, etc.), I wanted to use materials that I had on hand. That’s when my brain finally registered the large clay pot that’s been sitting empty in our backyard for over a year—whaalaa! It turns out that the woman who previously owned our house was a serious gardener who loved clay pots. Last summer my mom and I found a bajillion of them nestled beneath the pine needles in our backyard. Turns out that she also never raked up her pine needles… While we gave away most of the pots for free, we did keep a few of the nicer ones. I decided that it was the perfect size for a chunky tabletop centerpiece.
This is seriously one of the easiest projects ever. I feel a little awkward even giving you the instructions, lest you think I’m insulting your intelligence. All that said, a little tutorial never hurt anyone, right?
So here’s what I did:
1.) Sprayed off said clay pot using a hose in the backyard
2.) Perked it up with a few coats of Rust-Oleum Almond Gloss spray paint that we had leftover in our basement
3.) Crumpled up old newspaper to create a thick base layer in the bottom of the pot
4.) Glued fake (would it sound better to say “faux,” or is that completely dorky?) moss that I bought with a 50% off coupon at Michael’s to the top of the newspaper
5.) Stuck a few felt pads on the bottom of the pot to keep it from scratching the heck out of our table
6.) Ooohed and ahhhed over our fresh new centerpiece!


A few things to keep in mind… First, never buy anything full price at Michael’s or JoAnn’s, because they always have coupons available in the mail or online. Before heading to Michael’s for the moss, I did a quick Google search to see if there were any coupons available. I saved 50% just by taking a few minutes to look around the web. Second, I ended up buying the moss table runner instead of several separate packages of moss. By cutting it up, I gained a lot more moss for my money. I also realized that I could peel the table runner apart, which thinned out my moss, but also made it more pliable and expanded the amount I had to work with. Finally, table runner moss is held together by a piece of green netting which unfortunately shows through at times. To hide the netting, I simply glued miscellaneous pieces of moss over it. I did the same thing over any seams that showed. Trust me—this is a messy project and you will have plenty of rebellious moss to cover any imperfections that you find.
Cost breakdown:
- Large clay pot: came with our house—free!
- Spray paint: leftover from another project—technically free!
- Newspaper—we actually don’t pay to get the paper, but occasionally they leave one on our porch anyway, so we just save them for projects like this—free!
- Moss table runner--$6 after 50% off coupon
- Total: $6
This project took a bit of finagling, but with a few minutes of extra work I was able to create a unique and inexpensive centerpiece just in time for spring!
P.S. I also bought a hot glue gun at JoAnn’s for this very project, but I didn’t count it in the cost breakdown since I’ll use it forever. Luckily I had another 50% coupon, so it cost me less than $7!
Wednesday, April 13, 2011
Shelf M-M-M-Melf
Don’t ask…I’m so tired of grading tests that I’m struggling to think straight. Ahh…the life of a teacher. On the bright side, Matt made delicious chicken enchiladas for dinner while I graded. Makes you want to lightly punch him on the arm and say, “What a guy!”
In other news, we’ve been puttering around the house, but our main focus has been the yard. More importantly, we spent the past weekend at a marriage retreat in the mountains. One of my favorite takeaway thoughts from the weekend: “Your marriage should be the safest place in the world for both of you.” All that said, I’ve been neglecting our blog and need to get back in the swing of things. But it’s hard when the trees are budding and everything in you wants to be away from the computer! And when that’s the case, I say forget the internet—which never sleeps—and let yourself off the hook, right?
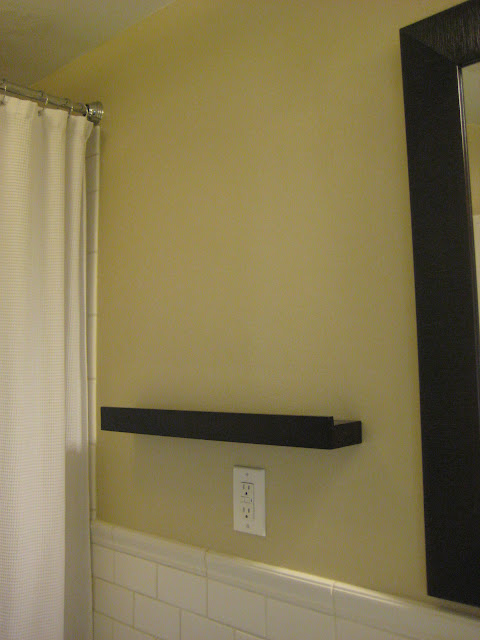
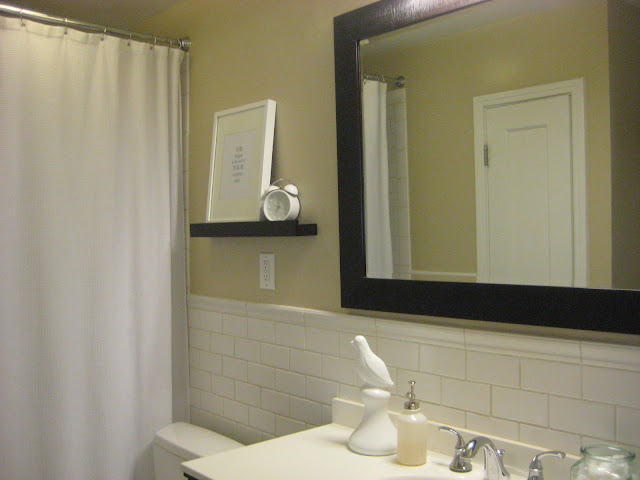
One project that we finally did tackle was hanging a shelf in our bathroom. We wanted a shallow shelf above our toilet—right between the shower curtain and mirror—but we didn’t want it to be too big or too expensive. But the real reason I wanted a shelf was not even for décor purposes. No. I needed a shelf to hold this stinkin’ cute clock I found on sale at Target.
Does anyone else lose track of time in the bathroom? I thought so! It’s those darn eyebrows that need plucking—you can spend forever on them! Anyway, that’s why I needed a shelf. If you’re wondering why I couldn’t just put the clock on the countertop, it’s because I’m Type A. I mean, who wants a cluttered bathroom countertop? Not me. No sirree.
Our first attempt at hanging a shelf ended in the typical Braham Fam way. We found a cheap version of what we thought we were looking for, realized that it was just slightly off after it was already hung, and ended up spending a few bucks more to get the real deal.
Sadly, I forgot to take pics of the first shelf, but let me just say that it was too deep. Kind of felt like you would hit your head on it when you stood up from doing your duty. It felt out of balance with the rest of our bathroom.
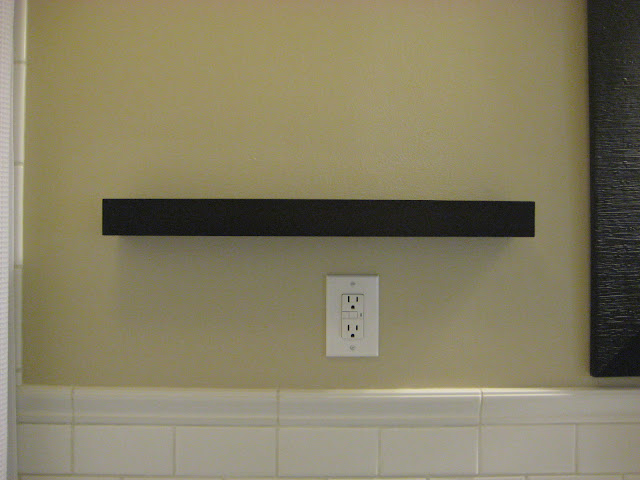
Then we took a night away in Denver. Before dinner at our favorite Bonefish Grill, we popped into the West Elm store at Cherry Creek. Wow…it’s the kind of store you could lose yourself in. But thanks to the hubs, I was able to stay fairly focused, and we ended up finding this shelf.
Depth? Perfect. Color? Excellent match for our bathroom vanity. Price? A little more than we wanted to spend…but that’s what you do on indulgent overnight getaways, right? Well, at least it’s what we did just this once.
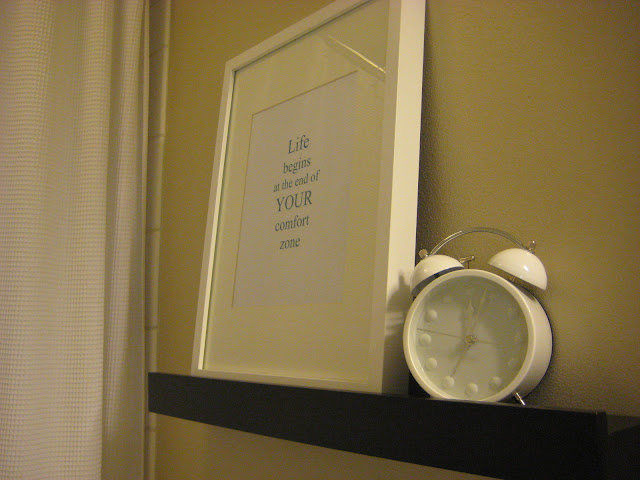
It didn’t take Matt long to pop this puppy up. Once it was hung, we grabbed an empty IKEA frame and filled it with one of our favorite quotes. (By the way, I’ve started a quote file where I can stash any great quotes that I run across so they’re ready to go for times like this.) And of course, we gave our clock a new home. I’m thinking that the space might need something else—like a tall, thin vase or maybe a wine bottle that’s painted a fun color. You know, something to garnish with a flower or two. There are tons of possibilities, and I have a feeling it will be one of those areas that changes regularly—kind of like a fireplace mantel.
Oh, and two of the best things about this shelf? 1.) There’s a small lip on the shelf that holds pictures in place. 2.) It came with a bar that connects to the wall and the shelf just snaps on top of it—which means it doesn’t tilt away from the wall, but sits nice and tight. I just hate it when shelves begin to droop.
While we probably could have made this shelf ourselves, sometimes it’s nice to let someone else do the work, don’tcha think?
In other news, we’ve been puttering around the house, but our main focus has been the yard. More importantly, we spent the past weekend at a marriage retreat in the mountains. One of my favorite takeaway thoughts from the weekend: “Your marriage should be the safest place in the world for both of you.” All that said, I’ve been neglecting our blog and need to get back in the swing of things. But it’s hard when the trees are budding and everything in you wants to be away from the computer! And when that’s the case, I say forget the internet—which never sleeps—and let yourself off the hook, right?
One project that we finally did tackle was hanging a shelf in our bathroom. We wanted a shallow shelf above our toilet—right between the shower curtain and mirror—but we didn’t want it to be too big or too expensive. But the real reason I wanted a shelf was not even for décor purposes. No. I needed a shelf to hold this stinkin’ cute clock I found on sale at Target.
Does anyone else lose track of time in the bathroom? I thought so! It’s those darn eyebrows that need plucking—you can spend forever on them! Anyway, that’s why I needed a shelf. If you’re wondering why I couldn’t just put the clock on the countertop, it’s because I’m Type A. I mean, who wants a cluttered bathroom countertop? Not me. No sirree.
Our first attempt at hanging a shelf ended in the typical Braham Fam way. We found a cheap version of what we thought we were looking for, realized that it was just slightly off after it was already hung, and ended up spending a few bucks more to get the real deal.
Sadly, I forgot to take pics of the first shelf, but let me just say that it was too deep. Kind of felt like you would hit your head on it when you stood up from doing your duty. It felt out of balance with the rest of our bathroom.
Then we took a night away in Denver. Before dinner at our favorite Bonefish Grill, we popped into the West Elm store at Cherry Creek. Wow…it’s the kind of store you could lose yourself in. But thanks to the hubs, I was able to stay fairly focused, and we ended up finding this shelf.
Depth? Perfect. Color? Excellent match for our bathroom vanity. Price? A little more than we wanted to spend…but that’s what you do on indulgent overnight getaways, right? Well, at least it’s what we did just this once.
It didn’t take Matt long to pop this puppy up. Once it was hung, we grabbed an empty IKEA frame and filled it with one of our favorite quotes. (By the way, I’ve started a quote file where I can stash any great quotes that I run across so they’re ready to go for times like this.) And of course, we gave our clock a new home. I’m thinking that the space might need something else—like a tall, thin vase or maybe a wine bottle that’s painted a fun color. You know, something to garnish with a flower or two. There are tons of possibilities, and I have a feeling it will be one of those areas that changes regularly—kind of like a fireplace mantel.
Oh, and two of the best things about this shelf? 1.) There’s a small lip on the shelf that holds pictures in place. 2.) It came with a bar that connects to the wall and the shelf just snaps on top of it—which means it doesn’t tilt away from the wall, but sits nice and tight. I just hate it when shelves begin to droop.
While we probably could have made this shelf ourselves, sometimes it’s nice to let someone else do the work, don’tcha think?
Wednesday, April 6, 2011
Kitchen Cabinet Inspiration
If you’re looking for an inexpensive way to update your kitchen cabinets, look no further! Rust-Oleum has come out with a new product that allows you to paint your cabinets using a step-by-step method that leaves typical sanding and refinishing options in the dust! From what we’ve heard, it takes some elbow grease, but the results are worth the extra effort. Plus, your wallet will thank you!
For a virtual rundown of the entire process, check out the before and after photos from our good friends’ blog.
If that doesn’t convince you, read up on Centsational Girl’s experience playing around with these new products while attending a Rust-Oleum conference.
Has anyone else tried this method? We’d love to hear about your experience!
Monday, April 4, 2011
Bringing Spring Inside
Colorado Springs hit a record high on Saturday—we were even inspired to hack at the stumps in our front yard. (Ahem…I should say Matt did most of the hacking while I pruned a few unruly bushes.) Unfortunately, snow decided to rear it’s ugly head on Sunday, dragging us from the 80s to the 30s within 24 hours. One of my friends told me that she was reading a book in her backyard on Saturday, practically sweating, and then she and her husband went skiing on Sunday! And yes, for those of you wondering, that is actually pretty typical Colorado weather. The good news is that today the sun is shining again and the snow will be long gone before tomorrow.
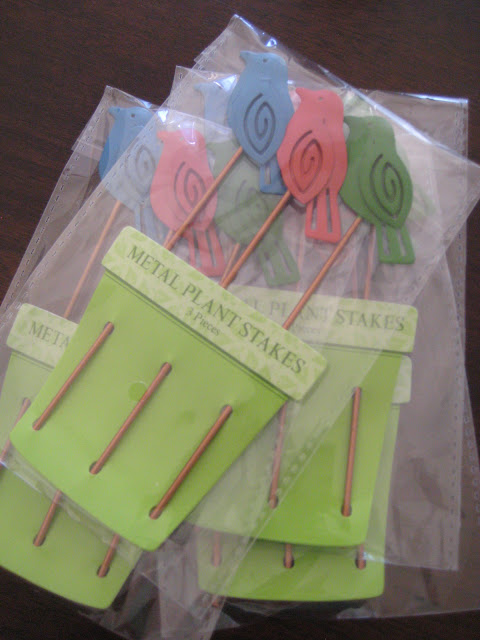
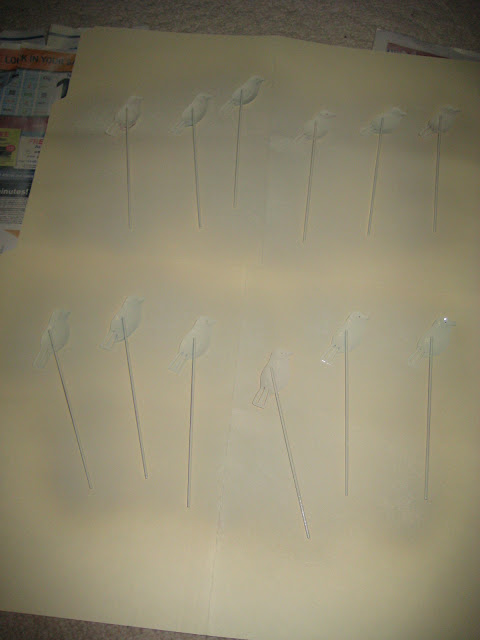
In spite of the recent cold, the tulips poking their heads above ground in our front yard have given me spring fever, so when I spotted these darling plant stakes in the $1 bin at Tar-jay, I decided to bring a bit of it inside.
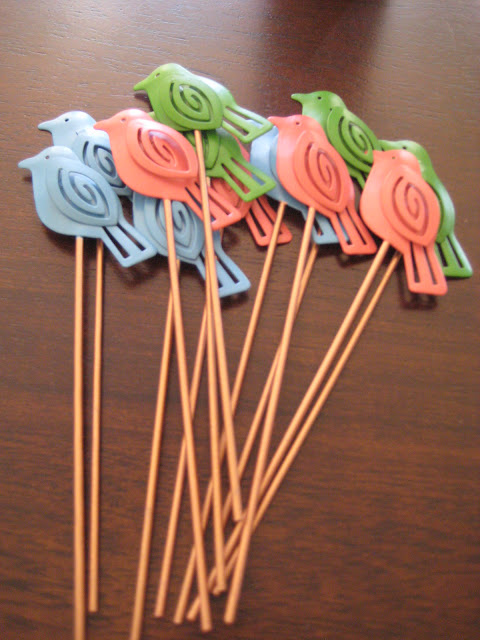
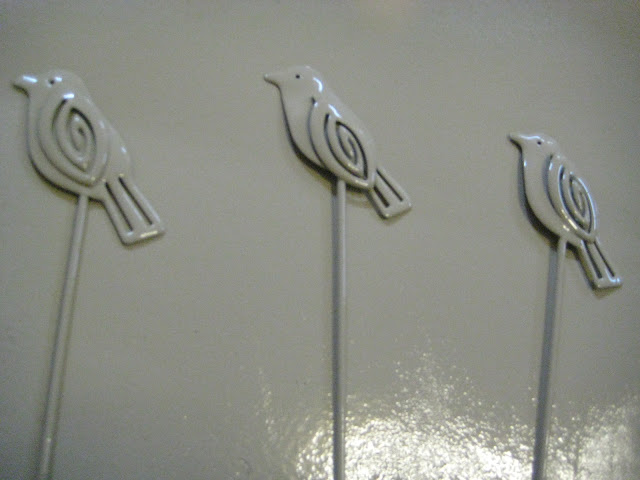
While I love their simple bird design (I’m into all things bird these days!), I wasn’t all that thrilled with their colors. But I’ve realized that just because an object might look dowdy at first glance, it often holds great potential—our house is a perfect example. It’s all about looking past those awkward details and seeing what it could be if you just tweaked it this way or that. Is anyone with me on this?
My idea? Name place holders!
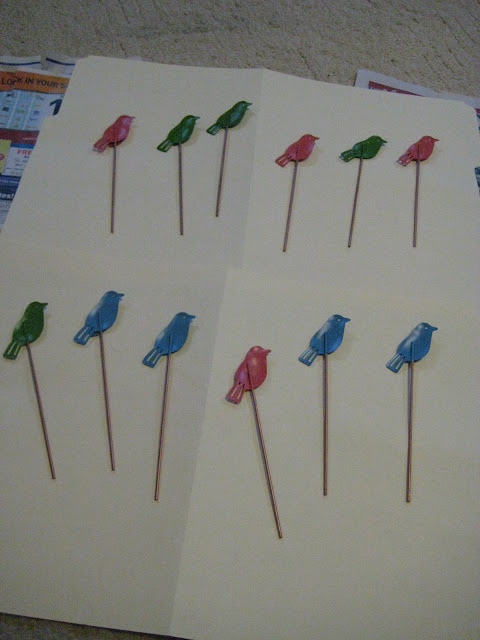
Creating these was a snap. After a quick coat of glossy almond spray paint…
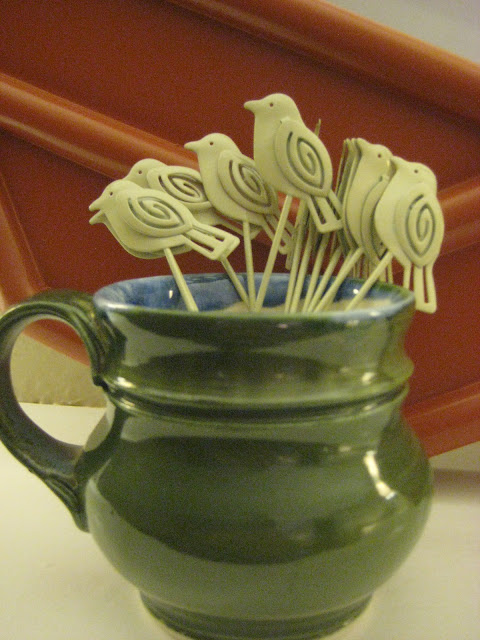
I simply plunked them into one of our favorite mugs so they’ll be ready to go when we have guests over for dinner.
And since you can tuck pieces of paper between their wings, I think it would be fun to use these birds to label food dishes when serving buffet style. To keep the spray painted portion from touching food, I’d just wrap the stem of the stake in foil. And who knows? Maybe someday they’ll grace actual house plants!
How’s that for adding a smidge of whimsy to a dinner party?
What other treasures have you discovered in the $1 bins?
In spite of the recent cold, the tulips poking their heads above ground in our front yard have given me spring fever, so when I spotted these darling plant stakes in the $1 bin at Tar-jay, I decided to bring a bit of it inside.

While I love their simple bird design (I’m into all things bird these days!), I wasn’t all that thrilled with their colors. But I’ve realized that just because an object might look dowdy at first glance, it often holds great potential—our house is a perfect example. It’s all about looking past those awkward details and seeing what it could be if you just tweaked it this way or that. Is anyone with me on this?
My idea? Name place holders!
Creating these was a snap. After a quick coat of glossy almond spray paint…
I simply plunked them into one of our favorite mugs so they’ll be ready to go when we have guests over for dinner.
And since you can tuck pieces of paper between their wings, I think it would be fun to use these birds to label food dishes when serving buffet style. To keep the spray painted portion from touching food, I’d just wrap the stem of the stake in foil. And who knows? Maybe someday they’ll grace actual house plants!
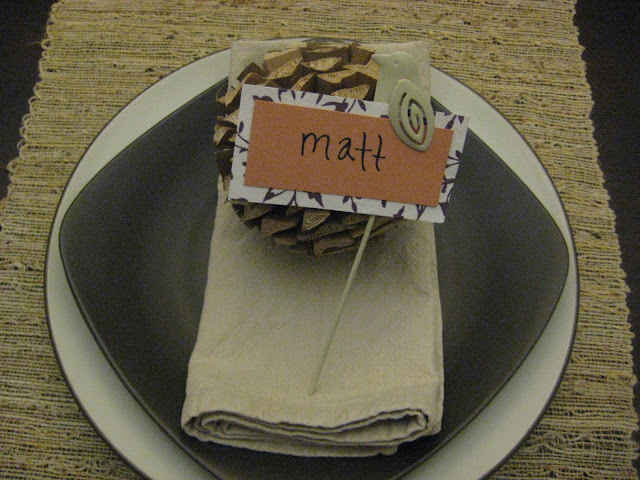
How’s that for adding a smidge of whimsy to a dinner party?
What other treasures have you discovered in the $1 bins?
Subscribe to:
Posts (Atom)