Thursday, June 23, 2011

Simple Pleasures

Our backyard is blooming!  Actually, it's been blooming for awhile now, but the irises are at their peak.


These lovely ladies just arrived, and their fragrance is a delight to the senses.  If you were to take a guess, what do you think they smell like?


As it turns out, they smell just like a bunch of grapes!   It tickles me purple pink that they're the same color and scent as grapes...

If you haven't taken the time to smell the roses yet, be sure to lean in and enjoy God's creation this summer.

Monday, June 20, 2011

Another Thrifty Find

Our kitchen has an odd corner that used to baffle me.  It's not very large, and it's near a window, which limits the kind of furniture that might fit there.  But one evening when I was making dinner, the proverbial light bulb clicked on.  A chair.  A cute little chair for the odd corner of our kitchen.  A place for friends to sit and chat.  A surface for bags laden with groceries.  A dash of texture (and--gasp--possibly even some color) for our kitchen.  A chair!

Of course, I wasn't about to spend lots of money on an expensive chair, so I turned to a girl's best friend--Craigslist.  Within a few days I spotted this beauty for a mere $25.


According to the seller, this chair once graced the halls of The Broadmoor, which is an absolutely fabulous (and outrageously expensive) resort in Colorado Springs.  If you live in the area, The Broadmoor makes for a great date with your special someone.  You can go high class and enjoy their delectable Sunday brunch, or you can meander around the lake and play a game by the fire in one of their lounges.  If you're lucky, there might be free entertainment in the black box theater.  And don't miss out on the ice sculptures and gingerbread village around Christmas!  Don't even get me started on the a.mazing decor...  Okay, I digress.  I'm starting to sound like a travel agent...

Aside from the fact that this chair is solidly built and boasts a smidgen of detail that I love...


it also has the perfect seat and back for reupholstering, which is something I've been dying to try ever since I fell head over heels for staple guns while covering our DIY headboard.


I plan to strip the peacock blue velvet from the chair and recover the base with upholstery from The Mill Fabric Outlet, which is my favorite fabric store in town.  I'll definitely repaint the wood as well, although I'm not sure if I'll stick with a distressed white (similar to my desk makeover) or a color of some sort.  Although I'm a teensy bit nervous to get down to the bones of this chair, I feel pretty confident that it can be done, as there are a ton of reupholstering tutorials online.  It's also comforting to know that I only spent $25, so it's not the end of the world if it doesn't turn out quite as I'm envisioning.  You know I'll keep you posted on the details--the good, the bad, and the ugly!

Have you guys found any great furniture deals lately?  It's addicting, isn't it?   I'd love to hear about them if you have a minute to leave me a comment or link to a photo.  Cheers!

Friday, June 17, 2011

Desk Makeover

Remember this bad boy?


After a few coats of paint, a bit of distress on the edges, and some poly, an adorable desk emerged!


Talk about a face lift!

Please pardon the drop cloth and garage mess.  I don't have a great place to stage photos, and since I'm going to attempt to sell this desk at our yard sale tomorrow, I didn't want to make a big fuss over it.  Here are a few more angles for ya...


Some of you know that I work at a local golf course over my summers.  And when I say "local," I mean literally one block behind our house!  Anyway, I have to get there by 5 am, which means I'm usually pretty tuckered out when I get home at 1:30 pm.  But I found that by painting this desk in stages, I was able to paint a layer each day after work which made the project more enjoyable since I wasn't forcing it all to happen in one day.  It also allowed each coat to dry thoroughly, which eliminated stickiness.

Before painting, I primed the desk using Zinsser's oil-based primer, which is supposed to be the best (at least according to blog authorities Centsational Girl and Young House Love--and the friendly sales associates at Home Depot).  The paint color is Benjamin Moore's White Dove in an eggshell finish.  I topped it with a coat of polyurethane in satin (which is the same finish as eggshell).  Then I spray painted the hardware using Krylon's Celery, which adds a cheery touch of color to the neutral base.  I've never painted furniture using so many layers, so I was a tad skeptical about whether or not each step was truly necessary.  Happily, the desk turned out great.  It will definitely hold up to some serious use without scratching thanks to the adhesive primer and the protective topcoat (I cannot say the same for our dressers that I painted this winter...although I love they way they turned out, they were a get-it-done paint job with little thought regarding longevity or paint adhesion).

I would love for this desk to end up in the room of a young girl or even the entryway of a home.  I'm crossing my fingers that it will catch someone's eye at our yard sale tomorrow!  As a back up, I'm also posting it on Craigslist.  I'll let you know what happens.

Happy Friday!

Friday, June 10, 2011

Setting the Stage

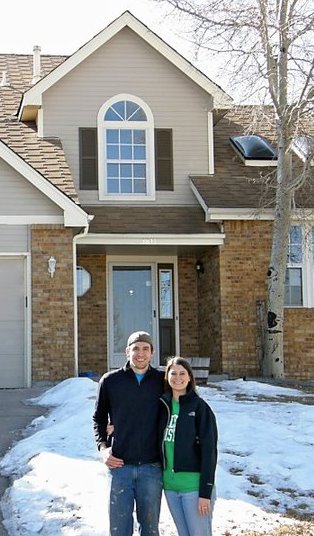
When I get really excited I tend to say, “Oh my word, oh my word, oh my word!!!”  Sometimes I even jump up and down and do a little happy dance.  So you can imagine how I felt when a realtor in town who is a friend of ours called on Tuesday asking me to help her stage a house that’s going on the market in a few days!  Holy cats!  As it turns out, my friend has not been overly happy with her current stager; apparently she’s somewhat pricey and struggles to be flexible in her staging design.  Since I’ve worked with my realtor friend in planning a baby shower and buying a house, she has a pretty good idea of what my style is and decided to see if I would join her in executing our very own stage.

I got the call at 3 pm on Tuesday, and she needed the house staged by 12 noon on Thursday.  Within about 30 minutes of her initial phone call, she showed me the house layout and then handed me a wad of cash to go out and purchase furniture!  She kept saying, “I trust you and I really like your style—I want you to do this for me.”  Picture my jaw practically hitting the ground as I mentally freaked out.  Yes, I was on cloud nine, but I was definitely sweating the super short time frame—and the fact that I’ve never staged a house before!  Of course I had to call my mom and practically scream the good news to her—hardly letting her get a word in edgewise—as I flew across town to look for a sofa/love seat, chair, area rug, and ottoman.  The funny thing is that my mom always helps me pick things out and actually purchase them, because sometimes I get stage fright (pun definitely intended) and hem and haw without being able to make up my mind.  I knew this time I would have to be more decisive…eek!

There are many confusing details to this staging story which I won’t bother to share, but just know that finding great furniture at a reasonable price at the last minute is…difficult.  For example, I really thought I had found the perfect linen sofa—modern, clean lines, fantastic price, ready to be sold on the spot—when a sales lady informed me that the sofa was actually located in the wrong area of the store, which meant it had to be ordered and wouldn’t be available for at least a week. (In case you're wondering, that's not the price of the sofa--that was the price for a three piece set.)


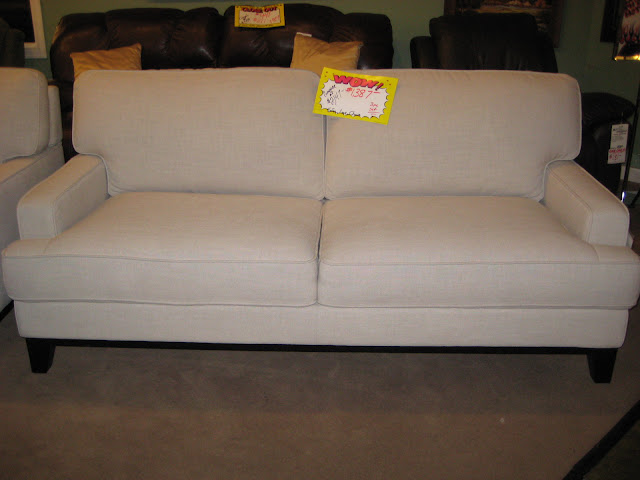
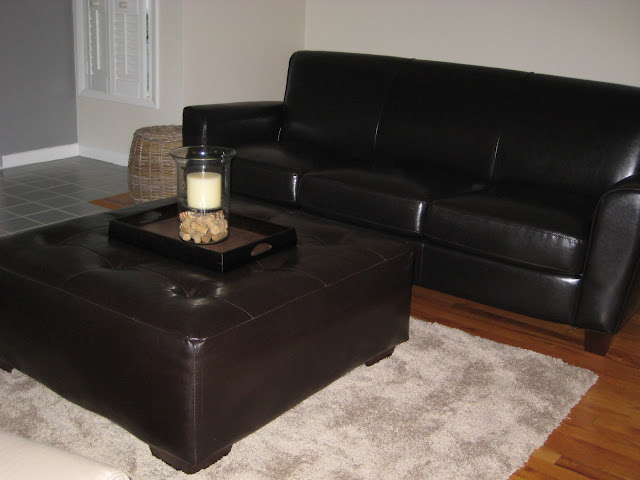
Yeah, that wasn’t happening.  I needed to be able to walk out with a sofa in one hand and a chair in the other.  In the end, we found a sofa and chair on super clearance at a local furniture chain, so they were willing to sell them to us off the floor.  It didn’t hurt that they had two of each piece in stock.  I snapped a photo of the sofa, but I didn't get one of the chair.  You'll see it all together in the staged photos below.


As it turned out, my friend needed a few more pieces that we couldn’t find on such late notice, so she ended up renting some of 
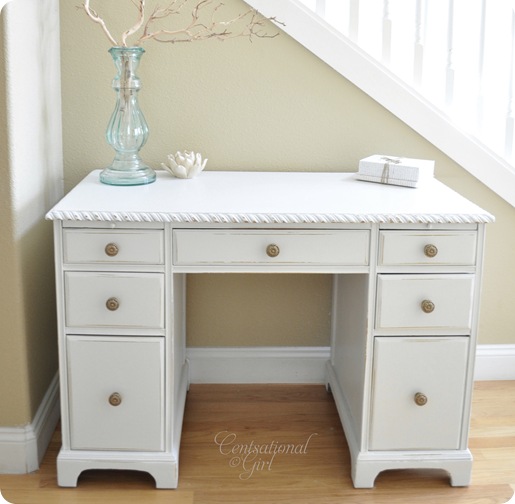
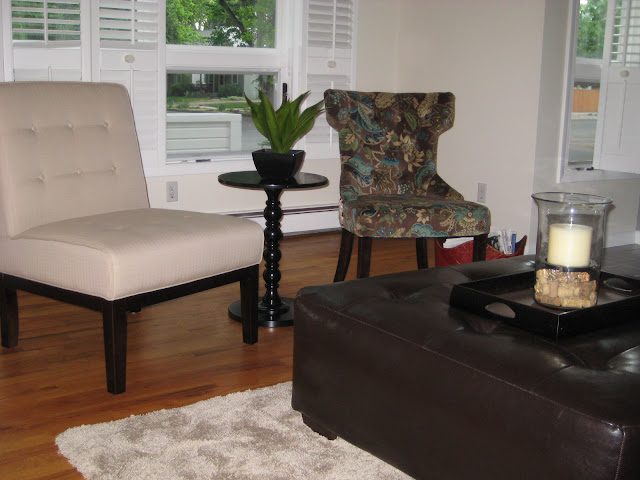
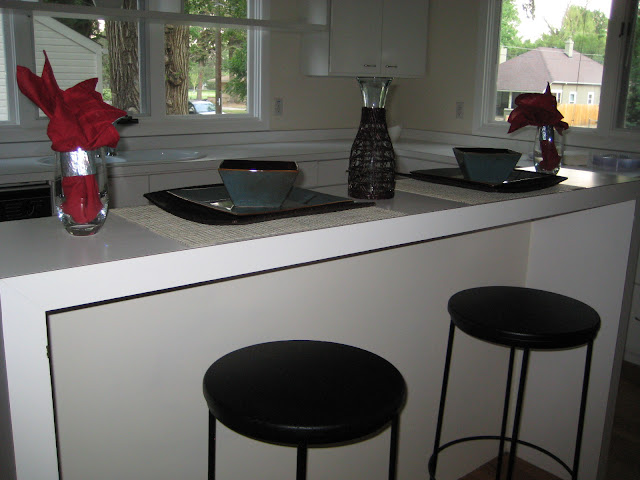
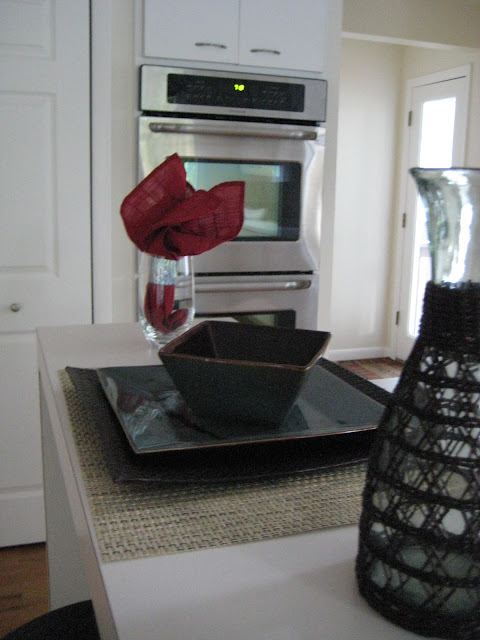
our furniture—so fun, right?  You might recognize our dining room table and parsons chairs, along with our ottoman, tray, glass hurricane, and wicker end table.  If the layout feels a little sparse, that was intentional.  You can’t necessarily tell from my photos, but the house is actually quite modern.  We wanted to keep the space open, rather than feeling cluttered or overly traditional.  Also, the table was used to serve wine and appetizers, so it wasn’t quite so bare on the day of the initial showing.  And don't you just love those huge, bright white plantation shutters?


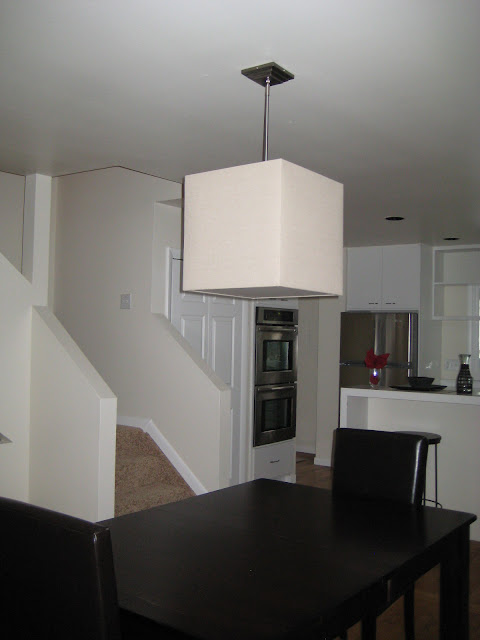
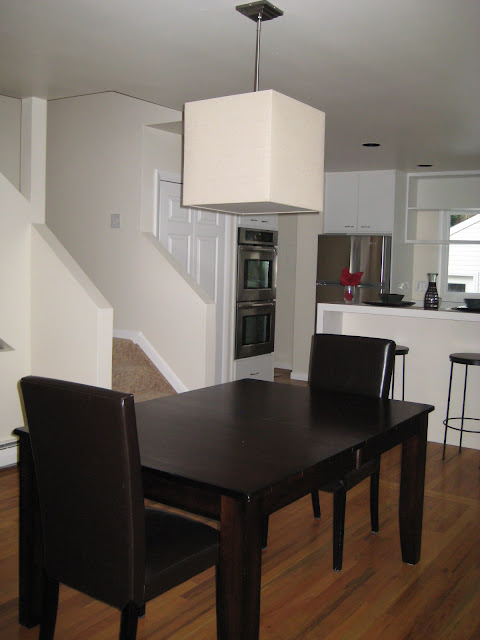
Oooo--I can't forget to mention the cool light fixture hanging above the dining room table.  After seeing our dining room light, my friend decided she needed something similar for this house.  I think it's fantastic.  While my friend had already purchased several of the accessories and some furniture herself, I was able to do some of the hard and fast searching for her when it came down to crunch time.  Often the thrill of the hunt is my favorite part of shopping, and this challenge was no exception.  I can’t wait to help her out in the future—yes, there might be a future to this!  And it involves being paid!  So.totally.awesome.and.unexpected.

Although these pieces may not be exactly what I would have picked out had I had a bit more time, they were available and worked great for the staging.  I spoke with my friend today about the initial showing to the realtors, and she said they loved it!  And...she even mentioned that a local real estate agency asked who had staged it for her!  Can you believe it?  I know…me neither.

While I’m certainly not counting on this to be a regular thing, I am so happy that I had a chance to try my hand at it.  I have lots more to learn, but the opportunity fell into my lap and I was able to jump on it.  Now here’s hoping the house sells in a snap when it goes on the market!

Tuesday, June 7, 2011

Outside These Walls: Building a Brick Hedge

Today I’m here to showcase a project completed by my good friends, Josh and Amber.


They bought their home a little over a year ago and have recently been concentrating on the yard.  To add some definition to their yard, they decided to build brick hedges around the side of their house and around some of the trees.

Before…


After!


Josh and Amber did all the grunt work themselves!  Here’s Amber’s step-by-step breakdown of the project:

First you need to measure out your wall and figure out how many blocks you'll need to purchase. You can calculate this with simple area formulas, but if you're not a math whiz just take your wall measurements to a local landscaping material company and they should be able to help you with the calculations. If you can, bring along pictures of the area, as that is usually helpful to them. While you're there you can decide what blocks you would like to purchase since they typically have a good selection and are often more helpful than Lowes or Home Depot.  Our wall was not very big, so we went with a smaller block (8in x 6in x 12in). Also, the larger blocks (12in x 8in x 16in) weigh about 75 pounds each, so the smaller 25 pound block seemed more manageable.

Then do a little price comparison. Check out the big box stores like Lowes and Home Depot, as well as local landscaping material retailers. Make sure to always factor in the delivery cost, which usually runs around $60-100! If you're willing to wait, usually Home Depot and Lowes have sales a couple times throughout the spring/summer season. We also opened a Lowe's business card, which saved us an extra 10% off our purchase, along with a $20 delivery fee rather than the usual $80. Altogether this ended up saving us about 50% compared to the local landscaping material companies, but this may differ depending on where you live. (Technically, the experts recommend you put down a layer of small rock and sand to aid with leveling the bricks which will obviously add to your cost. However, our soil is pretty hard so we skipped this step even though it took a little more time to get each brick level.)

Now you'll need to gather some tools. Here is what we used: small level (5 inches), large level (4 feet), hammer, flat edged shovel, pick axe, stakes, and twine. Use the stakes and twine to outline the shape of the entire wall. We lined up the back of each brick with the twine to ensure we ended up with a straight wall. Start your first brick at the lowest area. Make sure to dig down a little bit so the block is slightly submerged. Use the small level to make sure it is completely level.  Use the pick axe and shovel to dig the trench in both directions. Sometimes the claw end of the hammer was helpful to dig through the tough soil in order to get the ground level. Lay bricks one at a time, moving in both directions, making sure each is level (use the small level).  Once you've laid a couple bricks, use the large level to make sure the line of bricks is level. Continue this first level in both directions until the last brick is completely submerged in the ground. Now it is time to start the second level, continuing the same process as the first. Once the bricks from the second level become submerged in the ground, start the third level. Repeat this process until your wall is a tall as you desire. Place landscaping fabric/felt behind the wall and fill in the dirt/mulch behind your new wall.

Stand back and admire your hard work!


Don’t you love her oh-so-exact instructions?  She’s a math teacher.  *Wink, wink!*  I love how the new hedge adds definition and brings a crisp, clean look to their yard.

Keep in mind that Josh and Amber are not landscaping experts.  They simply had the desire to transform their yard on a dime, so they did a bit of research and got busy.  Great works, guys!  Now if only we could muster up the same motivation…

Sunday, June 5, 2011

Thrifty Find

In the teacher’s lounge at school not long ago, several of us were dreaming up ways to make an extra buck during our summer break.  Eventually someone brought up refinishing furniture and selling it via Craigslist or some other avenue.  I felt myself perk up.  Yes!  How fun would it be to refinish furniture and possibly make spare change doing something I love?!  Well, I can’t actually say it’s something I love yet.  I do enjoy giving furniture a face lift, but I certainly haven’t had much practice doing it, nor have I ever sold any pieces I’ve worked on.  Still, if I’ve learned anything from DIY, it’s that you have to be willing to begin somewhere and take occasional risks.  What’s the worst that can happen?  No one will buy it.  All that means is that I need to grow a slightly thicker skin and be careful not to overspend on the pieces l plan to refinish.

With that in mind, my friend Ellen and I headed to the ARC, a local thrift store.  We dug up several great finds, including a large paper cutter board (we decided to go the communal route, so we’re sharing it since we live close).  Then I spotted this solid wood writer’s desk marked at just $15 (it was 50% off)!


It has a few battle wounds, but nothing a sander, some wood putty, and a few layers of paint can’t cure.


It reminds me a lot of this desk from Centsational Girl, which would be perfect in a little girl’s room.


I ended up hauling off with it in hopes that it will be a good training piece for me.  I plan to use Kate’s painting tips on this piece.  I’ll let you know how it turns out—and when I strike it rich after selling my handiwork.  Just kidding!  At this point I’m simply excited to expand my skills while I try my hand at this painting/refinishing business.

P.S. If you’re interested in starting a home business, check out Miss Mustard Seed’s tried and true tips!  Be sure to search her blog for additional posts about this topic.